×
ToyotaParts- Hello
- Login or Register
- Quick Links
- Live Chat
- Track Order
- Parts Availability
- RMA
- Help Center
- Contact Us
- Shop for
- Toyota Parts
- Scion Parts
My Garage
My Account
Cart
OEM 2006 Scion xA Wiper Linkage
Wiper Blade- Select Vehicle by Model
- Select Vehicle by VIN
Select Vehicle by Model
orMake
Model
Year
Select Vehicle by VIN
For the most accurate results, select vehicle by your VIN (Vehicle Identification Number).
1 Wiper Linkage found

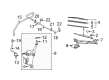
2006 Scion xA Wiper Transmission, Front
Part Number: 85150-52190$185.69 MSRP: $265.12You Save: $79.43 (30%)Ships in 1-3 Business DaysProduct Specifications- Other Name: Link Assembly, Front Wiper; Windshield Wiper Linkage; Linkage Assembly; Link Assembly, Windshield Wiper; Wiper Linkage
- Position: Front
- Part Name Code: 85160
- Item Weight: 2.60 Pounds
- Item Dimensions: 26.9 x 6.1 x 4.2 inches
- Condition: New
- Fitment Type: Direct Replacement
- SKU: 85150-52190
- Warranty: This genuine part is guaranteed by Toyota's factory warranty.
2006 Scion xA Wiper Linkage
Looking for affordable OEM 2006 Scion xA Wiper Linkage? Explore our comprehensive catalogue of genuine 2006 Scion xA Wiper Linkage. All our parts are covered by the manufacturer's warranty. Plus, our straightforward return policy and speedy delivery service ensure an unparalleled shopping experience. We look forward to your visit!
2006 Scion xA Wiper Linkage Parts Q&A
- Q: How to service and repair the Wiper Linkage on 2006 Scion xA?A: In order to fix the wiper motor linkage, disconnect the negative terminal on the battery and allow 90 seconds. Take off the wiper arms, cowl seal and the ventilator louvers. Disassemble the wiper motor and connection assembly and reassemble with torque values. Lastly, connect the battery again and initialize, should you want.
Related 2006 Scion xA Parts
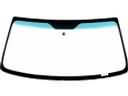 2006 Scion xA Windshield
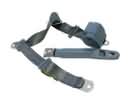 2006 Scion xA Seat Belt
 2006 Scion xA Brake Master Cylinder Reservoir
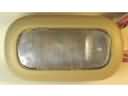 2006 Scion xA Dome Light
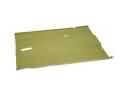 2006 Scion xA Floor Pan
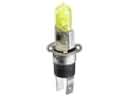 2006 Scion xA Fog Light Bulb
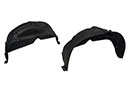 2006 Scion xA Wheelhouse
 2006 Scion xA Window Run
 2006 Scion xA Windshield Washer Nozzle
 2006 Scion xA Windshield Wiper
 2006 Scion xA Wiper Arm
 2006 Scion xA Wiper Motor