×
ToyotaParts- Hello
- Login or Register
- Quick Links
- Live Chat
- Track Order
- Parts Availability
- RMA
- Help Center
- Contact Us
- Shop for
- Toyota Parts
- Scion Parts
My Garage
My Account
Cart
OEM 2005 Scion xA Windshield
Glass Windshield- Select Vehicle by Model
- Select Vehicle by VIN
Select Vehicle by Model
orMake
Model
Year
Select Vehicle by VIN
For the most accurate results, select vehicle by your VIN (Vehicle Identification Number).
1 Windshield found
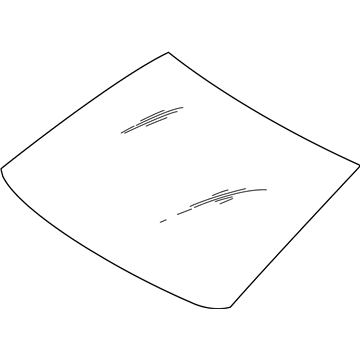
2005 Scion xA Windshield, Front
Part Number: 56101-52191$482.93 MSRP: $707.75You Save: $224.82 (32%)Ships in 1-3 Business DaysProduct Specifications- Other Name: Glass Sub-Assembly, Windshield; Windshield, Front; Glass, Windshield
- Manufacturer Note: *LAM,T=4.56,GREEN
- Position: Front
- Replaces: 56101-52190
- Part Name Code: 56111
- Condition: New
- Fitment Type: Direct Replacement
- SKU: 56101-52191
- Warranty: This genuine part is guaranteed by Toyota's factory warranty.
2005 Scion xA Windshield
Looking for affordable OEM 2005 Scion xA Windshield? Explore our comprehensive catalogue of genuine 2005 Scion xA Windshield. All our parts are covered by the manufacturer's warranty. Plus, our straightforward return policy and speedy delivery service ensure an unparalleled shopping experience. We look forward to your visit!
2005 Scion xA Windshield Parts Q&A
- Q: How to replace the windshield glass on 2005 Scion xA?A: The windshield glass replacement process begins with roof headlining assembly removal followed by front door opening trim LH and RH removal along with front pillar garnish LH and RH together with visors, assist grip, visor holders RH and LH and map lamp lens and map lamp. Keep the front part of the headlining only slightly down. The technician should begin by taking off the inner rear view mirror assembly followed by removing the cowl top ventilator louver by eliminating the wiper arm covers RH and LH and the front wiper arms LH and RH from their mounting positions. Next remove the front fender to cowl side seal LH after heating the installation surfaces to a temperature of 20 - 30 degrees Celsius (68 - 86 degrees Fahrenheit) and then detach the seal using similar methods as for the RH side. Carefully cut off the windshield moulding outside with a knife while taking precautions to protect the body then eliminate any remaining moulding. A proper windshield glass removal requires flexible wires inserted between the glass and body to create handles that can be used with protective tape on the outside surface. The glass removal process starts with cutting it using piano wires as the cutters move around the glass until stoppers disengage allowing the suction cup to extract the glass while keeping adhesive on the vehicle body intact. First clean the instrument panel before adding the instrument panel cushion No.1 while cleaning the windshield glass through stopper removal and scraping damaged adhesive off and wiping the glass ring with white gasoline. Install windshield glass stopper No.2 through application of Primer G followed by drying before adding two new stoppers on the glass surface. The window glass adhesive dam requires application of Primer G to its installation area followed by drying prior to installation using double-sided tape around the glass. Assess both the glass border and contact area with Primer G before adding the windshield molding on the exterior surface. Use a suction cup to position the glass while checking for evenness in the contact surface. Shaping and cleansing of the window area must be completed before removing the glass. The body contact surface receives a coating of Primer M as technicians apply Primer G both to the glass edge and contact surface. The glass installation requires Part No. 08850-00801 or equivalent adhesive which should be applied to the glass surface followed by alignment of reference marks using a suction cup before pressing the glass rim gently. Execute a leak test after the adhesive solidifies and fix any leaks using auto glass sealer before finishing the repair.


