×
ToyotaParts- Hello
- Login or Register
- Quick Links
- Live Chat
- Track Order
- Parts Availability
- RMA
- Help Center
- Contact Us
- Shop for
- Toyota Parts
- Scion Parts
My Garage
My Account
Cart
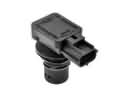
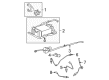
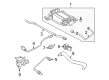
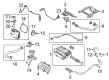
OEM Scion PCV Valve
Position Crank Ventilation Valve- Select Vehicle by Model
- Select Vehicle by VIN
Select Vehicle by Model
orMake
Model
Year
Select Vehicle by VIN
For the most accurate results, select vehicle by your VIN (Vehicle Identification Number).
8 PCV Valves found


Scion Valve Sub-Assembly, Ventilation Part Number: 12204-28030
$6.08 MSRP: $8.46You Save: $2.38 (29%)Ships in 1-3 Business DaysProduct Specifications- Other Name: Valve Sub-Assembly, Vent; Crankcase Vent Valve; PCV Valve
- Replaces: 12204-0H020


Scion Valve Sub-Assembly, Ventilation Part Number: 12204-36020
$10.03 MSRP: $13.96You Save: $3.93 (29%)Ships in 1-3 Business DaysProduct Specifications- Other Name: Valve Sub-Assembly, Vent; Crankcase Vent Valve; PCV Valve


Scion PCV Valve Part Number: 12204-37010
$6.08 MSRP: $8.46You Save: $2.38 (29%)Ships in 1-3 Business DaysProduct Specifications- Other Name: Valve Sub-Assembly, Vent; Engine Crankcase Vent Valve; Crankcase Vent Valve; Vent Valve; Valve Sub-Assembly, Ventilation


Scion PCV Valve Part Number: 12204-28020
$6.80 MSRP: $9.46You Save: $2.66 (29%)Ships in 1-3 Business DaysProduct Specifications- Other Name: Valve Sub-Assembly, Vent; Crankcase Vent Valve; Valve Sub-Assembly, Ventilation


Scion PCV Valve Part Number: 12204-21011
$13.61 MSRP: $18.95You Save: $5.34 (29%)Ships in 1-3 Business DaysProduct Specifications- Other Name: Valve Sub-Assembly, Vent; Crankcase Vent Valve; Valve Sub-Assembly, Ventilation
- Manufacturer Note: MARK 12204-21011
- Replaces: 12204-21010


Scion PCV Valve Part Number: SU003-06103
$11.45 MSRP: $14.83You Save: $3.38 (23%)Ships in 1-2 Business DaysProduct Specifications- Other Name: Valve Complete-Control; Crankcase Vent Valve; Valve Sub-Assembly, Ventilation
- Replaces: SU003-00132


Scion PCV Valve Part Number: 12204-47050
$10.50 MSRP: $14.62You Save: $4.12 (29%)Ships in 1-2 Business DaysProduct Specifications- Other Name: Valve Sub-Assembly, Vent; Crankcase Vent Valve; Valve Sub-Assembly, Ventilation
- Replaces: 12204-47030

Scion PCV Valve Part Number: 12204-WB001
$10.65 MSRP: $14.82You Save: $4.17 (29%)Ships in 1-2 Business DaysProduct Specifications- Other Name: Valve Sub-Assembly, Vent; Crankcase Vent Valve; Vent Valve; Valve Sub-Assembly, Ventilation
Scion PCV Valve
OEM parts deliver unmatched quality you can rely on. They pass extensive quality control inspections. Scion produces them to the official factory specifications. This process helps prevent defects and imperfections. So you can get exceptional lifespan and a flawless fit. Need new OEM Scion PCV Valve? You'll love our wide selection of genuine options. Shop in minutes and skip the hunt. Our prices are unbeatable, you'll save time and money. It's easy to shop and find the right piece. Our committed customer service team gives professional help from start to finish. Every part includes a manufacturer's warranty. We ship quickly, your parts will arrive fast at your door.
Scion PCV Valve maintains the gases in the crankcase within a check, reducing emissions while keeping the engine in good condition. In 2003, the brand entered the market with small cars that were priced in a straightforward way to first-time buyers. Scion avoided boring dealer games, instead promoting its range of products via online playgrounds such as an online Scion City. Scion maintained hype by issuing special Release Series in crazy colors to make owners feel that their car was unique. Scion was also Toyota's laboratory, an experimental field where new ideas were tested and leaked over into the broader range in the years after the badge was retired in 2016. No negotiation, plain, one-price stickers, and a limitless list of dealer options contained in the catalog meant that selecting a ride was like a game avatar. The outcome was more than 1,000,000 sales and a fan club that continues to exchange tales online. PCV Valve is mounted on the engine to draw vapor out of the crankcase and force it back into combustion to refine emissions and waste. PCV Valve avoids sludge build-up, oil dilution, and maintains power output with manifold vacuum across the rev range, on the daily blast or the highway run. PCV Valve also protects gaskets against pressure spikes that may cause leakages and result in drippy leaks. Frequently, the valve should be checked to prevent small clogs such as swelling into foul lazy and thirsty habits of fuel. Since the design remains adjustable throughout the entire line, PCV Valve provides the same easy advantage to every driver who desires to have a longer engine life.
Scion PCV Valve Parts and Q&A
- Q: How to install the PCV Valve on Scion tC?A:The installation of the Positive Crankcase Ventilation Valve for the 2AZ-FE emission control system requires users to coat 2 or 3 threads of the ventilation valve with Part No. 08833-00070, Three Bond 1342 or an equivalent adhesive. A 22 mm deep socket wrench should be used to place the ventilation valve while tightening it to 19 Nm (194 kgf-cm, 14 ft-lbf). Place the No. 1 engine cover sub-assembly afterward to complete the process and conduct engine oil leak inspection.
- Q: How to install the PCV Valve on Scion xD?A:Start the Positive Crankcase Ventilation Valve installation by applying Toyota Genuine Adhesive 1324 or equivalent to 2 or 3 threads of the valve. Begin by using Toyota Genuine Adhesive 1324 or Three Bond 1324 or equivalent to apply adhesive on 2 or 3 threads of the ventilation valve. Finally, tighten the valve to 20 Nm (204 kgf-cm, 15 ft-lbf) while connecting the ventilation hose. Before proceeding with automatic transaxle sub-assembly installation the technician must install both the intake manifold and transmission oil level gauge sub-assembly and the engine oil level dipstick. The order is to install the automatic transaxle's oil cooler tube followed by the starter assembly and injector vibration insulator and No. 1 delivery pipe spacer then continue with the fuel delivery pipe sub-assembly and fuel tube sub-assembly followed by the fuel pipe clamp and vacuum hose then connect the No. 1 fuel vapor feed hose along with harness bracket engine wire harness and air cleaner cap sub-assembly with hose. The negative battery terminal should receive the cable with 5.4 Nm (55 kgf-cm, 48 in-lbf) torque before adding engine coolant to check for coolant and fuel leakages. To complete the installation process torque down the No. 2 cylinder head cover followed by the engine under cover RH to 5.0 Nm (51 kgf-cm, 44 in-lbf) and engine under cover LH with the same torque specification.