×
ToyotaParts- Hello
- Login or Register
- Quick Links
- Live Chat
- Track Order
- Parts Availability
- RMA
- Help Center
- Contact Us
- Shop for
- Toyota Parts
- Scion Parts
My Garage
My Account
Cart
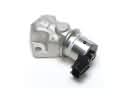
OEM Scion Fuel Injector
Gas Injector- Select Vehicle by Model
- Select Vehicle by VIN
Select Vehicle by Model
orMake
Model
Year
Select Vehicle by VIN
For the most accurate results, select vehicle by your VIN (Vehicle Identification Number).
12 Fuel Injectors found


Scion Injector Part Number: 23209-09175
$141.93 MSRP: $200.92You Save: $58.99 (30%)Ships in 1-2 Business DaysProduct Specifications- Other Name: Injector Set, Fuel; Fuel Injector; Injector Assembly, Fuel
- Replaces: 23209-39175

Scion Injector Part Number: 23209-09140
$149.45 MSRP: $211.56You Save: $62.11 (30%)Ships in 1-3 Business DaysProduct Specifications- Other Name: Injector Set, Fuel; Fuel Injector; Injector Assembly, Fuel
- Replaces: 23209-39145


Scion Injector Part Number: 23209-39146
$150.86 MSRP: $213.56You Save: $62.70 (30%)Ships in 1-3 Business DaysProduct Specifications- Other Name: Injector Set, Fuel; Fuel Injector; Injector Assembly, Fuel

Scion Injector Part Number: 23209-49205
$126.42 MSRP: $178.96You Save: $52.54 (30%)Ships in 1-3 Business DaysProduct Specifications- Other Name: Injector Set, Fuel; Fuel Injector; Injector Assembly, Fuel

Scion Injector Part Number: 23209-21020
$158.61 MSRP: $224.54You Save: $65.93 (30%)Ships in 1-3 Business DaysProduct Specifications- Other Name: Injector Set, Fuel; Fuel Injector; Injector Assembly, Fuel


Scion Injector Part Number: 23209-0H030
$170.72 MSRP: $241.67You Save: $70.95 (30%)Ships in 1-3 Business DaysProduct Specifications- Other Name: Injector Set, Fuel; Fuel Injector; Injector Assembly, Fuel
- Replaces: 23209-28080, 23209-0H060


Scion Injector Part Number: SU003-00326
$131.18 MSRP: $172.70You Save: $41.52 (25%)Ships in 1-3 Business DaysProduct Specifications- Other Name: Injector Sub Assembly; Fuel Injector; Injector Assembly, Fuel(For Port); Injector Assembly, Fuel
- Manufacturer Note: NO.2

Scion Injector Part Number: SU003-04462
$263.65 MSRP: $350.10You Save: $86.45 (25%)Ships in 1-3 Business DaysProduct Specifications- Other Name: Injector Sub Assembly; Fuel Injector; Injector Assembly, Fuel
- Manufacturer Note: MARK 3,NO.1

Scion Injector Part Number: SU003-04461
$263.65 MSRP: $350.10You Save: $86.45 (25%)Ships in 1-2 Business DaysProduct Specifications- Other Name: Injector Sub Assembly; Fuel Injector; Injector Assembly, Fuel
- Manufacturer Note: MARK 2,NO.1

Scion Injector Part Number: SU003-04460
$263.65 MSRP: $350.10You Save: $86.45 (25%)Ships in 1-3 Business DaysProduct Specifications- Other Name: Injector Sub Assembly; Fuel Injector; Injector Assembly, Fuel
- Manufacturer Note: MARK 1,NO.1
Scion Injector Part Number: 23209-09240
$163.20 MSRP: $231.02You Save: $67.82 (30%)Ships in 1-3 Business DaysProduct Specifications- Other Name: Injector Set, Fuel; Fuel Injector; Injector Assembly, Fuel
- Manufacturer Note: (L)
- Replaces: 23209-39235

Scion Injector Part Number: 23209-WB002
$162.70 MSRP: $230.33You Save: $67.63 (30%)Ships in 1-3 Business DaysProduct Specifications- Other Name: Injector Set, Fuel; Fuel Injector; Injector Assembly, Fuel
Scion Fuel Injector
OEM parts deliver unmatched quality you can rely on. They pass extensive quality control inspections. Scion produces them to the official factory specifications. This process helps prevent defects and imperfections. So you can get exceptional lifespan and a flawless fit. Need new OEM Scion Fuel Injector? You'll love our wide selection of genuine options. Shop in minutes and skip the hunt. Our prices are unbeatable, you'll save time and money. It's easy to shop and find the right piece. Our committed customer service team gives professional help from start to finish. Every part includes a manufacturer's warranty. We ship quickly, your parts will arrive fast at your door.
Scion Fuel Injector forces the engine to fire with sharp and clean power by pushing very accurate pulses of fuel. The brand hit the road in 2003 with small cars that dumped the bloated price sheets and stale trims. Scion talked directly to younger drivers using online worlds such as virtual Scion City and radical Release Series drops. Scion maintained this buying drill easy, one trim, wild paint, drive out. Scion was also Toyota's idea lab and therefore all limited runs were tested in weird technology and colors in actual traffic. The fact that all price tags included air con, alloy wheels, and a decent stereo caught buyers' liking as they did not need to haggle and they could hit the road sooner. Limited Release Series batches created hype and the ownership of something so limited to others flashed large on social media feeds. The Fuel Injector sprays into each cylinder a fine mist within the engine bay, allowing the computer to fine-tune the mixture on the fly to provide jumpy acceleration and thriftier cruising. The Fuel Injector operates on a returnless rail and, therefore, pressure remains constant and lines remain lean. In case of a Fuel Injector clogging, the car splutters, consumes more fuel, and releases additional smoke. Change a weary Fuel Injector early and the 1.5-liter mill continues to swagger along 35 mpg without fanfare.
Scion Fuel Injector Parts and Q&A
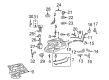
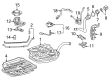
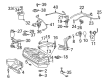
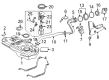
- Q: How to install the fuel injector assembly on Scion tC?A:The first step of fuel injector assembly installation requires applying gasoline or spindle oil to new O-rings before installing one onto each fuel injector. First put a small amount of gasoline or spindle oil on the fuel delivery pipe section touching each fuel injector O-ring before putting another light coating of oil on the O-ring before mounting the fuel injector to the pipe while checking for proper O-ring fitment and damage. The fuel injectors need to rotate without issues; if they do not one should replace the O-ring. The fuel delivery pipe sub-assembly requires new insulators to be placed into the cylinder head before adding the two delivery pipe spacers. Secure the delivery pipe with its attached four injectors while taking care to prevent injector loss but avoid overtightening the bolts. Carefully confirm that every fuel injector rotates without Resistance before re-tightening the bolts to 20 Nm (205 kgf-cm, 15 ft-lbf). The system requires connection of 4 fuel injector connectors as well as wire harness clamp installation. The ventilation hose No. 2 requires connection to the ventilation valve while maintaining a proper position between the hose clamp and paint mark. The procedure includes connecting the fuel main tube by pushing the fuel tube connector until it clicks before installing the fuel pipe clamp to seal the fuel tube within the fuel hose clamp. To complete the installation finish by putting on the air cleaner cap sub-assembly alongside the engine cover sub-assembly and attach the cable to the negative battery terminal while also checking for fuel leaks and executing initialization with the understanding that selective systems need initialization upon reconnecting the negative (-) battery cable.
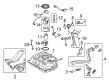
- Q: How to replace the fuel injector assembly on Scion xB?A:The first step to replace the fuel injector assembly requires fuel system pressure discharge. Begin by removing cylinder head cover No.2 through the removal of its 4 nuts. Begin by unplugging the 4 ignition coil connectors before removing the 4 bolts which will detach the ignition coils. Disconnect ventilation hose No. 2 and the other ventilation hose as part of the procedure to take off the cylinder head cover sub-assembly which requires removal of 9 bolts, 2 nuts, and 2 seal washers. Use Special Service Tool: 09268-21010 by fitting it to the connection and rotating until the retainers meet then push the tool toward the fuel tube assembly. Clean the area before uninstalling then carefully maintain straightness of the nylon tube. Shove and pull on the connector if it becomes stuck before you cover all separated parts to protect against damage. Use PPC4504 to detach the 4 fuel injector connectors then remove the 3 bolts from the fuel delivery pipe along with the 4 fuel injectors, taking care to prevent the parts from falling. A technician should remove two head cylinder spacers before extracting the four fuel injectors. New insulators need to be installed with a thin layer of grease or gasoline applying to the O-rings which will be placed on each injector. When installing the fuel delivery pipe with injectors apply grease or gasoline at both points where it meets O-rings. Also during the injector turn process use gentle pressure to guide the device into position without twisting any O-rings. Verify that the installed fuel injectors rotate without any resistance before moving forward with replacement of faulty units. Install the two spacers to the cylinder head and assemble the fuel delivery pipe with four fuel injectors before torquing bolt A to 19 N.m (194 kgf.cm, 14 ft.lbf) and bolt B to 9.0 N.m (92 kgf.cm, 80 in.lbf) and ensuring that the injectors rotate without dropping. Begin by checking the fuel tube alongside fuel injector connectors for damage while examining it for foreign objects. Then secure each wound connection by pulling on it before you install the fuel pipe clamp. The technician must install the cylinder head cover sub-assembly within three minutes after applying specified seal packing (Part No. 08826-00080 or equivalent) to designated locations. The technician then needs two hours to avoid engine starting time. Sea the cylinder head cover through its 9 bolts and two seal washers together with two nuts while tightening all fasteners uniformly to 10 Nm (102 kgf.cm, 7 ft.lbf). Afterwards secure ventilation hoses. The procedure to install ignition coil No.1 includes applying 9.0 N.m (92 kgf.cm, 80 in.lbf) torque while inspecting for fuel leaks before tightening nut B to 7.0 Nm (71 kgf.cm, 62 in.lbf) torque.