My Garage
Cart
Make sure this part fits

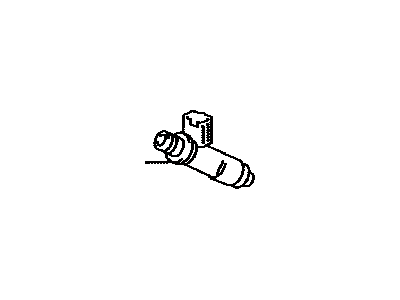
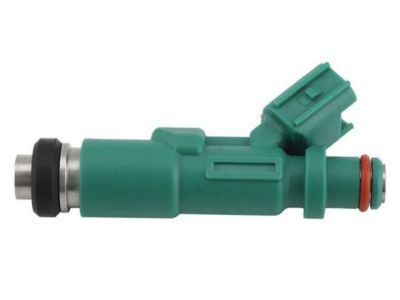
Toyota 23209-21020
Injector

2000-2009 Toyota 2320921020

Customer Questions & Expert Answers (21)
Toyota 23209-21020 Injector
  • Part Description
    Injector Set, Fuel; Fuel Injector
  • Part Name Code
    23250
  • Manufacturer
    Toyota
Make sure this part fits
$158.61 MSRP: $224.54
You Save: $65.93 (30%)
Ships in 1-3 Business Days
1
ADD TO CART
  • Related Parts
  • Product Specifications
  • Vehicle Fitment
  • Customer Questions & Expert Answers
  • Product Specifications

    BrandGenuine Toyota
    Part Name Code23250
    Manufacturer Part Number23209-21020
    Part DescriptionInjector Set, Fuel; Fuel Injector
    Other NamesInjector Assembly, Fuel
    Item Dimensions3.7 x 2.6 x 1.4 inches
    Item Weight0.60 Pounds
    ConditionNew
    Fitment TypeDirect Replacement
    Require Quantity4
    ManufacturerToyota
    SKU23209-21020
    WarrantyThis genuine Toyota part is guaranteed by Toyota's factory warranty.
    Shipping & ReturnShipping Policy Return Policy
    Warning: California's Proposition 65
  • Vehicle Fitment

    Year Make Model Trim Engine
    2004-2006 Scion xABase4 Cyl 1.5 L GAS
    2004-2006 Scion xBBase4 Cyl 1.5 L GAS
    2000-2005 Toyota EchoBase4 Cyl 1.5 L GAS
    2001-2009 Toyota PriusBase, Touring4 Cyl 1.5 L FULL HYBRID EV-GAS (FHEV)
  • Customer Questions & Expert Answers

    Q:
    Any advice on whether 23209-21020 is suitable for my car? Posted by ToyotaPartsNow Specialist
    A:
    Find out if part number 23209-21020 is the right fit for your car by Selecting Your Vehicle model.
    Posted by ToyotaPartsNow Specialist
    Q:
    How to service and repair the fuel injector on Scion xA? Posted by Customer
    A:
    Service and repair operations of the fuel injector begin by executing the following procedure: first remove the circuit opening relay (marked C/OPN) from the instrument panel junction block and start the engine until it stops and then turn the ignition switch OFF to check for engine start. The system must breathe through an open fuel tank cap alongside battery terminal disconnection for 90 seconds to block the Air Bag and seat belt pretensioner activation. Start by eliminating the 4 nuts and the No. 2 cylinder head cover from the sequence followed by removal of the ignition coil and the cylinder head cover sub-assembly. To disconnect the fuel tube sub-assembly use Special Service Tool: 09268-21010 while cleaning the connector first and applying a plastic bag for covering the disconnected pipe and connector. The fuel delivery pipe assembly removal starts with deconnecting 4 fuel injector connectors then three bolt removal and precise withdrawal of the combined fuel delivery pipe with 4 fuel injectors before extracting 2 spacers from the cylinder head. Pay attention to the 4 fuel injectors situated on the delivery pipe when replacing O-rings and insulators. Installation requires new insulators on each fuel injector with light grease or gasoline application to new O-rings then fuel injector insertion into the delivery pipe without rotating O-ring position. Install the 2 spacers on the cylinder head followed by the fuel delivery pipe with the 4 fuel injectors and torque bolt A to 19 N.m (194 kgf.cm, 14 ft.lbf) and bolt B to 9.0 N.m (194 kgf.cm, 14 ft.lbf) until finished connect the 4 fuel injector connectors. Check for any damage on the fuel tube and clear foreign objects before connecting its components with proper alignment of the tube to the pipe until a connecting "click" sound occurs. After installation of the fuel pipe clamp place the cylinder head cover sub-assembly along with the ignition coil before reconnecting the negative battery terminal. Install the No. 2 cylinder head cover by tightening nuts marked A first then nuts marked B to 7.0 N.m (71 kgf.cm and 62 in.lbf). The system needs initialization steps after you reconnect the battery terminal which has a negative (-) charge.
    Posted by ToyotaPartsNow Specialist
    Q:
    How to service and repair the fuel injector on Scion xB? Posted by Customer
    A:
    The procedure for servicing and fixing fuel injectors begins by removing the circuit opening relay (Marked C/OPN) from the instrument panel junction block to discharge fuel pressure. The engineer starts then stops the engine which leads to switching off the ignition and verifying engine non-start-up. The vehicle requires emptying fuel tank air through the cap removal and negative battery disconnection for a minimum 90-second period to stop Air Bag and seat belt pretensioners from activating. After removing the 4 nuts and No. 2 cylinder head cover, proceed to take out both the ignition coil and cylinder head cover sub-assembly. Disconnect the fuel tube sub-assembly through a combination of Special Service Tool: 09268-21010 along with removing the fuel pipe clamp while cleaning the connector beforehand and wrapping the separated pipe and connector with a plastic bag for protection. The process requires separating the fuel delivery pipe from its sub-assembly through disconnecting 4 fuel injector connectors and removing 3 bolts then carefully extracting the fuel pipe with the 4 fuel injectors while removing the 2 spacers from the cylinder head. You must detach the fuel injectors from their delivery position before removing the 4 O-rings and 4 insulators together with 4 fuel injectors. The installation method requires new insulators for each fuel injector and then you must apply a thin layer of grease or gasoline to the O-rings before positioning them correctly without rotating the parts. The fuel delivery pipe installation requires torquing bolt A to 19 N.m (194 kgf.cm, 14 ft.lbf) while torquing bolt B to 9.0 N.m (92 kgf.cm, 80 in.lbf). During this process, check for smooth rotation of the injectors. Attach the 4 fuel injector connectors before connecting the fuel tube while inspecting for damage and foreign objects and properly aligning the connector to the pipe. Secure the connection well. Place the fuel pipe clamp then attach the cylinder head cover sub-assembly together with the ignition coil. Reconnect the negative battery terminal after you check for fuel leaks and proceed to install the No. 2 cylinder head cover by first tightening nuts marked A to 7.0 N.m (71 kgf.cm, 62 in.lbf) then move to tighten nuts marked B to the same torque.
    Posted by ToyotaPartsNow Specialist
    Q:
    How to replace the fuel injector assembly on Scion xA? Posted by Customer
    A:
    The first step when replacing the fuel injector assembly consists of discharging fuel system pressure. Remove the cylinder head cover No.2 through the removal of its 4 retaining nuts. To begin remove the 4 ignition coil connectors and then remove the 4 bolts with the ignition coils. The ventilation hoses will need disconnecting before you remove the cylinder head cover sub-assembly through the removal of 9 bolts along with 2 nuts and 2 seal washers. The removal of fuel tube sub-assembly requires users to disconnect the fuel tube by detaching the fuel pipe clamp and utilizing Special Service Tool: 09268-21010 while also checking for dirt around the connector and refraining from bending the nylon tube. Detach the 4 fuel injector connectors before removing 3 bolts to carefully extract the fuel delivery pipe with its companion 4 fuel injectors without letting them fall. Install new insulators and O-rings onto the 4 fuel injectors before applying a small amount of grease or gasoline to each element. Connect the fuel delivery pipe sub-assembly with 2 spacers by ensuring the rotating motion of the injectors is smooth before attaching the 4 fuel injector connectors. The sub-assembly of the fuel tube receives installation after checking for damage and foreign objects while the fuel pipe clamp follows. Use seal packing (Part No. 08826-00080 or equivalent) on the cylinder head cover sub-assembly then install it with 9 bolts and 2 nuts and 2 seal washers and tighten all fasteners evenly to 10 N.m (102 kg.cm, 7 ft.lbf). Reinstall the ventilation hoses before you tighten the ignition coil No.1 with 9.0 N.m (92 kg.cm, 80 in.lbf). The last step involves checking for fuel leaks while installing cylinder head cover No.2 by first applying torque to nut A followed by nut B to 7.0 N.m (71 kg.cm, 62 in.lbf).
    Posted by ToyotaPartsNow Specialist
    Q:
    How to service and repair the fuel injector on Toyota Echo? Posted by Customer
    A:
    The starting point for fixing the fuel injector involves taking off the No.2 cylinder head cover and cylinder head cover. In order to disconnect the fuel tube the technician must remove the fuel pipe clamp alongside disconnecting the fuel tube connector from the fuel pipe while taking necessary precautions due to retained pressure in the fuel pipe line to prevent splashing. The service process begins by disconnecting four injector connectors as well as three bolts to separate the delivery pipe with its attached fuel pipe while also separating the 4 injectors. After that, two spacers must be removed from the cylinder head. When removing injectors from the delivery pipe users should handle them with care while taking out their accompanying O-rings as well as grommets from each injector. Start by placing new grommets on each injector followed by applying spindle oil or gasoline lightly on new O-rings and the delivery pipe contact zone with O-rings. Install the 4 injectors while turning them clockwise while pushing them into delivery pipes and verify that injector connectors should face outward direction. Install the 2 spacers onto the cylinder head before applying spindle oil or gasoline to grommet areas of delivery pipe and fuel pipe with 4 injectors attached to it. The delivery pipe and fuel pipe bolts should be installed briefly to verify simple rotation; any obstacles in rotation require O-ring replacement. Use the specified torques when securing delivery pipe bolts at 19 N.m (190 kgf.cm, 14 ft.lbf) and fuel pipe bolts at 9.0 N.m (92 kgf.cm, 80 in.lbf). Fasten the fuel tube connector to the fuel pipe while following safe connection procedures and install the fuel pipe clamp. You must install the wire harness protector cover by securing it with a bolt and 2 nuts while linking the PCV hose to the cylinder head cover and high-tension cords to ignition coils.
    Posted by ToyotaPartsNow Specialist
    Q:
    How to install the fuel injector on Toyota Prius? Posted by Customer
    A:
    The 1NZ-FXE fuel injector installation begins with applying spindle oil or gasoline to a fresh O-ring before mounting it onto each fuel injector after which the fuel delivery pipe surface that touches the O-ring needs treatment with the same oil and then the installation process starts. Follow the oil application on the O-ring by installing the fuel injector through right and left turning motions while pushing it onto the fuel delivery pipe while double-checking that the O-ring remains uncracked and unjammed. Examine the fuel injector movement for smooth performance because newly installed O-rings might need replacement if the fuel injector does not rotate without effort. You need to carefully install 4 new insulators and the 2 No. 1 delivery pipe spacers to the cylinder head while considering proper direction. Insert the fuel delivery pipe with all 4 fuel injectors before installing the 3 temporary bolts while avoiding droppage of the components. Verify the fuel injector rotation smoothness then torque bolts A and B to 19 Nm, 194 kgf-cm, 14 ft-lbf and 9.0 Nm, 92 kgf-cm, 80 in-lbf respectively. After fitting the fuel tube to the delivery pipe secure the No. 1 fuel pipe clamp. First, install the cylinder head cover sub-assembly and place the reservoir bracket through bolt 1 before tightening all three bolts to 8.5 Nm (87 kgf-cm, 75 in-lbf) according to a specified order. Place the connector clamp while also installing the wire harness clamp beside the No. 2 fuel vapor feed hose to its corresponding hose clamp. The brake master cylinder reservoir sub-assembly needs to be installed with 2 bolts done at 8.5 Nm (87 kgf-cm, 75 in-lbf) torque setting. Then connect the switch connector. The front outer cowl top panel sub-assembly receives 7 bolts tightened to 6.4 Nm (65 kgf-cm, 57 in-lbf) during assembly. This installation requires the connection of 4 wire harness clamps and the No. 2 engine room relay block requires 2 bolts to be tightened at 8.4 Nm (86 kgf-cm, 74 in-lbf). Wipe down and install the windshield wiper motor while linking it to the negative side of the battery before connecting the cable and examining for fuel leaks and completing initialization steps. Keep in mind that some systems need additional initialization when disconnecting then reconnecting the negative battery terminal.
    Posted by ToyotaPartsNow Specialist
    Q:
    What needs to be removed along with the ignition coils for the 2005 Scion xB? Posted by Customer
    A:
    Remove the 4 bolts.
    Posted by ToyotaPartsNow Specialist
    See expert answers on similar Fuel Injector
    Q:
    What is the final step in the installation process for the 2005 Toyota Echo? Posted by Customer
    A:
    Connect the fuel tube to the fuel pipe, ensuring to follow precautions during the connection, and install the fuel pipe clamp. Finally, install the wire harness protector cover with the bolt and 2 nuts, connect the PCV hose to the cylinder head cover, and connect the high tension cords to the ignition coils.
    Posted by ToyotaPartsNow Specialist
    See expert answers on similar Fuel Injector
    Q:
    What should be done after connecting the fuel injector connectors and the fuel tube for the 2004 Scion xB? Posted by Customer
    A:
    Check for damage or foreign objects and ensure a secure connection by pulling on them.
    Posted by ToyotaPartsNow Specialist
    See expert answers on similar Fuel Injector
    Q:
    What is the next step after disconnecting the ignition coils for the 2005 Scion xA? Posted by Customer
    A:
    Disconnect the ventilation hoses and remove the cylinder head cover sub-assembly by taking out 9 bolts, 2 nuts, and 2 seal washers.
    Posted by ToyotaPartsNow Specialist
    See expert answers on similar Fuel Injector
    Q:
    How do you position the delivery pipe and fuel pipe for the 2003 Toyota Echo? Posted by Customer
    A:
    Position the 2 spacers on the cylinder head, apply spindle oil or gasoline to the grommet contact points, and place the delivery pipe and fuel pipe with the injectors onto the cylinder head.
    Posted by ToyotaPartsNow Specialist
    See expert answers on similar Fuel Injector
    Q:
    What is the first step to service and repair the fuel injectors for the 2000 Toyota Echo? Posted by Customer
    A:
    Remove the No.2 cylinder head cover and the cylinder head cover.
    Posted by ToyotaPartsNow Specialist
    See expert answers on similar Fuel Injector
    Q:
    What is the final step in removing the fuel injectors for the 2008 Toyota Prius? Posted by Customer
    A:
    Pull out the 4 fuel injectors from the fuel delivery pipe.
    Posted by ToyotaPartsNow Specialist
    See expert answers on similar Fuel Injector
    Q:
    What is the final step in the process for the 2001 Toyota Echo? Posted by Customer
    A:
    Connect the fuel tube (fuel tube connector) to the fuel pipe, ensuring to observe precautions during the connection, install the fuel pipe clamp, install the wire harness protector cover with a bolt and 2 nuts, connect the PCV hose to the cylinder head cover, and connect the high-tension cords to the ignition coils.
    Posted by ToyotaPartsNow Specialist
    See expert answers on similar Fuel Injector
    Q:
    How should the new O-ring be prepared before installation for the 2003 Toyota Prius? Posted by Customer
    A:
    Apply a light coat of spindle oil or gasoline to the new O-ring before installing it.
    Posted by ToyotaPartsNow Specialist
    See expert answers on similar Fuel Injector
    Q:
    How can you check if the injectors are installed correctly for the 2002 Toyota Prius? Posted by Customer
    A:
    Check that the injectors rotate smoothly; if not, replace the O-ring.
    Posted by ToyotaPartsNow Specialist
    See expert answers on similar Fuel Injector
    Q:
    How do you remove the engine room relay block No. 2 for the 2005 Toyota Prius? Posted by Customer
    A:
    Take out the 2 bolts, remove the 4 wire harness clamps, and the 7 bolts securing the cowl top panel.
    Posted by ToyotaPartsNow Specialist
    See expert answers on similar Fuel Injector
    Q:
    How do you detach the brake master cylinder reservoir for the 2006 Toyota Prius? Posted by Customer
    A:
    Disconnect the brake fluid level switch connector and remove the bolts.
    Posted by ToyotaPartsNow Specialist
    See expert answers on similar Fuel Injector
    Q:
    What should be done after removing the delivery pipe and injectors for the 2001 Toyota Prius? Posted by Customer
    A:
    Remove the 2 spacers from the cylinder head and pull out the 4 injectors from the delivery pipe, while also removing the O-ring and grommet from each injector.
    Posted by ToyotaPartsNow Specialist
    See expert answers on similar Fuel Injector
    Q:
    What should you do after discharging the fuel system pressure for the 2009 Toyota Prius? Posted by Customer
    A:
    Remove the fuel tank cap to release air, disconnect the negative (-) battery terminal, and wait at least 90 seconds to prevent airbag activation before reinstalling the integration relay.
    Posted by ToyotaPartsNow Specialist
    See expert answers on similar Fuel Injector
    Q:
    What are the torque specifications for tightening the bolts during installation for the 2007 Toyota Prius? Posted by Customer
    A:
    Retighten to specified torque: 19 N.m for bolt A and 9.0 N.m for bolt B.
    Posted by ToyotaPartsNow Specialist
    See expert answers on similar Fuel Injector
    If you have any questions about this product, please don't hesitate to ask us. We will be happy to help you!

OEM Toyota 23209-21020, Excellent Performance and Perfect Fitment

To ensure reliability, purchase Toyota part # 23209-21020 Injector. It is sometimes referred to as Toyota Fuel Injector. OEM parts are unrivaled in terms of quality. They go through extensive quality control inspections and are produced in accordance with Toyota's official factory specifications. All of these remove defects and imperfections. So you can relax knowing they promise exceptional lifespan and flawless fitment.

ToyotaPartsNow.com is a leading supplier of genuine Toyota parts such as Toyota 2320921020 Injector. At ToyotaPartsNow.com, we have a wide variety of OEM Toyota parts available at competitive prices. Our comprehensive range of genuine Toyota parts come with a manufacturer's warranty for peace of mind. We also prioritize customer satisfaction, providing a hassle-free return policy and expedited delivery for all our parts. For detailed Toyota parts information, click here.
Choose ToyotaPartsNow for discounted prices, exceptional service and fast delivery