My Garage
Cart
Make sure this part fits

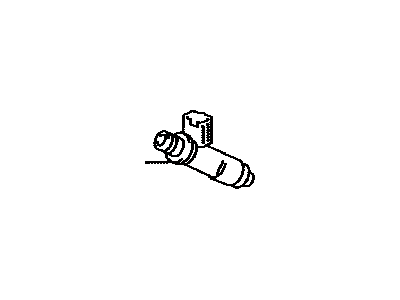
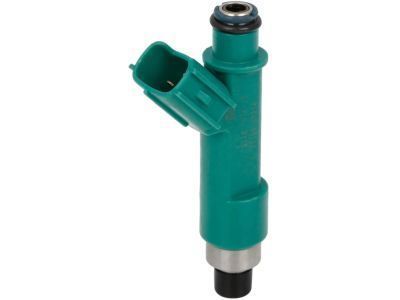
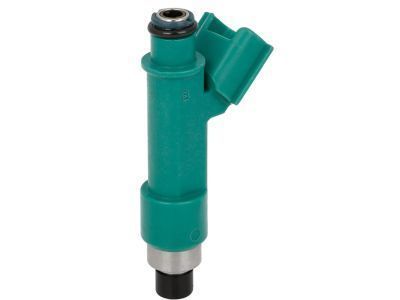
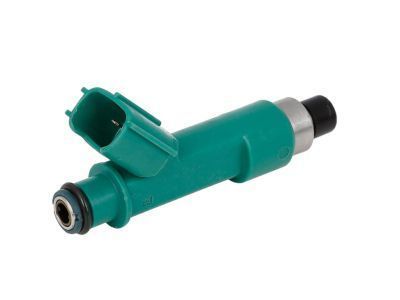
Toyota 23209-0H030
Injector

2004-2015 Toyota 232090H030

Customer Questions & Expert Answers (34)
Toyota 23209-0H030 Injector
  • Part Description
    Injector Set, Fuel; Fuel Injector
  • Part Name Code
    23250
  • Replaces
    23209-28080, 23209-0H060
  • Manufacturer
    Toyota
Make sure this part fits
$165.66 MSRP: $234.51
You Save: $68.85 (30%)
Ships in 1-3 Business Days
1
ADD TO CART
  • Related Parts
  • Product Specifications
  • Vehicle Fitment
  • Customer Questions & Expert Answers
  • Product Specifications

    BrandGenuine Toyota
    Part Name Code23250
    Manufacturer Part Number23209-0H030
    Part DescriptionInjector Set, Fuel; Fuel Injector
    Other NamesInjector Assembly, Fuel
    Item Dimensions3.8 x 2.8 x 1.5 inches
    Item Weight0.50 Pounds
    ConditionNew
    Fitment TypeDirect Replacement
    Replaces23209-28080, 23209-0H060
    Require Quantity4
    ManufacturerToyota
    SKU23209-0H030
    WarrantyThis genuine Toyota part is guaranteed by Toyota's factory warranty.
    Shipping & ReturnShipping Policy Return Policy
    Warning: California's Proposition 65
  • Vehicle Fitment

    Year Make Model Trim Engine
    2005-2010 Scion tCBase, Spec4 Cyl 2.4 L GAS
    2008-2015 Scion xBBase4 Cyl 2.4 L GAS
    2004-2009 Toyota CamryBase, CE, LE, SE, XLE4 Cyl 2.4 L GAS
    2009-2010 Toyota CorollaXRS4 Cyl 2.4 L GAS
    2004-2007 Toyota HighlanderBase4 Cyl 2.4 L GAS
    2009-2013 Toyota MatrixS, XRS4 Cyl 2.4 L GAS
    2004-2008 Toyota RAV4Base, L, Limited, Sport4 Cyl 2.4 L GAS
    2004-2008 Toyota SolaraSE, SE Sport, SLE, Sport4 Cyl 2.4 L GAS
  • Customer Questions & Expert Answers

    Q:
    Any advice on whether 23209-0H030 is suitable for my car? Posted by ToyotaPartsNow Specialist
    A:
    Find out if part number 23209-0H030 is the right fit for your car by Selecting Your Vehicle model.
    Posted by ToyotaPartsNow Specialist
    Q:
    How to remove the fuel injectors on Scion tC? Posted by Customer
    A:
    The removal process for 2AZ-FE engine fuel injectors starts by following these steps: eliminate fuel system pressure through seat cushion removal, floor hole cover removal, fuel pump connector disconnection, engine idling until power stops then switch OFF along with removing the fuel cap. You should connect the fuel pump connector after which you need to install the rear floor service hole cover and rear seat cushion. Start by removing power from the negative terminal and after that take off the engine cover sub-assembly along with the air cleaner cap sub-assembly. The Special Service Tool: 09268-21010 helps cleanly disconnect the fuel tube through removing the fuel pipe clamp and cleaning the fuel tube connector before using the tool to release the tube from its position paper. After fuel drainage from the tube proceed by enveloping separated components with plastic material. To access the fuel delivery pipe sub-assembly disconnect the Number 2 ventilation hose from the ventilation valve and detach the 2 wire harness clamps before disconnecting the 4 fuel injector connectors while removing the 2 bolts to extract the fuel delivery pipe with all 4 fuel injectors without dropping any item. To complete the task remove the fuel delivery pipe spacers along with the insulators from the cylinder head while extracting the 4 fuel injectors from the pipe.
    Posted by ToyotaPartsNow Specialist
    Q:
    How to install the fuel injector assembly on Scion tC? Posted by Customer
    A:
    Engine installation of the fuel injector assembly for the 2AZ-FE starts with a gasoline or spindle oil coating of new O-rings which needs to be installed onto each fuel injector. Before installing fuel injectors onto the fuel delivery pipe you should apply gasoline or spindle oil once to the O-ring on the pipe then repeat the application before installation. Before installation verify that the O-ring remains intact without its being jammed. Inspect the fuel injectors to ensure their smooth rotation throughout the process. Replace the O-ring in case of failed smooth rotation. The fuel delivery pipe sub-assembly requires installation of 4 new insulators into the cylinder head before adding the 2 delivery pipe spacers. The 4 fuel injectors must be installed onto the fuel delivery pipe before temporarily tightening the 2 bolts while maintaining constant vigilance to avoid dropping the injectors. Inspect the fuel injectors for effortless rotation before tightening their mounting bolts to 20 Nm (205 kgf-cm, 15 ft-lbf). Before closing the assembly connect the four fuel injector connectors while installing both wire harness clamps. Fasten the No. 2 ventilation hose to its ventilation valve position while aligning the paint mark which matches the hose clamp direction. Fitting the fuel tube connector requires a click then you can place the fuel pipe clamp while securing the fuel tube in the fuel hose clamp. Reattach the cable to the negative terminal of the battery while installing the air cleaner cap sub-assembly and the engine cover sub-assembly. Perform inspections for fuel leakage and execute system initializations with attention to systems that need initialization when disconnecting and reconnecting the negative battery terminal.
    Posted by ToyotaPartsNow Specialist
    Q:
    How to install the fuel injector assembly on Toyota Camry? Posted by Customer
    A:
    The 2AZ-FE engine installation of its fuel injector assembly begins with applying gasoline or spindle oil to new O-rings which should get placed on each fuel injector. Apply a thin layer of gasoline or spindle oil to the fuel delivery pipe region touching the fuel injector O-ring before you place the right and left fuel injectors on the pipe while ensuring the O-ring remains uncracked and undeformed. The fuel injector should turn without issues but replacement of the O-ring becomes necessary if rotation is difficult. Fit four new insulators to the cylinder head before positioning the two delivery pipe spacers on the head surface. Secure the fuel delivery pipe along with its installed 4 fuel injectors without dropping them while lightly tightening both bolts. Reposition the fuel injector if it fails to rotate properly before replacing the O-ring when needed. Follow with a torque setting of 20 Nm (204 kgf-cm, 15 ft-lbf) on the 2 bolts and attach the 4 fuel injector connectors then the 2 wire harness clamps. The ventilation valve must receive the hose connection with proper installation of the paint mark alongside the hose clamp. The procedure requires fitting the fuel tube through the fuel hose clamp followed by connecting the fuel tube connector and installing the No. 1 fuel pipe clamp. Complete the procedure by connecting the cable to the negative battery terminal after leak checks then installing the No. 1 engine cover sub-assembly.
    Posted by ToyotaPartsNow Specialist
    Q:
    How to remove the fuel injector on Toyota Camry? Posted by Customer
    A:
    Discharging fuel system pressure must be the first step before removing a 2AZ-FE engine fuel injector. After disconnection from the negative battery terminal users must remove the air cleaner cap sub-assembly and the No. 1 engine cover sub-assembly. The fuel tube sub-assembly requires disconnection through the removal of the No. 1 fuel pipe clamp after checking for debris on both the pipe and connector area. If the connector proves difficult to remove, pinch the connector to disconnect it manually and then clean the sealing surface. Users must detach the fuel tube from its clamp on the fuel hose before disconnecting the No. 2 ventilation hose from the ventilation valve. After disconnecting the 4 fuel injector connectors the procedure calls for the removal of the wire harness clamps and 2 bolts to take out the fuel delivery pipe together with the 4 fuel injectors while being cautious of dropping them. The last step involves removal of the 2 delivery pipe spacers and 4 insulators from the cylinder head before extracting 4 injectors from the delivery pipe along with their 4 O-rings.
    Posted by ToyotaPartsNow Specialist
    Q:
    How to remove the fuel injectors on Scion xB? Posted by Customer
    A:
    The first step for extracting the 2AZ-FE engine fuel injectors requires the discharge of fuel system pressure. The removal procedure begins by taking out both the No. 1 engine cover sub-assembly and the air cleaner cap sub-assembly which includes the hose. Disconnection of the fuel main tube occurs through removing it from its clamp position with the fuel hose and the No. 2 fuel pipe while maintaining a straight line for the tube. Through the use of Special Service Tool: 09268-21010 you should space the retainer inside the connector to the tool's chamfer edge. Apply the fuel tube into the tool along with the connector and position the retainer onto the tool's chamfered section. Sliding the tool and connector together will produce a "click" sound which indicates the correct connection while you drain any residual fuel from the tube. Wrap the separated parts in a plastic bag to protect them. You can start the fuel delivery pipe sub-assembly removal process by disconnecting the No. 2 ventilation hose from the ventilation valve followed by disconnecting four fuel injector connectors and removing the two wire harness clamps. The two bolts need removal to extract the fuel delivery pipe and four fuel injectors while maintaining care to prevent them from falling. Users must also remove the two delivery pipe spacers and four insulators from the cylinder head. To complete the task remove the four fuel injectors from the fuel delivery pipe.
    Posted by ToyotaPartsNow Specialist
    Q:
    How to remove the fuel injectors on Toyota RAV4? Posted by Customer
    A:
    The procedure for fuel injector removal from a 2AZ-FE engine begins with fuel system pressure release achieved by removing the console box then disconnecting the connector to start the engine until it stops and turn off the ignition and finally removing the fuel tank cap to expose air. Reinstall the console box afterwards you reconnect the connector. Follow the next step by removing the negative battery cable while allowing at least 90 seconds of waiting time to avoid Air Bag activation. The first step involves clearing the No. 1 engine cover along with the air cleaner cap sub-assembly. Use Special Service Tool: 09268-21010 while disconnecting the fuel main tube by first removing the fuel tube from the fuel hose clamp and the fuel pipe clamp then cleaning the fuel tube connector. Use a plastic bag to protect the separated components when draining all remaining fuel. Disengage the No. 2 ventilation hose from the ventilation valve before removing the fuel delivery pipe sub-assembly with steps starting with wire harness clamp removal then separating the 4 fuel injector connectors before removing the 2 bolts to extract the fuel delivery pipe and its 4 fuel injectors without any drops. Pulling the 4 fuel injectors from the delivery pipe means first removing both delivery pipe spacers and all 4 insulators mounted on the cylinder head.
    Posted by ToyotaPartsNow Specialist
    Q:
    What should be done after installing the fuel injectors for the 2007 Scion tC? Posted by Customer
    A:
    Install 4 new insulators and 2 delivery pipe spacers into the cylinder head, then install the fuel delivery pipe with the injectors and temporarily tighten the 2 bolts.
    Posted by ToyotaPartsNow Specialist
    See expert answers on similar Fuel Injector
    Q:
    What components need to be removed before accessing the fuel injector assembly for the 2005 Scion tC? Posted by Customer
    A:
    Remove the engine cover sub-assembly No.1, air cleaner cap sub-assembly, and fuel delivery pipe sub-assembly.
    Posted by ToyotaPartsNow Specialist
    See expert answers on similar Fuel Injector
    Q:
    How should the fuel main tube be connected for the 2010 Scion xB? Posted by Customer
    A:
    Connect the fuel main tube, pushing the fuel tube connector until it clicks.
    Posted by ToyotaPartsNow Specialist
    See expert answers on similar Fuel Injector
    Q:
    What is the next step after disconnecting the hoses for the 2004 Toyota Camry? Posted by Customer
    A:
    Loosen the 2 air cleaner cap bolts and the air cleaner hose clamp bolt to remove the air cleaner cap and filter element.
    Posted by ToyotaPartsNow Specialist
    See expert answers on similar Fuel Injector
    Q:
    What should be done after installing the O-rings on the fuel injectors for the 2009 Scion tC? Posted by Customer
    A:
    Apply a light coat of gasoline or spindle oil to the fuel delivery pipe that contacts the O-ring of the fuel injector, then apply a light coat to the O-ring again before installing the fuel injectors onto the fuel delivery pipe.
    Posted by ToyotaPartsNow Specialist
    See expert answers on similar Fuel Injector
    Q:
    What is the next step after reinstalling the rear seat cushion for the 2006 Scion tC? Posted by Customer
    A:
    Disconnect the cable from the negative battery terminal, remove the engine cover sub-assembly, and the air cleaner cap sub-assembly.
    Posted by ToyotaPartsNow Specialist
    See expert answers on similar Fuel Injector
    Q:
    What should be done after installing the O-rings on the fuel injectors for the 2008 Scion tC? Posted by Customer
    A:
    Apply a light coat of gasoline or spindle oil to the fuel delivery pipe that contacts the O-ring of the fuel injector, then apply a light coat of gasoline or spindle oil to the O-ring again before installing the fuel injectors onto the fuel delivery pipe.
    Posted by ToyotaPartsNow Specialist
    See expert answers on similar Fuel Injector
    Q:
    What should be done after disconnecting the fuel tube for the 2008 Scion xB? Posted by Customer
    A:
    Drain any remaining fuel and cover the disconnected parts with a plastic bag for protection.
    Posted by ToyotaPartsNow Specialist
    See expert answers on similar Fuel Injector
    Q:
    What should be done carefully during the removal of the fuel delivery pipe for the 2005 Toyota Camry? Posted by Customer
    A:
    Be careful not to drop the injectors during this process.
    Posted by ToyotaPartsNow Specialist
    See expert answers on similar Fuel Injector
    Q:
    What should be removed after discharging the fuel system pressure for the 2009 Scion xB? Posted by Customer
    A:
    Remove the No. 1 engine cover sub-assembly and the air cleaner cap sub-assembly with the hose.
    Posted by ToyotaPartsNow Specialist
    See expert answers on similar Fuel Injector
    Q:
    How do you disconnect the fuel tube sub-assembly for the 2009 Toyota Camry? Posted by Customer
    A:
    Remove the No. 1 fuel pipe clamp and check for foreign matter on the pipe and around the connector before disconnecting the quick connector. If stuck, pinch the connector and push and pull the pipe to disconnect without using tools, and clean the sealing surface if necessary.
    Posted by ToyotaPartsNow Specialist
    See expert answers on similar Fuel Injector
    Q:
    What should be done with the injectors during removal for the 2006 Toyota Highlander? Posted by Customer
    A:
    Ensure not to drop the injectors.
    Posted by ToyotaPartsNow Specialist
    See expert answers on similar Fuel Injector
    Q:
    How should the new injectors be installed for the 2005 Toyota Highlander? Posted by Customer
    A:
    Push the injector while twisting it back and forth, then install the 4 injectors, ensuring not to twist the O-ring and checking that it turns smoothly after installation.
    Posted by ToyotaPartsNow Specialist
    See expert answers on similar Fuel Injector
    Q:
    What should be done with the O-rings and injector vibration insulators for the 2009 Toyota Corolla? Posted by Customer
    A:
    Remove the O-rings from the fuel injector assemblies and take out the 4 injector vibration insulators.
    Posted by ToyotaPartsNow Specialist
    See expert answers on similar Fuel Injector
    Q:
    What is the torque specification for tightening the 2 bolts for the 2007 Toyota Highlander? Posted by Customer
    A:
    Tighten the 2 bolts to a torque of 20 N.m (204 kgf.cm, 15 ft.lbf).
    Posted by ToyotaPartsNow Specialist
    See expert answers on similar Fuel Injector
    Q:
    What should you do if the connector and pipe are stuck for the 2007 Toyota Camry? Posted by Customer
    A:
    Pinch the connector and push and pull the pipe to disconnect, avoiding the use of tools, and clean the sealing surface if necessary.
    Posted by ToyotaPartsNow Specialist
    See expert answers on similar Fuel Injector
    Q:
    What is the first step to service and repair the fuel injector for the 2006 Toyota RAV4? Posted by Customer
    A:
    Discharge the fuel system pressure by removing the console box, disconnecting the connector, starting the engine until it stops, turning off the ignition, removing the fuel tank cap to release air, reconnecting the connector, and reinstalling the console box.
    Posted by ToyotaPartsNow Specialist
    See expert answers on similar Fuel Injector
    Q:
    How should the fuel injectors be installed onto the fuel delivery pipe for the 2009 Toyota Matrix? Posted by Customer
    A:
    Install the right and left fuel injectors onto the fuel delivery pipe, ensuring the O-ring is not cracked or displaced during installation.
    Posted by ToyotaPartsNow Specialist
    See expert answers on similar Fuel Injector
    Q:
    How do you check for fuel leaks after the installation for the 2007 Toyota RAV4? Posted by Customer
    A:
    Connect an intelligent tester to the DLC3, turn the ignition to ON without starting the engine, select the Active Test mode, and check for leaks before turning off the ignition and disconnecting the tester.
    Posted by ToyotaPartsNow Specialist
    See expert answers on similar Fuel Injector
    Q:
    What should you never do when removing and installing the fuel injector for the 2005 Toyota RAV4? Posted by Customer
    A:
    Never reuse the O-ring.
    Posted by ToyotaPartsNow Specialist
    See expert answers on similar Fuel Injector
    Q:
    What should be removed after taking out the fuel delivery pipe for the 2009 Toyota Matrix? Posted by Customer
    A:
    Remove the 2 delivery pipe spacers and the 4 insulators from the cylinder head, and pull the 4 fuel injectors out of the fuel delivery pipe.
    Posted by ToyotaPartsNow Specialist
    See expert answers on similar Fuel Injector
    Q:
    What is the next step after positioning the injector connector for the 2006 Toyota Solara? Posted by Customer
    A:
    Place the 2 spacers on the cylinder head and position the delivery pipe with the 4 injectors.
    Posted by ToyotaPartsNow Specialist
    See expert answers on similar Fuel Injector
    Q:
    What additional components need to be removed during the process for the 2005 Toyota Solara? Posted by Customer
    A:
    Remove the ventilation hose No. 2, disconnect the 4 injector connectors, and take off the 2 clamps and wire harness from the delivery pipe.
    Posted by ToyotaPartsNow Specialist
    See expert answers on similar Fuel Injector
    Q:
    What is the torque specification for tightening the bolts for the 2008 Toyota RAV4? Posted by Customer
    A:
    Tighten the bolts to a torque of 20 Nm (204 kgf-cm, 15 ft-lbf).
    Posted by ToyotaPartsNow Specialist
    See expert answers on similar Fuel Injector
    Q:
    What are the final steps to complete the process for the 2007 Toyota Solara? Posted by Customer
    A:
    Connect the fuel tube sub-assembly, install the air cleaner cap sub-assembly, inspect for fuel leaks, and finally install the engine cover sub-assembly No. 1.
    Posted by ToyotaPartsNow Specialist
    See expert answers on similar Fuel Injector
    Q:
    What should be removed after discharging the fuel system pressure for the 2008 Toyota Solara? Posted by Customer
    A:
    Remove the air cleaner cap sub-assembly and the engine cover sub-assembly No. 1.
    Posted by ToyotaPartsNow Specialist
    See expert answers on similar Fuel Injector
    Q:
    What is the first step to install the 2AZ-FE fuel injector for the 2008 Toyota Solara? Posted by Customer
    A:
    Install a new insulator to the injector and apply a light coat of grease or gasoline to a new O-ring before installing it onto the injector.
    Posted by ToyotaPartsNow Specialist
    See expert answers on similar Fuel Injector
    If you have any questions about this product, please don't hesitate to ask us. We will be happy to help you!

OEM Toyota 23209-0H030, Excellent Performance and Perfect Fitment

To ensure reliability, purchase Toyota part # 23209-0H030 Injector. It is sometimes referred to as Toyota Fuel Injector. OEM parts are unrivaled in terms of quality. They go through extensive quality control inspections and are produced in accordance with Toyota's official factory specifications. All of these remove defects and imperfections. So you can relax knowing they promise exceptional lifespan and flawless fitment.

ToyotaPartsNow.com is a leading supplier of genuine Toyota parts such as Toyota 232090H030 Injector. At ToyotaPartsNow.com, we have a wide variety of OEM Toyota parts available at competitive prices. Our comprehensive range of genuine Toyota parts come with a manufacturer's warranty for peace of mind. We also prioritize customer satisfaction, providing a hassle-free return policy and expedited delivery for all our parts. For detailed Toyota parts information, click here.
Choose ToyotaPartsNow for discounted prices, exceptional service and fast delivery