×
ToyotaParts- Hello
- Login or Register
- Quick Links
- Live Chat
- Track Order
- Parts Availability
- RMA
- Help Center
- Contact Us
- Shop for
- Toyota Parts
- Scion Parts
My Garage
My Account
Cart
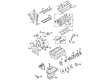
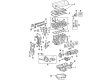
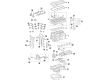
OEM 2010 Toyota Camry Camshaft
Cam- Select Vehicle by Model
- Select Vehicle by VIN
Select Vehicle by Model
orMake
Model
Year
Select Vehicle by VIN
For the most accurate results, select vehicle by your VIN (Vehicle Identification Number).
8 Camshafts found

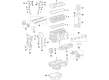
2010 Toyota Camry Camshaft
Part Number: 13502-36030$367.39 MSRP: $538.41You Save: $171.02 (32%)Ships in 1-3 Business DaysProduct Specifications- Other Name: Camshaft Sub-Assembly
- Replaces: 13502-0V010, 13502-36010
- Part Name Code: 13512
- Item Weight: 4.50 Pounds
- Item Dimensions: 21.1 x 3.3 x 2.8 inches
- Condition: New
- Fitment Type: Direct Replacement
- SKU: 13502-36030
- Warranty: This genuine part is guaranteed by Toyota's factory warranty.

2010 Toyota Camry Camshaft
Part Number: 13501-36050$377.60 MSRP: $553.38You Save: $175.78 (32%)Ships in 1-3 Business DaysProduct Specifications- Other Name: Camshaft Sub-Assembly
- Replaces: 13501-0V010, 13501-36020
- Part Name Code: 13511
- Item Weight: 5.70 Pounds
- Item Dimensions: 20.9 x 3.5 x 3.0 inches
- Condition: New
- Fitment Type: Direct Replacement
- SKU: 13501-36050
- Warranty: This genuine part is guaranteed by Toyota's factory warranty.

2010 Toyota Camry Camshaft
Part Number: 13502-31061$533.55 MSRP: $781.93You Save: $248.38 (32%)Ships in 1-3 Business DaysProduct Specifications- Other Name: Camshaft Sub-Assembly
- Replaces: 13502-31041, 13502-0P020, 13502-31040, 13502-31060, 13502-31080, 13502-0P021
- Part Name Code: 13512
- Item Weight: 4.40 Pounds
- Item Dimensions: 20.7 x 3.3 x 2.8 inches
- Condition: New
- Fitment Type: Direct Replacement
- SKU: 13502-31061
- Warranty: This genuine part is guaranteed by Toyota's factory warranty.

2010 Toyota Camry Camshaft
Part Number: 13501-31091$533.55 MSRP: $781.93You Save: $248.38 (32%)Ships in 1-3 Business DaysProduct Specifications- Other Name: Camshaft Sub-Assembly
- Replaces: 13501-31100, 13501-31090, 13501-0P021, 13501-0P020, 13501-31061, 13501-31060
- Part Name Code: 13511
- Item Weight: 4.60 Pounds
- Item Dimensions: 21.5 x 3.5 x 3.0 inches
- Condition: New
- Fitment Type: Direct Replacement
- SKU: 13501-31091
- Warranty: This genuine part is guaranteed by Toyota's factory warranty.

2010 Toyota Camry Camshaft Sub-Assembly
Part Number: 13054-31061$533.55 MSRP: $781.93You Save: $248.38 (32%)Ships in 1-3 Business DaysProduct Specifications- Other Name: Camshaft
- Replaces: 13054-0P020, 13054-31030, 13054-31080, 13054-31060, 13054-0P021, 13054-31031
- Part Name Code: 13054
- Item Weight: 4.80 Pounds
- Item Dimensions: 21.8 x 3.4 x 2.9 inches
- Condition: New
- Fitment Type: Direct Replacement
- SKU: 13054-31061
- Warranty: This genuine part is guaranteed by Toyota's factory warranty.

2010 Toyota Camry Camshaft
Part Number: 13053-31061$533.55 MSRP: $781.93You Save: $248.38 (32%)Ships in 1-3 Business DaysProduct Specifications- Other Name: Camshaft Sub-Assembly
- Replaces: 13053-0P021, 13053-31080, 13053-0P020, 13053-31060
- Part Name Code: 13053
- Item Weight: 4.80 Pounds
- Item Dimensions: 21.4 x 3.6 x 3.0 inches
- Condition: New
- Fitment Type: Direct Replacement
- SKU: 13053-31061
- Warranty: This genuine part is guaranteed by Toyota's factory warranty.

2010 Toyota Camry Camshaft
Part Number: 13501-28070$358.08 MSRP: $524.78You Save: $166.70 (32%)Ships in 1-3 Business DaysProduct Specifications- Other Name: Camshaft Sub-Assembly
- Manufacturer Note: (J)
- Replaces: 13501-0H060
- Part Name Code: 13511
- Item Weight: 3.10 Pounds
- Item Dimensions: 20.9 x 3.4 x 3.0 inches
- Condition: New
- Fitment Type: Direct Replacement
- SKU: 13501-28070
- Warranty: This genuine part is guaranteed by Toyota's factory warranty.

2010 Toyota Camry Camshaft
Part Number: 13502-28030$321.18 MSRP: $458.57You Save: $137.39 (30%)Ships in 1-3 Business DaysProduct Specifications- Other Name: Camshaft Sub-Assembly
- Replaces: 13502-0H030, 13502-0H040
- Part Name Code: 13512
- Item Weight: 4.40 Pounds
- Item Dimensions: 21.9 x 3.4 x 3.0 inches
- Condition: New
- Fitment Type: Direct Replacement
- SKU: 13502-28030
- Warranty: This genuine part is guaranteed by Toyota's factory warranty.
2010 Toyota Camry Camshaft
Looking for affordable OEM 2010 Toyota Camry Camshaft? Explore our comprehensive catalogue of genuine 2010 Toyota Camry Camshaft. All our parts are covered by the manufacturer's warranty. Plus, our straightforward return policy and speedy delivery service ensure an unparalleled shopping experience. We look forward to your visit!
2010 Toyota Camry Camshaft Parts Q&A
- Q: How to remove the camshaft on 2010 Toyota Camry?A: The procedure to remove the 2AZ-FXE engine camshaft begins with the removal of the front wheel on the right side followed by the engine under cover on the left side and right side and the front fender apron seal right side and No. 1 engine cover sub-assembly and ignition coil assembly and cylinder head cover sub-assembly. The next step requires setting the No. 1 cylinder at TDC/compression and afterward extracting the No. 1 chain tensioner assembly. After using a wrench to hold the No. 2 camshaft you can start by loosening the camshaft timing set bolt before uniformly loosening and removing the specific order of 10 bearing cap bolts from the 5 bearing caps. The technician should detach both the camshaft timing sprocket with its attached timing chain after removing the camshaft timing sprocket set bolt and holding the No. 2 camshaft during the process. The removal should be followed by uniformly loosening and removing the 10 bearing cap bolts and the 5 bearing caps while keeping a grip on the chain. A string must tie the timing chain to prevent its fall into the timing chain cover. The correct method to remove the camshaft timing gear assembly includes using a vise clamp to stop camshaft rotation and wrapping electrical tape around all ports except the advance port then applying 100 kPa (1.0 kgf/cm2, 14 psi) air pressure through the oil path as you turn the gear clockwise by hand. Use a shop rag to cover the paths so oil drop prevention is achievable. When removing the camshaft timing gear flange bolt maintain pressure on other four bolts and break the straight pin lock before reuse.
Related 2010 Toyota Camry Parts
 2010 Toyota Camry Oil Pan
 2010 Toyota Camry Timing Chain Tensioner
 2010 Toyota Camry Dipstick
 2010 Toyota Camry Drain Plug Washer
 2010 Toyota Camry Piston
 2010 Toyota Camry Oil Filler Cap
 2010 Toyota Camry Crankshaft Gear
 2010 Toyota Camry Crankshaft Seal
 2010 Toyota Camry Dipstick Tube
 2010 Toyota Camry Drain Plug
 2010 Toyota Camry Engine Mount Torque Strut
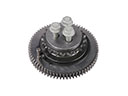 2010 Toyota Camry Timing Idler Gear