My Garage
Cart

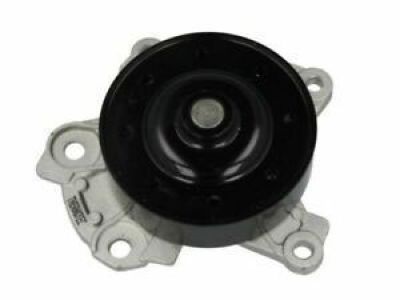
OEM 2009 Scion xD Water Pump

H2O Pump
  • Select Vehicle by Model
  • Select Vehicle by VIN
Select Vehicle by Model
Make
Model
Year
or
Select Vehicle by VIN
For the most accurate results, select vehicle by your VIN (Vehicle Identification Number).

1 Water Pump found

  • 2009 Scion xD Water Pump - 16100-39465
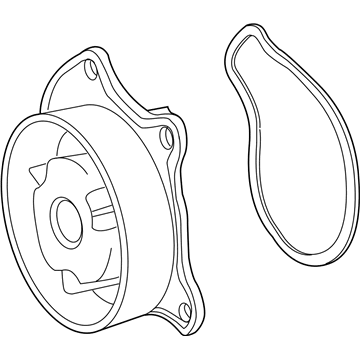
    2009 Scion xD Water Pump Diagram - 16100-39465
    View related parts

    2009 Scion xD Water Pump

    Part Number: 16100-39465
    $86.02 MSRP: $120.99
    You Save: $34.97 (29%)
    Product Specifications
    • Other Name: Engine Water Pump; Pump Assembly, Engine Water
    • Part Name Code: 16100
    • Item Weight: 2.80 Pounds
    • Item Dimensions: 9.4 x 6.0 x 5.5 inches
    • Condition: New
    • Fitment Type: Direct Replacement
    • SKU: 16100-39465
    • Warranty: This genuine part is guaranteed by Toyota's factory warranty.
    More Info
    Fits the following 2009 Scion xD Submodels:
    • Base | 4 Cyl 1.8 L GAS

2009 Scion xD Water Pump

Looking for affordable OEM 2009 Scion xD Water Pump? Explore our comprehensive catalogue of genuine 2009 Scion xD Water Pump. All our parts are covered by the manufacturer's warranty. Plus, our straightforward return policy and speedy delivery service ensure an unparalleled shopping experience. We look forward to your visit!

2009 Scion xD Parts Questions & Experts Answers

  • Q: How to install the water pump assembly and complete the associated components on 2009 Scion xD?
    A: Fitting the 2ZR-FE water pump assembly starts with applying a new gasket to the timing chain cover that has uniform and clean surfaces. The water pump assembly requires five bolts to be secured by tightening bolt A to 26 Nm (260 kgf-cm, 19 ft-lbf) and bolt B to 24 Nm (240 kgf-cm, 17 ft-lbf). First attach the front suspension crossmember sub-assembly before mounting the engine assembly with transaxle. Add the front axle assembly for both sides of the vehicle while keeping in mind there is no difference between the left and right side installation procedures. The installation should continue with front lower suspension arm sub-assemblies and front stabilizer link assemblies and tie rod end sub-assemblies both for the left and right sides. The installation procedures for each side remain identical. Proceed with the installation of front speed sensors and front axle shaft nuts alongside the front exhaust pipe assembly and front floor brace center and front console box followed by rear console box assembly and console box carpet as well as console box cover rear and console panel upper shift lever knob sub-assembly (for manual transaxle), no. 1 steering column hole cover sub-assembly, steering sliding yoke sub-assembly and column hole cover silencer sheet with clutch release cylinder assembly (for manual transaxle). Assemble the sub-assembly of fuel tube along with heater water hoses Inlet A and outlet A, engine wire connection, no. 1 fuel vapor feed hose, union to check valve hose, and transmission control cable assemblies for both automatic and manual transaxles. The installation process includes the pulley compressor assembly alongside the radiator assembly and upper radiator support sub-assembly and absorber and no. 1 cooler cover and hood lock assembly and no. 2 oil cooler inlet hose (for automatic transaxle) and no. 1 oil cooler outlet hose (for automatic transaxle) together with the front bumper cover and no. 1 radiator hose and no. 2 radiator hose and the fan & generator V belt and its required adjustment and inspection. The procedure requires installation of the no. 2 cylinder head cover alongside battery carrier and air cleaner bracket before putting together the air cleaner assembly and outer cowl top panel followed by front air shutter seal RH and front wiper motor and link with cowl top ventilator louver LH and its sub-assembly the procedure continues with hood to cowl top seal installation before adding front wiper arm and blade assemblies for both sides along with their front wiper arm head caps. To conclude the procedure install the battery tray and battery, add engine coolant, inspect for fuels leaks as well as exhaust gas and engine coolant leaks, then install both engine under covers and front wheels before conducting inspections of ignition timing, engine idling speed and CO/HC levels and front wheel alignment, ABS sensor signal with ABS and VSC sensor signal with VSC.

Related 2009 Scion xD Parts