×
ToyotaParts- Hello
- Login or Register
- Quick Links
- Live Chat
- Track Order
- Parts Availability
- RMA
- Help Center
- Contact Us
- Shop for
- Toyota Parts
- Scion Parts
My Garage
My Account
Cart
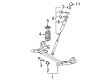
OEM 2007 Toyota Sienna Shock Absorber
Suspension Shock Absorber- Select Vehicle by Model
- Select Vehicle by VIN
Select Vehicle by Model
orMake
Model
Year
Select Vehicle by VIN
For the most accurate results, select vehicle by your VIN (Vehicle Identification Number).
2 Shock Absorbers found


 Product Specifications
- Other Name: Absorber Set, Shock; Rear Shock Absorber; Suspension Kit; Strut Assembly; Complete Strut; Shock; Absorber Assembly, Shock, Rear Passenger Side; Absorber Assembly, Shock, Rear Driver Side
- Replaces: 48531-A9060
- Item Weight: 5.20 Pounds
- Item Dimensions: 26.1 x 6.6 x 5.8 inches
- Condition: New
- Fitment Type: Direct Replacement
- SKU: 48531-A9200
- Warranty: This genuine part is guaranteed by Toyota's factory warranty.


2007 Toyota Sienna Shock Absorber, Rear
Part Number: 48531-A9050$59.48 MSRP: $83.48You Save: $24.00 (29%)Ships in 1-3 Business DaysProduct Specifications- Other Name: Absorber, Shock, Rear; Suspension Kit; Strut Assembly; Shock Set; Complete Strut; Shock; Absorber Assembly, Shock, Rear Passenger Side; Absorber Assembly, Shock, Rear Driver Side
- Manufacturer Note: MARK 48531-AE020
- Position: Rear
- Item Weight: 7.00 Pounds
- Item Dimensions: 25.6 x 6.8 x 5.7 inches
- Condition: New
- Fitment Type: Direct Replacement
- SKU: 48531-A9050
- Warranty: This genuine part is guaranteed by Toyota's factory warranty.
2007 Toyota Sienna Shock Absorber
Looking for affordable OEM 2007 Toyota Sienna Shock Absorber? Explore our comprehensive catalogue of genuine 2007 Toyota Sienna Shock Absorber. All our parts are covered by the manufacturer's warranty. Plus, our straightforward return policy and speedy delivery service ensure an unparalleled shopping experience. We look forward to your visit!
2007 Toyota Sienna Shock Absorber Parts Q&A
- Q: How to service and repair the rear shock absorber on 2007 Toyota Sienna?A: The servicing and repair process of a rear shock absorber must start with removing the rear wheel as an initial step. Remove the rear shock absorber cap LH after you detach both the shock absorber head cover and the cap. It is essential to support the rear axle beam with a jack while using a 6 mm hexagon wrench to maintain hold on the piston rod before removing the lock nut. The service worker should take out the rear shock absorber LH cushion retainer and rear shock absorber cushion No.1 then remove the nut and cushion retainer and shock absorber assembly rear LH. Take away the rear spring bumper No.1 LH from the shock absorber assembly rear LH. The shock absorber testing requires operators to depress and elevate the rod to notice strange noises or resistance; shock absorber replacement should occur if any unusual problems are verified. The process begins when you connect the rear spring bumper No.1 LH to the shock absorber assembly LH while suspending the rear axle beam assembly with a jack for appropriate installation of the rear shock absorber assembly rear LH alongside the cushion retainer and nut. A 6 mm hexagon wrench should be used to tighten a new lock nut before applying full torque to 30 Nm (310 kgf-cm, 22 ft. lbs.). The rear shock absorber cap LH and shock absorber head cover need installation before reinstalling the rear wheel where proper torque should be 103 Nm (1,050 kgf-cm, 76 ft. lbs.). When stabilizing the shock absorber assembly rear LH for a complete tightening sequence it may require a jack to support the rear axle beam while placing 90 kg (198 lbs) weight inside the rear compartment. Set the shock absorber nut to 115 Nm (1,173 kgf-cm, 85 ft. lbs.) torque before completion. Check the alignment of the rear wheels as the last step. To dispose of this shock absorber fully stretch the rod until it creates a hole that releases the gas from the cylinder while flying fragments are avoided along with the identification that the gas is non-poisonous and effective. For 2WD drive type devices measure 234 mm (9.22 inch) as the shock absorber length and for 4WD drive type models it extends to 258 mm (10.16 inch).
Related 2007 Toyota Sienna Parts
 2007 Toyota Sienna Control Arm
 2007 Toyota Sienna Ball Joint
 2007 Toyota Sienna Sway Bar Link
 2007 Toyota Sienna Sway Bar Bushing
 2007 Toyota Sienna Axle Beam Mount
 2007 Toyota Sienna Bump Stop
 2007 Toyota Sienna Coil Springs
 2007 Toyota Sienna Crossmember Bushing
 2007 Toyota Sienna Front Cross-Member
 2007 Toyota Sienna Shock and Strut Boot
 2007 Toyota Sienna Strut Housing
 2007 Toyota Sienna Sway Bar Bracket