×
ToyotaParts- Hello
- Login or Register
- Quick Links
- Live Chat
- Track Order
- Parts Availability
- RMA
- Help Center
- Contact Us
- Shop for
- Toyota Parts
- Scion Parts
My Garage
My Account
Cart
OEM 2007 Scion tC Shock Absorber
Suspension Shock Absorber- Select Vehicle by Model
- Select Vehicle by VIN
Select Vehicle by Model
orMake
Model
Year
Select Vehicle by VIN
For the most accurate results, select vehicle by your VIN (Vehicle Identification Number).
2 Shock Absorbers found

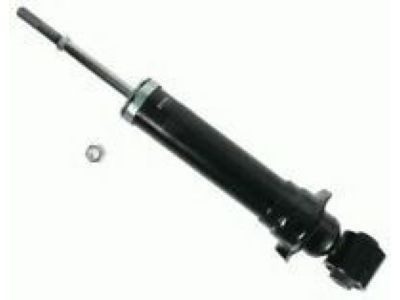
2007 Scion tC Shock Absorber, Rear Passenger Side
Part Number: 48530-80268$101.42 MSRP: $142.37You Save: $40.95 (29%)Ships in 1-2 Business DaysProduct Specifications- Other Name: Absorber Set, Rear Right-Hand; Suspension Shock Absorber; Strut Assembly Kit; Complete Strut; Shock; Absorber Assembly, Shock, Rear Passenger Side; Absorber Assembly, Shock, Rear Driver Side
- Manufacturer Note: MARK 48530-21140
- Position: Rear Passenger Side
- Item Weight: 3.10 Pounds
- Item Dimensions: 26.4 x 6.6 x 5.9 inches
- Condition: New
- Fitment Type: Direct Replacement
- SKU: 48530-80268
- Warranty: This genuine part is guaranteed by Toyota's factory warranty.
2007 Scion tC Shock Absorber
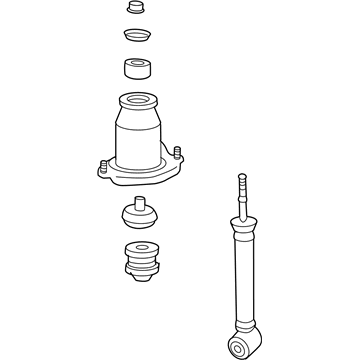
Part Number: 48530-80152$128.26 MSRP: $181.99You Save: $53.73 (30%)Ships in 1-3 Business DaysProduct Specifications- Other Name: Absorber Assembly, Shock; Shock; Absorber Assembly, Shock, Rear Passenger Side; Absorber Assembly, Shock, Rear Driver Side
- Manufacturer Note: MARK 48530-21140
- Item Weight: 6.50 Pounds
- Item Dimensions: 25.8 x 6.7 x 5.7 inches
- Condition: New
- Fitment Type: Direct Replacement
- SKU: 48530-80152
- Warranty: This genuine part is guaranteed by Toyota's factory warranty.
2007 Scion tC Shock Absorber
Looking for affordable OEM 2007 Scion tC Shock Absorber? Explore our comprehensive catalogue of genuine 2007 Scion tC Shock Absorber. All our parts are covered by the manufacturer's warranty. Plus, our straightforward return policy and speedy delivery service ensure an unparalleled shopping experience. We look forward to your visit!
2007 Scion tC Shock Absorber Parts Q&A
- Q: How to service and repair the front shock absorber with coil spring on 2007 Scion tC?A: Begin the front shock absorber with coil spring service and repair task by taking off the front wheel and wiper arm head cap and both front wiper arms before handling the hood to cowl top seal and left-hand side cowl top ventilator louver. Use a jack to support the front No. 1 suspension lower arm LH before removing the stabilizer link nut while disconnecting the assembly from the left-hand side. The front speed sensor LH requires complete disconnection from the shock absorber assembly by removing its bolt. Loosen the lock nut on the front shock absorber housing except for complete removal before removing its two lower nuts and three upper nuts which will retain all bolts. Slower movement of the jack allows you to remove the shock absorber from its position. You should first clamp the shock absorber in a vise and then remove the lock nut using Special Service Tool: 09727-30021 before you proceed to take off one by one the dust seal and suspension support LH followed by the coil spring seat upper LH, coil spring insulator upper LH, coil spring LH, spring bumper LH, and coil spring insulator lower LH. A thorough examination of the front shock absorber assembly LH requires manual compression and extension of the rod to identify any abnormal resistance or sounds with a new component installation recommendation. The coil spring manipulation requires the Special Service Tool to compress the spring during LH lower insulator spring bumper installation and to achieve correct positioning. Reassemble the front shock absorber assembly LH by first placing the coil spring into the lower seat, next add the upper insulator and seat, then set the dust seal and suspension support LH before tightening a new lock nut temporarily. Follow the below procedure for installation: Firstly, fasten the shock absorber with coil spring to the steering knuckle through two bolts applied from the front and then install the vehicle using the jack before securing it with upper nuts set to 52 Nm torque and lower nuts set to 240 Nm torque. After locking the torque of the nut at 47 Nm apply MP grease No. 2 to marked components before adding the suspension dust cover. After installing the front speed sensor LH and stabilizer link assembly LH (torque: 74 Nm), the technician should fasten the front wheel (torque: 103 Nm) but should start installation with the cowl top ventilator louver and then proceed to attach the hood to cowl top seal and both front wiper arms and head cap. Examine and correct the front wheel alignment at the end of the procedure. emporary disposal of the shock absorber requires a piston rod extension before drilling a hole into the cylinder to release gas while using appropriate protective equipment.


