My Garage
Cart

OEM 2006 Scion tC Shock Absorber

Suspension Shock Absorber
  • Select Vehicle by Model
  • Select Vehicle by VIN
Select Vehicle by Model
Make
Model
Year
or
Select Vehicle by VIN
For the most accurate results, select vehicle by your VIN (Vehicle Identification Number).

2 Shock Absorbers found

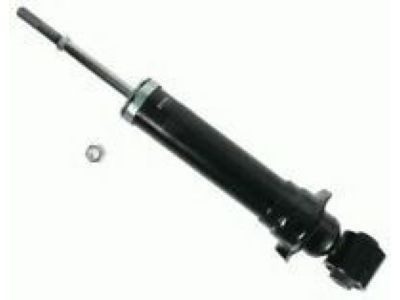
  • 2006 Scion tC Shock Absorber - 48530-80268
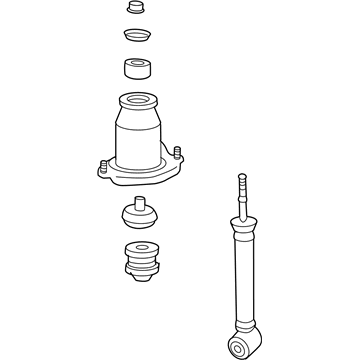
    2006 Scion tC Shock Absorber Diagram - 48530-80268
    View related parts

    2006 Scion tC Shock Absorber, Rear Passenger Side

    Part Number: 48530-80268
    $89.57 MSRP: $125.74
    You Save: $36.17 (29%)
    Ships in 1-2 Business Days
    ADD TO CART
    Product Specifications
    • Other Name: Absorber Set, Rear Right-Hand; Suspension Shock Absorber; Strut Assembly Kit; Complete Strut; Shock; Absorber Assembly, Shock, Rear Passenger Side; Absorber Assembly, Shock, Rear Driver Side
    • Manufacturer Note: MARK 48530-21140
    • Position: Rear Passenger Side
    • Item Weight: 3.10 Pounds
    • Item Dimensions: 26.4 x 6.6 x 5.9 inches
    • Condition: New
    • Fitment Type: Direct Replacement
    • SKU: 48530-80268
    • Warranty: This genuine part is guaranteed by Toyota's factory warranty.
    More Info
    Fits the following 2006 Scion tC Submodels:
    • Base, Spec | 4 Cyl 2.4 L GAS
  • 2006 Scion tC Shock Absorber - 48530-80152
    2006 Scion tC Shock Absorber Diagram - 48530-80152
    View related parts

    2006 Scion tC Shock Absorber

    Part Number: 48530-80152
    $128.26 MSRP: $181.99
    You Save: $53.73 (30%)
    Ships in 1-3 Business Days
    ADD TO CART
    Product Specifications
    • Other Name: Absorber Assembly, Shock; Shock; Absorber Assembly, Shock, Rear Passenger Side; Absorber Assembly, Shock, Rear Driver Side
    • Manufacturer Note: MARK 48530-21140
    • Item Weight: 6.50 Pounds
    • Item Dimensions: 25.8 x 6.7 x 5.7 inches
    • Condition: New
    • Fitment Type: Direct Replacement
    • SKU: 48530-80152
    • Warranty: This genuine part is guaranteed by Toyota's factory warranty.
    More Info
    Fits the following 2006 Scion tC Submodels:
    • Base, Spec | 4 Cyl 2.4 L GAS

2006 Scion tC Shock Absorber

Looking for affordable OEM 2006 Scion tC Shock Absorber? Explore our comprehensive catalogue of genuine 2006 Scion tC Shock Absorber. All our parts are covered by the manufacturer's warranty. Plus, our straightforward return policy and speedy delivery service ensure an unparalleled shopping experience. We look forward to your visit!

2006 Scion tC Parts Questions & Experts Answers

  • Q: How to service and repair the rear shock absorber with coil spring on 2006 Scion tC?
    A: Service and repair of the rear shock absorber with coil spring requires first removing the tonneau cover and several components like deck board assembly, back door scuff plate, and deck floor boxes (LH and RH) and rope hook followed by rear No. 1 floor board, rear seat cushion assembly, rear seatback assembly, front door scuff plate, No. 1 luggage compartment trim hook, No. 1 side trim assembly, No. 2 deck side trim hook and deck trim side panel assembly before handling the rear wheel. Disengage the skid control sensor wire followed by removing the bolt as well as wire bracket then proceed to disconnect rear stabilizer link assembly LH and RH. To support the LH suspension arm No. 1 users should initially remove the nut while holding it then detach the 3 nuts, 3 bolts and suspension lower brace LH, 2 bolts for the No. 3 parking brake cable, and 3 bolts from the suspension arm bracket LH. First pull down the No. 1 suspension arm LH and then remove the shock absorber together with its coil spring. Disassemble the rear shock absorber by first removing its cap followed by spring coil compression using Special Service Tool: 09727-30021 (09727-00010, 09727-00021, 09727-00031) while you use a 6 mm hexagon wrench to hold the piston rod until you successfully detach the nut. Proceed with removal of the No. 1 shock absorber cushion washer, suspension support LH, spring front bracket LH, No. 1 shock absorber cushion and No. 1 spring bumper LH, coil spring insulator upper LH and coil spring. Use aprocedure tocheck the rear shock absorber through compression and extension of its rod while checkingfor absent or strange sounds or resistance and replace it if a malfunction is present. Reassembly requires using the special service tool to compress the coil spring then inserting the coil spring into the shock absorber with the lower end sitting properly inside the spring lower seat. Afterward, install the No. 1 spring bumper LH followed by the suspension support LH and position the coil spring insulator upper LH to the spring front bracket LH. After installing the suspension support LH with No. 1 shock absorber cushion washer and the spring front bracket LH next to the coil spring insulator upper LH, use a new center nut to make temporary tightening followed by special service tool removal to verify spring bracket direction before securing it with a 6 mm hexagon wrench to 56 Nm (571 kgf-cm, 41 ft. lbs.) torque. Install the rear shock absorber cap, then install the shock absorber with coil spring using 3 nuts, tightening them to 80 Nm (816 kgf-cm, 59 ft. lbs.), temporarily tighten the bolt and nut while fixing the nut, install the suspension No. 1 arm LH with 3 bolts to a torque of 65 Nm (663 kgf-cm, 48 ft. lbs.), connect the No. 3 parking brake cable with 2 bolts to a torque of 6.0 Nm (61 kgf-cm, 53 inch lbs.), and install the suspension lower brace LH with 3 bolts to a torque of 64 Nm (653 kgf-cm, 47 ft. lbs.). Connect the rear stabilizer link assembly LH to the nut at 44 Nm (449 kgf-cm, 32 ft. lbs.) while using a 5-mm hexagon wrench if the ball joint spins with the nut before reinstalling it on the opposite side. The skid control sensor wire installation requires wiring it to the bracket with a 5.0 Nm (51 kgf-cm, 44 inch lbs.) torque setting before linking the sensor connector. Fully tighten the rear shock absorber with coil spring bolt and nut to 140 Nm (1,430 kgf-cm, 103 ft. lbs.) while holding the nut in place after emptying the vehicle and bouncing it multiple times for suspension stabilization. End the procedure by verifying the rear wheel alignment while also testing the ABS speed sensor output. Before disposal start by stretching the shock absorber rod fully and next drill a hole at the cylinder section between points A and B to remove the internal gas while maintaining safe equipment use because of the potential metal debris. The discharged gas appears clear with no scent and shows no poisonous properties.

Related 2006 Scion tC Parts