×
ToyotaParts- Hello
- Login or Register
- Quick Links
- Live Chat
- Track Order
- Parts Availability
- RMA
- Help Center
- Contact Us
- Shop for
- Toyota Parts
- Scion Parts
My Garage
My Account
Cart
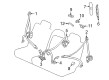
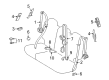
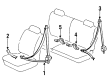
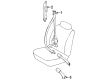
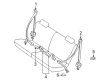
OEM Toyota Land Cruiser Seat Belt
Seat Safety Belt- Select Vehicle by Model
- Select Vehicle by VIN
Select Vehicle by Model
orMake
Model
Year
Select Vehicle by VIN
For the most accurate results, select vehicle by your VIN (Vehicle Identification Number).
228 Seat Belts found


Toyota Land Cruiser Lap & Shoulder Belt, Gray, Outer Passenger Side Part Number: 73360-60325-B2
$183.01 MSRP: $261.30You Save: $78.29 (30%)Ships in 1-3 Business Days
Toyota Land Cruiser Belt Assembly, Rear Seat, Outer Passenger Side Part Number: 73360-60325-A2
$183.01 MSRP: $261.30You Save: $78.29 (30%)Ships in 1-3 Business Days


Toyota Land Cruiser Lap & Shoulder Belt, Passenger Side Part Number: 73210-60453-A1
$275.74 MSRP: $393.70You Save: $117.96 (30%)Ships in 1-3 Business Days

Toyota Land Cruiser Belt Assembly, Front Seat Inner, Driver Side Part Number: 73230-60460-B0
$44.56 MSRP: $62.03You Save: $17.47 (29%)

Toyota Land Cruiser Lap & Shoulder Belt, Beige, Outer Passenger Side Part Number: 73360-60490-E0
$256.01 MSRP: $365.53You Save: $109.52 (30%)Ships in 1-3 Business Days
Toyota Land Cruiser Belt Assembly, Front Seat Outer, Passenger Side Part Number: 73210-60580-A0
$257.80 MSRP: $368.08You Save: $110.28 (30%)Ships in 1-3 Business Days

Toyota Land Cruiser Lap & Shoulder Belt, Beige, Outer Driver Side Part Number: 73370-60330-E0
$275.86 MSRP: $393.86You Save: $118.00 (30%)Ships in 1-3 Business Days

Toyota Land Cruiser Seat Belt Assembly, Driver Side GRAY Part Number: 73220-60062-B0
$189.65 MSRP: $270.78You Save: $81.13 (30%)
Toyota Land Cruiser Lap & Shoulder Belt, Blue Gray, Driver Side GRAY Part Number: 73220-60270-B0
$179.28 MSRP: $255.97You Save: $76.69 (30%)Ships in 1-3 Business Days
Toyota Land Cruiser Lap & Shoulder Belt, Blue/Gray, Outer Passenger Side Part Number: 73560-60121-B0
$175.55 MSRP: $250.66You Save: $75.11 (30%)Ships in 1-3 Business Days
Toyota Land Cruiser Belt Assembly, Rear Seat, Outer Driver Side Part Number: 73370-60185-B2
$183.01 MSRP: $261.30You Save: $78.29 (30%)Ships in 1-3 Business DaysToyota Land Cruiser Lap & Shoulder Belt, Blue/Gray, Passenger Side GREY Part Number: 73210-60451-B0
$279.36 MSRP: $398.86You Save: $119.50 (30%)Ships in 1-3 Business Days
Toyota Land Cruiser Belt Assembly, Front Seat Inner, Passenger Side Part Number: 73240-60390-B0
$44.32 MSRP: $61.69You Save: $17.37 (29%)
Toyota Land Cruiser Lap & Shoulder Belt, Blue/Gray, Outer Driver Side Part Number: 73370-60182-B0
$174.12 MSRP: $246.49You Save: $72.37 (30%)
Toyota Land Cruiser Belt Assembly, Rear Seat, Outer Driver Side Part Number: 73370-60185-A2
$183.01 MSRP: $261.30You Save: $78.29 (30%)


Toyota Land Cruiser Lap & Shoulder Belt, Blue/Gray, Outer Passenger Side Part Number: 73360-60322-B0


| Page 1 of 12 |Next >
1-20 of 228 Results
Toyota Land Cruiser Seat Belt
Choose genuine Seat Belt that pass strict quality control tests. You can trust the top quality and lasting durability. Shopping for OEM Seat Belt for your Toyota Land Cruiser? Our website is your one-stop destination. We stock an extensive selection of genuine Toyota Land Cruiser parts. The price is affordable so you can save more. It only takes minutes to browse and find the exact fit. Easily add to cart and check out fast. Our hassle-free return policy will keep you stress-free. We process orders quickly for swift delivery. Your parts will arrive faster, so you can get back on the road sooner.
Toyota Land Cruiser Seat Belt Parts and Q&A
- Q: What is the correct procedure for activating and disposing of a rear seat outer belt with a seat belt pretensioner using Special Service Tools 09082-00700 and 09082-00770, both when installed and not installed on Toyota Land Cruiser?A:It is essential to activate the seat belt pretensioner before the scrapping or disposal of vehicles and seat outer belts. Report all activation abnormalities to the service department of Toyota Motor Sales U.S.A. Inc. It is prohibited to discard a pretensioner-free rear seat outer belt because pretensioner activation releases a loud sound. Activate the rear seat outer belt pretensioner only after standing at least 10 m (32.8 ft.) distance and wearing gloves and safety glasses. Post-disposal hand wash the hands with water and refrain from applying water to activated pretensioners. Activation procedures must be conducted in areas free from electrical disturbances and the procedure requires usage of the specified special service tool (SRS air bag deployment tool). You need a battery to dispose of the rear No. 1 seat outer belt assembly installed in the vehicle and you should check the special service tool works properly before connecting the red clip to the battery positive terminal and the black clip to the negative terminal when you press the activation switch to check the LED. Remove the pretensioner connector then detach essential components before setting up the special service tool for use. Add the floor anchor of the seat belt then link special service tool: 09082-00700 to special service tool: 09082-00770 before connecting the tool to the seat belt pretensioner. After positioning the tool at least 10 meters from the vehicle and securing all windows and doors users must activate the pretensioner in an area where no person is present within 10 meters of the vehicle. Make sure you avoid touching the outer belt resting on the rear seat for minimum thirty minutes following at least a thirty-minute waiting period before disposing of it appropriately. There are specific steps for belt disposal outside of vehicle installation beginning with winding the rear No. 1 outside belt around its retractor followed by cutting it 100 mm from the retractor then verifying the tool functions correctly for activation use. Put a tire over the rear seat outer belt then move the tool 10 meters away while connecting it to the battery alongside a requirement of no one being closer than 10 meters and finally activate the pretensioner. The process ends with tire removal together with the tool followed by placing the rear outer seat belt into a plastic bag which needs to be tightly tied before disposal as regular auto parts.
- Q: How to Remove the Rear Center Seat Outer Seat Belt Assembly on Toyota Land Cruiser?A:The process starts with removing the 4 clips along with 4 guides to detach the seat belt anchor cover of the rear center seat outer belt assembly for the rear No. 2 seat. Next, remove the roof headlining. Remove the 3-point rear No. 2 seat belt assembly by disassembling the bolt and through-anchor and subsequently removing the 2 bolts and the belt from it.


Related Toyota Land Cruiser Parts
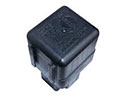 Toyota Land Cruiser Starter Relay
 Toyota Land Cruiser Antenna
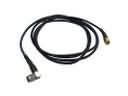 Toyota Land Cruiser Antenna Cable
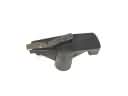 Toyota Land Cruiser Distributor Rotor
 Toyota Land Cruiser Horn Relay
 Toyota Land Cruiser Ignition Relay
 Toyota Land Cruiser Knock Sensor
 Toyota Land Cruiser Neutral Safety Switch
 Toyota Land Cruiser Oxygen Sensor
 Toyota Land Cruiser Relay Block
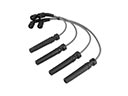 Toyota Land Cruiser Spark Plug Wire
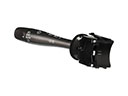 Toyota Land Cruiser Turn Signal Switch