×
ToyotaParts- Hello
- Login or Register
- Quick Links
- Live Chat
- Track Order
- Parts Availability
- RMA
- Help Center
- Contact Us
- Shop for
- Toyota Parts
- Scion Parts
My Garage
My Account
Cart
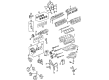
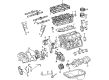
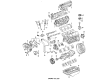
OEM Toyota 4Runner Timing Belt
Engine Timing Belt- Select Vehicle by Model
- Select Vehicle by VIN
Select Vehicle by Model
orMake
Model
Year
Select Vehicle by VIN
For the most accurate results, select vehicle by your VIN (Vehicle Identification Number).
4 Timing Belts found


Toyota 4Runner Belt, Timing Part Number: 13568-09070
$61.13 MSRP: $85.81You Save: $24.68 (29%)Ships in 1-3 Business Days


Toyota 4Runner Timing Belt Part Number: 13568-YZZ03
$58.42 MSRP: $81.32You Save: $22.90 (29%)Ships in 1-3 Business Days
Toyota 4Runner Timing Belt Part Number: 13568-YZZ07
Toyota 4Runner Timing Belt Part Number: 13568-YZZ05
Toyota 4Runner Timing Belt
Choose genuine Timing Belt that pass strict quality control tests. You can trust the top quality and lasting durability. Shopping for OEM Timing Belt for your Toyota 4Runner? Our website is your one-stop destination. We stock an extensive selection of genuine Toyota 4Runner parts. The price is affordable so you can save more. It only takes minutes to browse and find the exact fit. Easily add to cart and check out fast. Our hassle-free return policy will keep you stress-free. We process orders quickly for swift delivery. Your parts will arrive faster, so you can get back on the road sooner.
Toyota 4Runner Timing Belt Parts and Q&A
- Q: How to remove the timing belt on Toyota 4Runner?A:The timing belt removal starts with removing engine under cover followed by draining engine coolant and disconnection of the upper radiator hose. Disconnect the PS pressure pump first by disconnecting two PS air hoses from the air intake chamber and resonator then unfastening the bolt from the pressure tube clamp mount to the frame before the generator Drive Belt and finally disconnecting the pump. The A/C compressor requires detachment from the engine through removal of its connector and drive belt and four bolts for vehicles with A/C system. Begin by loosening the fan that uses fluid coupling along with fan pulleys before removing the generator drive belt and then taking out the No.2 fan shroud and fan equipped with fluid coupling and fan pulleys. The five bolts holding the A/C compressor bracket must be removed when working on vehicles equipped with A/C. To remove the oil dipstick and guide you should remove the bolt and then extract the dipstick and guide as well as their O-ring. Begin removal of the No.2 timing belt cover by first disconnecting four high-tension cord clamps while taking out six bolts and then disconnecting the Camshaft position sensor connector. First remove the nut from the PS pump adjusting strut then take out the bolt and nut and finally remove the fan bracket. This procedure requires SST 09213-54015 (90119-08216), 09330-00021 to loosen crankshaft pulley bolt before removing SST, pulley bolt and pulley through using SST 09950-50012 (09951-05010, 09952-05010, 09953-05020, 09954-05030). Take out the two bolts securing the starter wire bracket and the four bolts attached to the No.1 timing belt cover for removal. Apply the crankshaft pulley bolt to establish the No.1 cylinder at TDC/compression by rotating the crankshaft to achieve correct timing mark alignment while checking camshaft timing pulley orientation with the No.3 timing belt cover. When reusing a timing belt the technician should look for three installation marks and a front mark; if any of these marks are absent they should create new ones before removing the timing belt. Disassemble the timing belt tensioner assembly by both bolts while removing its components together with the dust boot until the timing belt becomes completely exposed. Use SST 09960-10010 (09962-01000, 09963-01000) to detach the camshaft timing pulley bolt from the RH side before its subsequent disassembly into separate bolt, knock pin and pulley parts. The procedure requires performing it again on the LH camshaft timing pulley. The No.2 idler pulley removal starts with unbolted the pulley but the No.1 idler pulley requires a 10 mm hexagon wrench to extract the pivot bolt followed by the pulley and plate washer. Before installing the crankshaft timing pulley, use SST together with a service bolt (if needed). Check the timing belt for any defects while confirming its straight condition as well as its avoidance of oil, water, steam, and proper physical installation and expected wear. You should inspect idler pulleys for oil leakage then verify their smooth operation while checking the timing belt tensioner for oil leaks and proper push rod operations. Install the crankshaft timing pulley through the key groove by using the pulley set key to slide it on. Fit the No.1 idler pulley using a 10 mm hexagon wrench so it moves freely before moving to the installation of the No.2 idler pulley. The LH camshaft timing pulley needs installation with SST to apply the bolt while maintaining knock pin alignment and facing the flange outward. Complete the same process with the RH camshaft timing pulley. Begin by setting the No.1 cylinder at TDC/compression position then install the timing belt correctly while aligning its timing marks. Use a hexagon wrench to lock the tensioner push rod before installing the tensioner and examine valve timing by rotating the belt until the timing marks suit. The procedure requires fitting the timing belt guide along with the No.1 timing belt cover and starter wire bracket but check for gasket integrity throughout installation. Mount the crankshaft pulley after proper realignment then apply the necessary torque values. Mount the fan bracket followed by No.2 timing belt cover and the oil dipstick and guide while placing soapy water on the O-ring. The installation of A/C compressor bracket must be completed before installing the fan with fluid coupling and fan pulleys in a temporary manner. After the placement of No.2 fan shroud proceed to adjust the drive belt for the generator before fan tightening with fluid coupling and fan pulleys. Ensure the A/C compressor engines connection then add the PS apparatus before making sure all components are in place securely. The maintenance procedure consists of installing the upper radiator hose followed by coolant addition to the engine compartment and engine start-up for leak inspection and subsequent engine under cover replacement and road test execution and repeat engine coolant level check.
- Q: How to install the timing belt on Toyota 4Runner?A:The installation of a timing belt on the 2UZ-FE engine requires the first step to involve checking No. 1 and No. 2 timing belt idlers for oil leaks and proper functionality before deciding on replacements. The Water Pump requires two inspections for coolant leakage and the bearing should move exactly as it should before replacing the components. The replacement of all pulleys including the crankshaft and oil pump along with the water pump and two idler units should occur without employing cleansers. Follow this procedure by placing the No. 1 cylinder at TDC/compression when the camshaft timing pulley marks match the crankshaft timing pulley marks. Position the timing belt over the crankshaft timing pulley followed by No. 2 idler, camshaft timing pulleys on both LH and RH banks and water pump pulley and No. 1 idler while making sure installation marks match their corresponding timing marks. Press the push rod at 981 to 9,807 N while aligning the holes before securing it with a 1.27 mm hexagon wrench on the belt tensioner. Proceed by releasing the press and installing the dust boot. The temporary belt tensioner installation requires two bolt tightening procedures at 26 Nm before you remove the hexagon wrench. Use the crankshaft pulley to check the valve timing while rotating it clockwise from TDC for two revolutions, reinstall the timing belt if any pulleys do not match their timing marks. The proper orientation of No. 1 crankshaft position sensor plate must be followed by securing the timing belt cover with four bolts torqued to 7.5 Nm. Use Special Service Tool: 09223-46011 to tap in the pulley set key into the crankshaft damper key groove before installing the damper bolt with Special Service Tool: 09213-70011 and Special Service Tool: 09213-70020 and torquing it to 245 Nm. The sub-assembly of fan bracket should be installed when idler pulleys retain two bolts along with two nuts prior to reaching torque values of 16 Nm for 12 mm head measurements and 32 Nm for 14 mm head measurements. After securing the V-ribbed belt tensioner assembly with its bolt and two nuts torqued to 16 Nm, continue by installing the No. 2 timing belt cover with two bolts torqued to 16 Nm. Install the No. 3 timing belt cover sub-assembly using four bolts which require torque of 7.5 Nm followed by installing the No. 2 timing chain or belt cover sub-assembly through one nut and three bolts tightened to 7.5 Nm. The oil cooler pipe needs one bolt and one nut installation where torque reaches 7.5 Nm before attaching the three hoses. Mount the single bolt of the No. 2 idler pulley sub-assembly at 39 Nm torque followed by compressor installation with stay, nut, and three bolts torqued at 47 Nm while the nut reaches 25 Nm torque. Mount the generator assembly and vane pump assembly with one nut alongside two bolts before torquing them to 43 Nm. Install the fan with fluid coupling by starting with engine pulley attachment to the fan followed by placing the fan-shroud combination into the engine compartment to tighten three bolts to 5.0 Nm and the fan coupling bolts with four nuts to 29 Nm. The final steps include fitting the fan and generator V belt before adding the radiator support seal upper, air cleaner hose assembly and throttle body cover sub-assembly with 7.5 Nm torques on its two nuts. Engine coolant must be added along with leak checks.


Related Toyota 4Runner Parts
 Toyota 4Runner Oil Filter
 Toyota 4Runner Cylinder Head
 Toyota 4Runner Cam Gear
 Toyota 4Runner Crankshaft Gear
 Toyota 4Runner Crankshaft Pulley
 Toyota 4Runner Crankshaft Seal
 Toyota 4Runner Cylinder Head Gasket
 Toyota 4Runner Engine Oil Cooler
 Toyota 4Runner Oil Pan Gasket
 Toyota 4Runner Piston
 Toyota 4Runner Piston Ring Set
 Toyota 4Runner Rocker Arm