My Garage
Cart
Make sure this part fits

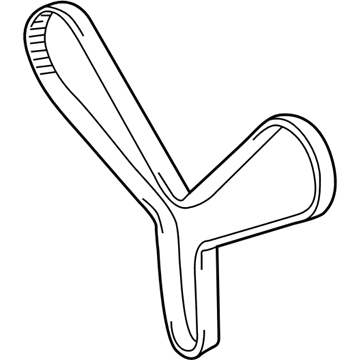
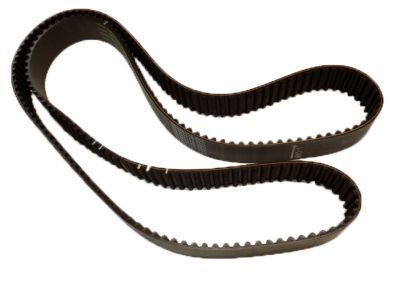
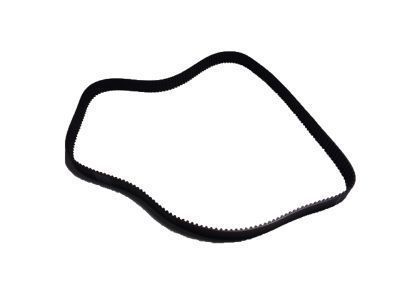
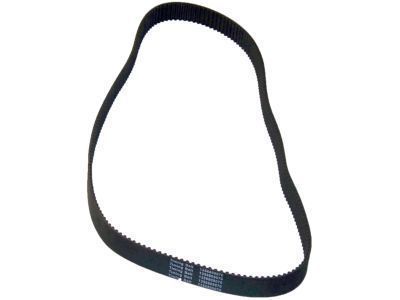
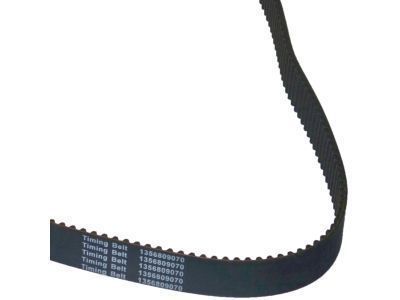
Toyota 13568-09070
Belt, Timing

1998-2009 Toyota 1356809070

Customer Questions & Expert Answers (27)
Toyota 13568-09070 Belt, Timing
  • Part Description
    Engine Timing Belt; Timing Belt Kit; Timing Belt
  • Part Name Code
    13568
  • Replaces
    13568-59095
  • Manufacturer
    Toyota
Make sure this part fits
$61.13 MSRP: $85.81
You Save: $24.68 (29%)
Ships in 1-3 Business Days
1
ADD TO CART
  • Related Parts
  • Product Specifications
  • Vehicle Fitment
  • Customer Questions & Expert Answers
  • Product Specifications

    BrandGenuine Toyota
    Part Name Code13568
    Manufacturer Part Number13568-09070
    Part DescriptionEngine Timing Belt; Timing Belt Kit; Timing Belt
    Manufacturer Note(L)
    Item Dimensions13.4 x 11.6 x 2.2 inches
    Item Weight2.40 Pounds
    ConditionNew
    Fitment TypeDirect Replacement
    Replaces13568-59095
    ManufacturerToyota
    SKU13568-09070
    WarrantyThis genuine Toyota part is guaranteed by Toyota's factory warranty.
    Shipping & ReturnShipping Policy Return Policy
    Warning: California's Proposition 65
  • Vehicle Fitment

    Year Make Model Trim Engine
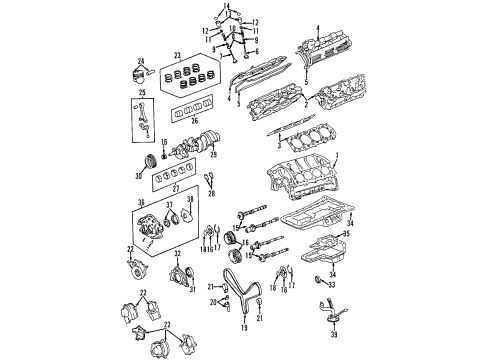
    2003-2009 Toyota 4RunnerLimited, Sport, SR58 Cyl 4.7 L GAS
    1998-2007 Toyota Land CruiserBase8 Cyl 4.7 L GAS
    2001-2009 Toyota SequoiaLimited, SR58 Cyl 4.7 L GAS
    2000-2009 Toyota TundraBase, Limited, SR58 Cyl 4.7 L GAS
  • Customer Questions & Expert Answers

    Q:
    Is 13568-09070 a good match for my car? Posted by ToyotaPartsNow Specialist
    A:
    Find out if part number 13568-09070 is the right fit for your car by Selecting Your Vehicle model.
    Posted by ToyotaPartsNow Specialist
    Q:
    How to install the timing belt on Toyota 4Runner? Posted by Customer
    A:
    The installation of a timing belt on the 2UZ-FE engine requires the first step to involve checking No. 1 and No. 2 timing belt idlers for oil leaks and proper functionality before deciding on replacements. The water pump requires two inspections for coolant leakage and the bearing should move exactly as it should before replacing the components. The replacement of all pulleys including the crankshaft and oil pump along with the water pump and two idler units should occur without employing cleansers. Follow this procedure by placing the No. 1 cylinder at TDC/compression when the camshaft timing pulley marks match the crankshaft timing pulley marks. Position the timing belt over the crankshaft timing pulley followed by No. 2 idler, camshaft timing pulleys on both LH and RH banks and water pump pulley and No. 1 idler while making sure installation marks match their corresponding timing marks. Press the push rod at 981 to 9,807 N while aligning the holes before securing it with a 1.27 mm hexagon wrench on the belt tensioner. Proceed by releasing the press and installing the dust boot. The temporary belt tensioner installation requires two bolt tightening procedures at 26 Nm before you remove the hexagon wrench. Use the crankshaft pulley to check the valve timing while rotating it clockwise from TDC for two revolutions, reinstall the timing belt if any pulleys do not match their timing marks. The proper orientation of No. 1 crankshaft position sensor plate must be followed by securing the timing belt cover with four bolts torqued to 7.5 Nm. Use Special Service Tool: 09223-46011 to tap in the pulley set key into the crankshaft damper key groove before installing the damper bolt with Special Service Tool: 09213-70011 and Special Service Tool: 09213-70020 and torquing it to 245 Nm. The sub-assembly of fan bracket should be installed when idler pulleys retain two bolts along with two nuts prior to reaching torque values of 16 Nm for 12 mm head measurements and 32 Nm for 14 mm head measurements. After securing the V-ribbed belt tensioner assembly with its bolt and two nuts torqued to 16 Nm, continue by installing the No. 2 timing belt cover with two bolts torqued to 16 Nm. Install the No. 3 timing belt cover sub-assembly using four bolts which require torque of 7.5 Nm followed by installing the No. 2 timing chain or belt cover sub-assembly through one nut and three bolts tightened to 7.5 Nm. The oil cooler pipe needs one bolt and one nut installation where torque reaches 7.5 Nm before attaching the three hoses. Mount the single bolt of the No. 2 idler pulley sub-assembly at 39 Nm torque followed by compressor installation with stay, nut, and three bolts torqued at 47 Nm while the nut reaches 25 Nm torque. Mount the generator assembly and vane pump assembly with one nut alongside two bolts before torquing them to 43 Nm. Install the fan with fluid coupling by starting with engine pulley attachment to the fan followed by placing the fan-shroud combination into the engine compartment to tighten three bolts to 5.0 Nm and the fan coupling bolts with four nuts to 29 Nm. The final steps include fitting the fan and generator V belt before adding the radiator support seal upper, air cleaner hose assembly and throttle body cover sub-assembly with 7.5 Nm torques on its two nuts. Engine coolant must be added along with leak checks.
    Posted by ToyotaPartsNow Specialist
    Q:
    How to remove the timing belt on Toyota 4Runner? Posted by Customer
    A:
    The first step to replace the 2UZ-FE timing belt requires draining the engine coolant and separating the negative terminal from the battery. You should begin by taking off the 2 nuts from the throttle body cover sub-assembly before removing the air cleaner hose assembly together with the radiator support seal upper using the 11 clips. Start by unfastening each clip and the 2 hose clamps which enable separation of the 2 oil cooler hoses from the fan shroud followed by the removal of the 3 bolts needed to detach the fan shroud from the radiator before finally removing the 4 nuts to separate the fan with fluid coupling from the engine. Together remove the fan shroud and fan with fluid coupling from the vehicle along with the fan pulley. Open the vacuum hose to remove the vane pump assembly's nut along with its 2 bolts while hanging the hoses rather than detaching them. Remove the generator assembly followed by disconnecting the compressor connector before taking off the nut and 3 bolts and compressor stay and compressor while carefully hanging up the hoses. Uninstall the No. 2 idler pulley sub-assembly which requires removal of the pulley bolt and idler pulley and cover plate before disconnecting three hoses and removing bolt then nut and oil cooler pipe. Start by opening the 4 bolts which secure the No. 3 timing belt cover sub-assembly LH after disconnecting the cam position sensor connector. Proceed with removing the No. 2 timing chain or belt cover after removing its nut and 3 bolts. Subsequently remove the sub-assembly by dismantling the 2 bolts. Disconnect the V-ribbed belt tensioner assembly following bolt removal and disassembly of the two nuts and detach the fan bracket sub-assembly by unfastening the two nuts and two bolts. To remove the pulley bolt from the crankshaft damper sub-assembly use Special Service Tools: 09213-70011 and 09213-70020 followed by the crankshaft pulley removal with Special Service Tools: 09950-50013 and 09951-05010. Start the timing belt removal by uninstalling the four bolts from the No. 1 cover then proceed to take off the 1st crankshaft position sensor plate. Before dismantling the timing belt check for three installation marks distributed on the belt surface while the crankshaft turns. The No. 1 cylinder requires an initial positioning to approximately 50 degrees BTDC/compression. The engine technician sets crankshaft position at 50 degrees BTDC/compression while aligning both crankshaft timing pulley marks with oil pump body and verifies proper camshaft pulley and timing belt plate alignment. A single complete crankshaft turn must occur before rotating it counterclockwise halfway towards the 50 degrees position. Begin by alternatively loosening and finally removing the 2 bolts and chain tensioner unit with dust boot. Complete the removal process by operating Special Service Tool: 09960-10010 to relax the camshaft timing pulley (RH bank) tension versus the crankshaft timing pulley through counterclockwise rotation and separate the timing belt from the No. 1 timing belt idler to extract the timing belt.
    Posted by ToyotaPartsNow Specialist
    Q:
    How to perform the timing belt service and repair on Toyota Land Cruiser? Posted by Customer
    A:
    Starting the timing belt service requires engine coolant drain and the removal of the oil pan protector and engine under cover. The V-bank cover together with battery clamp cover can be removed by disconnecting the fuel return hose and 4 nuts which include 2 bolts. Start by removing the fluid coupling nuts (4) to separate the drive belt, fan and fan pulley then proceed to take off the air cleaner together with the intake air connector assembly. Start by taking off the radiator assembly and then the drive belt idler pulley before both RH and LH No.3 timing belt covers along with their needed wires and bolts. Remove the fan bracket as well as detach the A/C compressor from the engine. During reuse of the timing belt it is important to search for any existing installation indicators. Apply Special Service Tool: 09213-70011 (90100-70020) and set the No.1 cylinder at TDC/compression by loosening the crankshaft pulley bolt with 09330-00021 and the 09330-00021 tool. The technician should remove the timing belt tensioner before they disconnect the timing belt from the camshaft timing pulleys using Special Service Tool: 09960-10010 (09962-01000, 09963-01000). Then proceed to remove the camshaft timing pulleys along with the generator and drive belt tensioner and crankshaft pulley using Special Service Tool: 09950-50013 (09951-05010, 09952-05010, 09953-05010, 09953-05020, 09950-05011, 09954-05021). The service requires removal of the No.1 timing belt cover and timing belt guide and timing belt. If using the belt again, mark it beforehand. The service requires technicians to remove the No.1 and No.2 idler pulleys and the crankshaft timing pulley from the system. Check the timing belt for damage as well as inspect both idler pulleys for oil leaks while testing the timing belt tensioner for correct operation. Fits the crankshaft timing pulley together with the No.1 and No.2 idler pulleys by using adhesive before placing the timing belt across the crankshaft timing pulley. The procedure requires installation of timing belt cover spacer followed by timing belt guide and lastly the No.1 timing belt cover. Chassis engineers should tap the crankshaft pulley before installing both the drive belt tensioner and evaluating the crankshaft pulley alignment. Secure the timing belt to pair of camshaft timing pulleys and operate the timing belt tensioner before moving ahead. Install the temporary belt tensioner then verify valve timing before tightening the crankshaft pulley bolt which requires Special Service Tool: 09213-70011 (90100-70020), 09330-00021. Secure the fan bracket along with A/C compressor and No.2 timing belt cover and both RH and LH No.3 timing belt covers while connecting their corresponding wires. Next install these components: drive belt idler pulley together with radiator assembly as well as fan components matched with air cleaner and intake air connector assembly. Add coolant to the engine followed by engine start-up to search for leaks then check the coolant amount. Finally put on the battery clamp cover and the engine under cover and oil pan protector.
    Posted by ToyotaPartsNow Specialist
    Q:
    How to remove the timing belt on Toyota Sequoia? Posted by Customer
    A:
    The first step to remove the 2UZ-FE engine timing belt requires disconnecting the negative terminal battery cable for at least 90 seconds to disable the SRS system. Now one must remove the No. 1 engine under cover followed by draining the engine coolant while also removing the throttle body cover sub-assembly. Begin by removing the air cleaner assembly together with its air cleaner hose before proceeding to take off the inlet and outlet radiator hoses. Direct the procedure to separate the fan shroud when a trailer towing system exists on the vehicle. The first step is to disconnect the connector and remove four fastenings including the 3 bolts, nut and No. 1 compressor stay from the cooler compressor assembly. The vane pump assembly requires both connector disconnection and bolt removal from two points. The next maintenance step involves taking out the generator assembly with the oil cooler pipe along with the No. 2 idler pulley sub-assembly and both timing belt covers of No. 2 and No. 3. Before removing the No. 3 timing belt cover, users should disconnect the camshaft position sensor connector along with the wire and remove the wire harness grommet from the path. The technician must use Special Service Tools: 09213-70011 09330-00021 and Special Service Tools: 09950-50013 09951-05010 to get rid of the V-ribbed belt tensioner assembly and fan bracket sub-assembly and crankshaft damper sub-assembly. The following sequence consists of clearing the No. 1 timing belt cover as well as timing gear cover spacer and No. 1 crankshaft position sensor plate. Place the pulley set bolt on the No. 1 cylinder temporarily and rotate the crankshaft clockwise to line up its timing marks at the compression position of TDC. The repair process requires the sequence of loosening alternate bolts and removing the timing belt tensioner and dust boot which results in timing belt removal before using a 10 mm hexagon wrench to take out the No. 1 and No. 2 timing belt idlers.
    Posted by ToyotaPartsNow Specialist
    Q:
    How to Properly Remove and Install a Timing Belt on Toyota Tundra? Posted by Customer
    A:
    Engaging in the timing belt removal procedure needs the removal of engine under cover followed by draining engine coolant and disconnecting the upper radiator hose. The PS pump gets detached from the engine through removal of two PS air hoses from the air intake chamber and resonator along with a bolt holding the PS pressure tube clamp to the frame and through removal of the drive belt and the bolt and nut securing the PS pump. Users should detach the A/C compressor from the engine by removing its connector along with drive belt and four bolts. The generator drive belt is removed first as technicians loosen the fan with fluid coupling and fan pulleys to replace the No.2 fan shroud. After removing the fan with fluid coupling and fan pulleys of the A/C-equipped vehicles follow the procedure to remove five bolts from the A/C compressor bracket. During the sequence of steps use disconnect the upper radiator hose before proceeding to remove the No.2 timing belt cover by disconnecting the camshaft position sensor connector and four high-tension cord clamps then remove six bolts. The procedure to remove the fan bracket starts with taking out the nut and PS pump adjusting strut then moving on to the bolt and nut before removing the bracket. Align the groove of the crankshaft pulley to "0" timing mark of No.1 timing belt cover while setting the No.1 cylinder at TDC/compression until both camshaft timing pulleys and No.3 timing belt cover timing marks align; repeat this procedure if necessary by turning the crankshaft pulley once. Finishing the timing belt reuse requires setting matchmarks on both the timing belt and camshaft timing pulleys before positioning the timing belt at the end of the No.1 timing belt cover. Start by alternately unscrewing and removing two bolts from the timing belt tensioner before removing both components with their dust boot. LH camshaft timing pulley requires SST 09960-10011 (09962-01000, 09963-01000) for pulley bolt loosening before removing the bolt knock pin and pulley. Utilize SST 09213-54015 (90119-08216), 09330-00021 to free the pulley bolt of the crankshaft pulley and if extra help is needed SST 09950-50012 (09551-05010, 09552-05010, 09553-05020, 09554-05030) can be used. Removal of the timing belt guide and timing belt begins following bolt removal from the starter wire bracket and four indicating bolts securing the No.1 timing belt cover. The timing belt maintenance requires new installation marks to replace any vanished original marks so they match the pre-drilled marks of the crankshaft timing pulley. Start by extracting the No.2 idler pulley bolt before proceeding to uninstall the pivot bolt, No.1 idler pulley and plate washer using a 10 mm hexagon wrench. If the crankshaft timing pulley does not detach easily by hand use SST 09950-50010 (and its related parts) with service bolts to remove it. The inspection of the timing belt must confirm its free state from bending, twisting and turning inside out and its complete separation from oil, water and steam. You must examine the timing belt for a variety of conditions including premature parting, cracked or damaged teeth as well as visible wear or cracks and proper alignment of belt guide and pulleys. The inspection of idler pulleys should include checks for oil leakage while ensuring smooth operation and the timing belt tensioner should show no oil leakage while its push rod demonstrates correct motion. Check the push rod measurement between the housing end to ensure a range of 10.0 - 10.8 mm (0.394 - 0.425 inch). When installing the crankshaft timing pulley place the pulley set key into the key groove before sliding it on keeping the sensor part protected from damage. A 10 mm hexagon wrench should be used to install the No.1 idler pulley and No.2 idler pulley as per specified torque values. Proceed by installing the timing belt temporarily when the engine temperature is cool and then align the timing marks between the crankshaft timing pulley and oil pump body while maintaining proper clean condition of all pulleys. First place the timing belt guide with its cup side facing out before you install the No.1 timing belt cover together with the starter wire bracket. Verify that all gasket seals remain in good shape. Fitting the crankshaft pulley demands correct alignment while keeping to required torque values. The LH camshaft timing pulley needs installation through SST while maintaining alignment of the knock pin hole. Align the timing marks during the installation process by setting the No.1 cylinder to the TDC/compression position. Fit the timing belt onto the LH camshaft timing pulley while its installation mark faces the timing mark then verify the tension. The replacement of RH camshaft timing pulley requires both cleaning and alignment of established installation marks during the timing belt installation. Follow the correct procedure to set the timing belt tensioner while you implement a solid installation of the dust boot. The valve timing needs verification through crankshaft pulley revolution turns while confirming that all timing marks align correctly. You must install the fan bracket while setting the No.2 timing belt cover and A/C compressor bracket if present with proper torque requirements. Initially mount the fan through fluid coupling alongside fan pulleys before putting on the No.2 fan shroud. The generator drive belt installation and adjustment process follows while the fan receives coupling with fluid attachment along with fan pulleys installation. The A/C compressor must be connected to the engine if present. Use proper torque on the PS pump connection to the engine before reconnecting the upper radiator hose. Engine coolant completes the filling process before starting the engine to check for leaks and afterward installing the under cover. The road test follows this sequence to confirm normal operating conditions. The results will be assessed for noise, shock, slippage, correct shift points and smooth operation before engine coolant recheck.
    Posted by ToyotaPartsNow Specialist
    Q:
    What components should be removed after disconnecting the timing belt for the 2001 Toyota Land Cruiser? Posted by Customer
    A:
    Remove the camshaft timing pulleys, generator, drive belt tensioner, and crankshaft pulley with the appropriate Special Service Tool: 09950-50012 (09951-05010, 09952-05010, 09953-05010, 09953-05020, 09954-05010).
    Posted by ToyotaPartsNow Specialist
    See expert answers on similar Timing Belt
    Q:
    How do you loosen the crankshaft pulley bolt for the 2003 Toyota Land Cruiser? Posted by Customer
    A:
    Use Special Service Tool: 09213-70011 (90100-70020), 09330-00021, and set the No.1 cylinder to TDC/compression by aligning the crankshaft pulley groove with the timing mark "0" and ensuring the camshaft timing pulleys align.
    Posted by ToyotaPartsNow Specialist
    See expert answers on similar Timing Belt
    Q:
    What should be done before loosening the crankshaft pulley bolt for the 2000 Toyota Land Cruiser? Posted by Customer
    A:
    If reusing the timing belt, check for 3 installation marks; if they are missing, mark the belt before disassembly.
    Posted by ToyotaPartsNow Specialist
    See expert answers on similar Timing Belt
    Q:
    What should be done after setting the timing belt tensioner for the 2003 Toyota Sequoia? Posted by Customer
    A:
    Install it with the bolts and check valve timing by turning the crankshaft pulley.
    Posted by ToyotaPartsNow Specialist
    See expert answers on similar Timing Belt
    Q:
    What should be done after removing the timing belt for the 2005 Toyota Sequoia? Posted by Customer
    A:
    Place new installation marks if reusing the timing belt.
    Posted by ToyotaPartsNow Specialist
    See expert answers on similar Timing Belt
    Q:
    What should be done after draining the engine coolant for the 2006 Toyota Land Cruiser? Posted by Customer
    A:
    Remove the V-bank cover, air cleaner hose assembly, and air cleaner assembly by disconnecting the MAF meter connector, removing the air cleaner cap and element, and taking out 3 bolts from the air cleaner case assembly.
    Posted by ToyotaPartsNow Specialist
    See expert answers on similar Timing Belt
    Q:
    What components need to be removed next for the 2002 Toyota Land Cruiser? Posted by Customer
    A:
    Remove the radiator assembly and drive belt idler pulley by taking off the pulley bolt, cover plate, and idler pulley.
    Posted by ToyotaPartsNow Specialist
    See expert answers on similar Timing Belt
    Q:
    How do you temporarily install the timing belt for the 2001 Toyota Sequoia? Posted by Customer
    A:
    Clean the pulleys, align the installation mark with the timing mark of the crankshaft timing pulley, and install the timing belt cover spacer and timing belt guide.
    Posted by ToyotaPartsNow Specialist
    See expert answers on similar Timing Belt
    Q:
    What is the procedure for installing the generator assembly and vane pump assembly for the 2009 Toyota Sequoia? Posted by Customer
    A:
    Install the generator assembly, vane pump assembly with 2 bolts torqued to 28 Nm (286 kgf-cm, 21 ft-lbf), and connect the connector.
    Posted by ToyotaPartsNow Specialist
    See expert answers on similar Timing Belt
    Q:
    What should you check if reusing the timing belt for the 2005 Toyota Land Cruiser? Posted by Customer
    A:
    If reusing the timing belt, check for 3 installation marks; if they are gone, mark the belt before removal.
    Posted by ToyotaPartsNow Specialist
    See expert answers on similar Timing Belt
    Q:
    What are the final steps after reassembling for the 2007 Toyota Land Cruiser? Posted by Customer
    A:
    Install the air cleaner assembly and hose assembly, V-bank cover, reconnect the negative battery terminal, perform initialization, add engine coolant, check for leaks, and finally install the engine under covers.
    Posted by ToyotaPartsNow Specialist
    See expert answers on similar Timing Belt
    Q:
    What should be removed after the vane pump assembly for the 2008 Toyota Sequoia? Posted by Customer
    A:
    Remove the generator assembly, the oil cooler pipe by removing the nut and bolt, and disconnect the 3 water by-pass hoses.
    Posted by ToyotaPartsNow Specialist
    See expert answers on similar Timing Belt
    Q:
    What is the last step in the process for the 2002 Toyota Sequoia? Posted by Customer
    A:
    Install the drive belt idler pulley, PS pump, fan pulley, fan, fluid coupling, and drive belt, followed by the intake air connector assembly, throttle body cover, radiator assembly, fill with engine coolant, start the engine to check for leaks, recheck the coolant level, and install the engine under cover.
    Posted by ToyotaPartsNow Specialist
    See expert answers on similar Timing Belt
    Q:
    What is the order of installation after the timing belt for the 2004 Toyota Sequoia? Posted by Customer
    A:
    Install the timing belt cover spacer and guide, followed by the No.1 timing belt cover.
    Posted by ToyotaPartsNow Specialist
    See expert answers on similar Timing Belt
    Q:
    How do you secure the crankshaft pulley for the 2007 Toyota Sequoia? Posted by Customer
    A:
    Tighten the crankshaft pulley bolt using Special Service Tool: 09213-70011 (90119-08216), 09330-00021.
    Posted by ToyotaPartsNow Specialist
    See expert answers on similar Timing Belt
    Q:
    What is the final step after completing the installation for the 2003 Toyota Tundra? Posted by Customer
    A:
    Start the engine to check for leaks, reinstall the engine under cover, and conduct a road test to check for abnormal noise, shock, slippage, correct shift points, and smooth operation, followed by rechecking the engine coolant level.
    Posted by ToyotaPartsNow Specialist
    See expert answers on similar Timing Belt
    Q:
    What should be done after installing the timing belt tensioner for the 2002 Toyota Tundra? Posted by Customer
    A:
    Set it with specified torque and check valve timing by turning the crankshaft pulley two revolutions to ensure alignment of timing marks.
    Posted by ToyotaPartsNow Specialist
    See expert answers on similar Timing Belt
    Q:
    What steps are involved in removing the fan and related components for the 2001 Toyota Tundra? Posted by Customer
    A:
    Loosen the fan with fluid coupling and fan pulleys, remove the drive belt for the generator, and remove the No.2 fan shroud. Then, remove the fan with fluid coupling and fan pulleys, and if equipped with A/C, remove the A/C compressor bracket by removing the five bolts.
    Posted by ToyotaPartsNow Specialist
    See expert answers on similar Timing Belt
    Q:
    What steps are involved in removing the LH No.3 timing belt cover for the 2000 Toyota Tundra? Posted by Customer
    A:
    Disconnect the engine wire from the 2 wire clamps, remove 4 bolts and a nut, disconnect the camshaft position sensor wire and connector, and finally remove the cover along with the bolt, nut, and oil cooler pipe.
    Posted by ToyotaPartsNow Specialist
    See expert answers on similar Timing Belt
    Q:
    How do you connect the timing belt to the camshaft timing pulleys for the 2006 Toyota Sequoia? Posted by Customer
    A:
    Install the LH and RH camshaft timing pulleys, connecting the timing belt to both camshaft timing pulleys using Special Service Tool: 09960-10010.
    Posted by ToyotaPartsNow Specialist
    See expert answers on similar Timing Belt
    Q:
    What is the process to set the No. 1 cylinder at TDC/compression for the 2004 Toyota Tundra? Posted by Customer
    A:
    Turn the crankshaft pulley to align its groove with the timing mark "0" of the No. 1 timing belt cover and check the alignment of the timing marks of the camshaft timing pulleys and No. 3 timing belt cover.
    Posted by ToyotaPartsNow Specialist
    See expert answers on similar Timing Belt
    If you have any questions about this product, please don't hesitate to ask us. We will be happy to help you!

OEM Toyota 13568-09070, Excellent Performance and Perfect Fitment

To ensure reliability, purchase Toyota part # 13568-09070 Belt, Timing. It is sometimes referred to as Toyota Timing Belt. OEM parts are unrivaled in terms of quality. They go through extensive quality control inspections and are produced in accordance with Toyota's official factory specifications. All of these remove defects and imperfections. So you can relax knowing they promise exceptional lifespan and flawless fitment.

ToyotaPartsNow.com is a leading supplier of genuine Toyota parts such as Toyota 1356809070 Belt, Timing. At ToyotaPartsNow.com, we have a wide variety of OEM Toyota parts available at competitive prices. Our comprehensive range of genuine Toyota parts come with a manufacturer's warranty for peace of mind. We also prioritize customer satisfaction, providing a hassle-free return policy and expedited delivery for all our parts. For detailed Toyota parts information, click here.
Choose ToyotaPartsNow for discounted prices, exceptional service and fast delivery