×
ToyotaParts- Hello
- Login or Register
- Quick Links
- Live Chat
- Track Order
- Parts Availability
- RMA
- Help Center
- Contact Us
- Shop for
- Toyota Parts
- Scion Parts
My Garage
My Account
Cart
OEM 2010 Scion xD Axle Shaft
Car Axle Shaft- Select Vehicle by Model
- Select Vehicle by VIN
Select Vehicle by Model
orMake
Model
Year
Select Vehicle by VIN
For the most accurate results, select vehicle by your VIN (Vehicle Identification Number).
2 Axle Shafts found

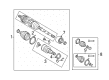
2010 Scion xD Axle Assembly, Driver Side
Part Number: 43420-52250$331.08 MSRP: $472.71You Save: $141.63 (30%)Ships in 1-3 Business DaysProduct Specifications- Other Name: Shaft Assembly, Front Drive; CV Axle Assembly, Front Left; GSP Cv Axle; Axle Shaft; Shaft Assembly, Front Drive, Driver Side; CV Axle Assembly
- Position: Driver Side
- Part Name Code: 43420
- Item Weight: 14.40 Pounds
- Item Dimensions: 28.9 x 7.5 x 6.4 inches
- Condition: New
- Fitment Type: Direct Replacement
- SKU: 43420-52250
- Warranty: This genuine part is guaranteed by Toyota's factory warranty.
2010 Scion xD Axle Assembly, Passenger Side
Part Number: 43410-52250$412.90 MSRP: $605.12You Save: $192.22 (32%)Ships in 1-3 Business DaysProduct Specifications- Other Name: Shaft Assembly, Front Drive; CV Axle Assembly, Front Right; GSP Cv Axle; Axle Shaft; Shaft Assembly, Front Drive, Passenger Side; CV Axle Assembly
- Position: Passenger Side
- Part Name Code: 43410
- Item Weight: 14.80 Pounds
- Item Dimensions: 28.9 x 7.5 x 6.6 inches
- Condition: New
- Fitment Type: Direct Replacement
- SKU: 43410-52250
- Warranty: This genuine part is guaranteed by Toyota's factory warranty.
2010 Scion xD Axle Shaft
Looking for affordable OEM 2010 Scion xD Axle Shaft? Explore our comprehensive catalogue of genuine 2010 Scion xD Axle Shaft. All our parts are covered by the manufacturer's warranty. Plus, our straightforward return policy and speedy delivery service ensure an unparalleled shopping experience. We look forward to your visit!
2010 Scion xD Axle Shaft Parts Q&A
- Q: How to install the axle shaft assembly on 2010 Scion xD?A: Install the front drive shaft assembly by first applying gear oil to the inboard joint spline followed by spline alignment before using a hammer and screwdriver to insert the drive shaft while keeping the front drive shaft hole snap ring cut area facing down so it does not damage the oil seal and inboard joint boot. Repetition of the procedure for the left side will install the right-hand assembly. Finish the installation of the front axle by moving it to position the drive shaft spline correctly with the front axle then inserting it while monitoring the use of adequate force and probing for debris on the speed sensor rotor. Fasten the front lower suspension arm onto the steering knuckle using a new castle nut which needs to be tightened to 98 Nm (1000 kgf-cm, 72 ft-lbf). When the clip holes do not align, apply an additional turn to the nut but not beyond 60 degrees. You should place a new clip on before you join the tie rod end to the steering knuckle through a new castle nut which requires a torque of 49 Nm (500 kgf-cm, 36 ft-lbf) along with a fresh cotter pin. When installing the front stabilizer link assembly with its nut use a socket hexagon wrench 6 to hold the stud when the ball joint starts to turn with the nut and torquing to 74 Nm (755 kgf-cm, 55 ft-lbf). The procedure for installing the front speed sensor includes positioning its bolt on the steering knuckle followed by tightening to 8.5 Nm (87 kgf-cm, 75 in-lbf) torque while preserving the sensor tip cleanliness and its original installation angle before using the same bolt to fasten the speed sensor and flexible hose with a 29 Nm (300 kgf-cm, 22 ft-lbf) torque value that must exclude any hose twisting. The drive shaft and axle hub nut threads should be cleaned with a non-residue solvent for a new axle hub nut installation with a 30 mm socket wrench torque of 216 Nm (2203 kgf-cm, 160 ft-lbf). Use a chisel and hammer to caulk the axle hub nut after installation. Torque the front wheel to 103 Nm (1050 kgf-cm, 76 ft-lbf) and proceed to fill the automatic transaxle fluid while conducting leak inspections. When working with manual transaxle the technician should perform oil topping-off service along with an inspection process to verify the absence of fluid leaks. The technician must inspect and adjust the front wheel alignment before installing an engine under cover that requires a 5.0 Nm (51 kgf-cm, 44 in-lbf) torque setting. They must also check the VSC sensor signal during this process.
Related 2010 Scion xD Parts
 2010 Scion xD Automatic Transmission Filter
 2010 Scion xD CV Joint
 2010 Scion xD Clutch Disc
 2010 Scion xD Clutch Fork
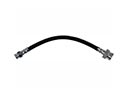 2010 Scion xD Clutch Hose
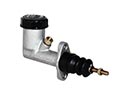 2010 Scion xD Clutch Master Cylinder
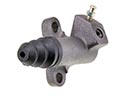 2010 Scion xD Clutch Slave Cylinder
 2010 Scion xD Flywheel
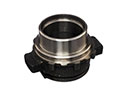 2010 Scion xD Release Bearing
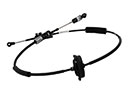 2010 Scion xD Shift Cable
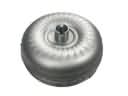 2010 Scion xD Torque Converter
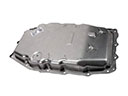 2010 Scion xD Transmission Pan