×
ToyotaParts- Hello
- Login or Register
- Quick Links
- Live Chat
- Track Order
- Parts Availability
- RMA
- Help Center
- Contact Us
- Shop for
- Toyota Parts
- Scion Parts
My Garage
My Account
Cart
OEM 2009 Toyota Yaris Antenna Cable
Radio Antenna Cable- Select Vehicle by Model
- Select Vehicle by VIN
Select Vehicle by Model
orMake
Model
Year
Select Vehicle by VIN
For the most accurate results, select vehicle by your VIN (Vehicle Identification Number).
4 Antenna Cables found

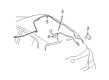
2009 Toyota Yaris Antenna Cable
Part Number: 86101-52340$104.40 MSRP: $146.53You Save: $42.13 (29%)Ships in 1-3 Business DaysProduct Specifications- Other Name: Cord Sub-Assembly, Antenna; Cable
- Part Name Code: 86101
- Item Weight: 1.10 Pounds
- Item Dimensions: 15.3 x 6.1 x 2.1 inches
- Condition: New
- Fitment Type: Direct Replacement
- SKU: 86101-52340
- Warranty: This genuine part is guaranteed by Toyota's factory warranty.

2009 Toyota Yaris Antenna Cable
Part Number: 86101-52410$91.04 MSRP: $127.80You Save: $36.76 (29%)Ships in 1-3 Business DaysProduct Specifications- Other Name: Cord Sub-Assembly, Antenna
- Part Name Code: 86101J
- Item Weight: 0.80 Pounds
- Item Dimensions: 11.9 x 7.7 x 1.8 inches
- Condition: New
- Fitment Type: Direct Replacement
- SKU: 86101-52410
- Warranty: This genuine part is guaranteed by Toyota's factory warranty.

2009 Toyota Yaris Antenna Cable
Part Number: 86101-52590$91.35 MSRP: $128.23You Save: $36.88 (29%)Ships in 1-3 Business DaysProduct Specifications- Other Name: Cord Sub-Assembly, Antenna
- Part Name Code: 86101J
- Item Weight: 0.80 Pounds
- Item Dimensions: 11.6 x 7.6 x 1.9 inches
- Condition: New
- Fitment Type: Direct Replacement
- SKU: 86101-52590
- Warranty: This genuine part is guaranteed by Toyota's factory warranty.

2009 Toyota Yaris Antenna Cable
Part Number: 86101-52600$79.55 MSRP: $111.65You Save: $32.10 (29%)Ships in 1-3 Business DaysProduct Specifications- Other Name: Cord Sub-Assembly, Antenna
- Part Name Code: 86101
- Item Weight: 1.10 Pounds
- Item Dimensions: 15.9 x 6.1 x 2.1 inches
- Condition: New
- Fitment Type: Direct Replacement
- SKU: 86101-52600
- Warranty: This genuine part is guaranteed by Toyota's factory warranty.
2009 Toyota Yaris Antenna Cable
Looking for affordable OEM 2009 Toyota Yaris Antenna Cable? Explore our comprehensive catalogue of genuine 2009 Toyota Yaris Antenna Cable. All our parts are covered by the manufacturer's warranty. Plus, our straightforward return policy and speedy delivery service ensure an unparalleled shopping experience. We look forward to your visit!
2009 Toyota Yaris Antenna Cable Parts Q&A
- Q: How to install the antenna cable for the sedan while ensuring safety precautions regarding the SRS Air Bag system on 2009 Toyota Yaris?A: Safety measures for SRS Air Bags must be observed before starting antenna cable installation on the sedan. For the No. 2 antenna cord sub-assembly installation with curtain shield Air Bag you should place the antenna cord tapes into the 4 claws of the front and rear side rail spacers and use the roof headlining markings for alignment before securing the antenna cord with 8 new pieces of tape keeping the adhesive surface untouched. The body requires six claws with six new pieces of tape when installing without a curtain shield Air Bag present. To install the roof headlining assembly begin by securing appropriate hooks and clips and nest the antenna connector before enacting the clamp mechanism. Complete installation of the map light assembly together with the room light assembly after installing both visor holders and visor assemblies and assist grip sub-assembly and its attached assist grip cover. The antenna cord sub-assembly should receive five clamps while the antenna amplifier connector needs attachment and the bracket should be fastened with a bolt. Continue with the installation of the radio receiver assembly, instrument cluster center finish panel sub-assembly, upper instrument panel sub-assembly, glove compartment door assembly, combination meter assembly, instrument cluster finish No.1 panel, instrument panel finish panel ends (RH and LH), instrument panel lower center finish panel, front pillar garnishes (RH and LH), center pillar upper garnishes (RH and LH), front seat outer belt assemblies (RH and LH), seat belt anchor cover cap, center pillar lower garnishes (RH and LH), roof side inner garnishes (RH and LH), rear seat side covers (RH and LH), rear door opening trim Weather Strips (RH and LH), rear door scuff plates (RH and LH), front door opening trim Weather Strips (RH and LH), cowl side trim boards (RH and LH), instrument panel under cover sub-assemblies (RH and LH), front door scuff plates (RH and LH), luggage compartment trim inner pad, spare wheel cover assembly, luggage compartment floor mat, rear seatback assemblies (RH and LH for 60/40 split seat type), rear seatback assembly for fixed seat type, and rear seat cushion cover pad sub-assembly for both seat types. Attach the cable to the negative battery terminal while tightening it with 5.4 Nm torque (55 kgf-cm or 48 in-lbf). Then verify the SRS warning light operation.
Related 2009 Toyota Yaris Parts
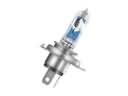 2009 Toyota Yaris Headlight Bulb
 2009 Toyota Yaris Antenna
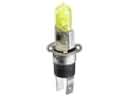 2009 Toyota Yaris Fog Light Bulb
 2009 Toyota Yaris Power Window Switch
 2009 Toyota Yaris Spark Plug
 2009 Toyota Yaris TPMS Sensor
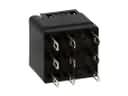 2009 Toyota Yaris ABS Relay
 2009 Toyota Yaris Air Bag Control Module
 2009 Toyota Yaris Air Bag Sensor
 2009 Toyota Yaris Antenna Mast
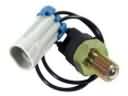 2009 Toyota Yaris Back Up Light Switch
 2009 Toyota Yaris Daytime Running Light Relay