×
ToyotaParts- Hello
- Login or Register
- Quick Links
- Live Chat
- Track Order
- Parts Availability
- RMA
- Help Center
- Contact Us
- Shop for
- Toyota Parts
- Scion Parts
My Garage
My Account
Cart
OEM 2009 Toyota Yaris Air Bag Sensor
Air Bag Impact Sensor- Select Vehicle by Model
- Select Vehicle by VIN
Select Vehicle by Model
orMake
Model
Year
Select Vehicle by VIN
For the most accurate results, select vehicle by your VIN (Vehicle Identification Number).
4 Air Bag Sensors found
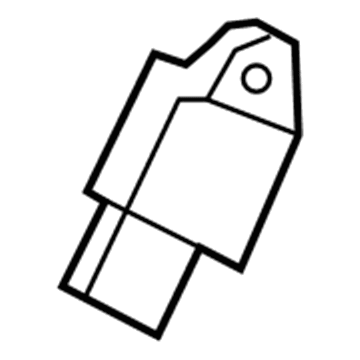
2009 Toyota Yaris Sensor Assembly, Side Air Bag, Passenger Side, Center
Part Number: 89831-0R010$98.34 MSRP: $118.58You Save: $20.24 (18%)Ships in 1-3 Business DaysProduct Specifications- Other Name: Sensor, Side Air Bag; Sensor Assembly, Side Air Bag, Driver Side; Air Bag Sensor
- Position: Center
- Replaces: 89831-28020, 89831-0T030
- Item Weight: 0.60 Pounds
- Item Dimensions: 4.5 x 2.7 x 2.2 inches
- Condition: New
- Fitment Type: Direct Replacement
- SKU: 89831-0R010
- Warranty: This genuine part is guaranteed by Toyota's factory warranty.
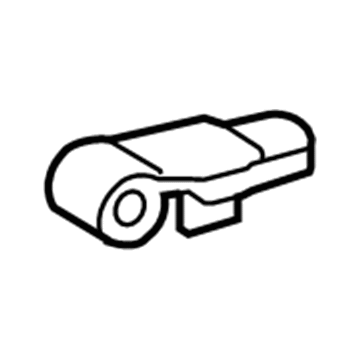
2009 Toyota Yaris Front Impact Sensor
Part Number: 89173-39375$94.20 MSRP: $113.57You Save: $19.37 (18%)Ships in 1-3 Business DaysProduct Specifications- Other Name: Sensor, Air Bag, Front; Air Bag Impact Sensor, Front; Air Bag Sensor; Front Sensor; Sensor, Air Bag, Front Passenger Side; Sensor, Air Bag, Front Driver Side
- Position: Front
- Item Weight: 1.40 Pounds
- Item Dimensions: 4.7 x 2.9 x 2.4 inches
- Condition: New
- Fitment Type: Direct Replacement
- SKU: 89173-39375
- Warranty: This genuine part is guaranteed by Toyota's factory warranty.
2009 Toyota Yaris Rear Sensor
Part Number: 89831-33020$108.06 MSRP: $151.68You Save: $43.62 (29%)Ships in 1-3 Business DaysProduct Specifications- Other Name: Sensor, Side Air Bag; Air Bag Impact Sensor, Rear; Air Bag Sensor; Side Impact Sensor; Side Sensor; Sensor, Air Bag, Rear Passenger Side; Sensor, Air Bag, Rear Driver Side
- Position: Rear
- Item Weight: 0.60 Pounds
- Item Dimensions: 4.5 x 2.6 x 2.1 inches
- Condition: New
- Fitment Type: Direct Replacement
- SKU: 89831-33020
- Warranty: This genuine part is guaranteed by Toyota's factory warranty.
2009 Toyota Yaris Position Sensor, Driver Side
Part Number: 89178-33040$80.57 MSRP: $113.09You Save: $32.52 (29%)Ships in 1-3 Business DaysProduct Specifications- Other Name: Sensor, Seat Position; Seat Track Position Sensor, Left; Sensor, Seat Position Air Bag
- Position: Driver Side
- Part Name Code: 89178A
- Item Weight: 0.50 Pounds
- Item Dimensions: 2.1 x 1.5 x 1.4 inches
- Condition: New
- Fitment Type: Direct Replacement
- SKU: 89178-33040
- Warranty: This genuine part is guaranteed by Toyota's factory warranty.
2009 Toyota Yaris Air Bag Sensor
Looking for affordable OEM 2009 Toyota Yaris Air Bag Sensor? Explore our comprehensive catalogue of genuine 2009 Toyota Yaris Air Bag Sensor. All our parts are covered by the manufacturer's warranty. Plus, our straightforward return policy and speedy delivery service ensure an unparalleled shopping experience. We look forward to your visit!
2009 Toyota Yaris Air Bag Sensor Parts Q&A
- Q: How to install the Center Air Bag Sensor Assembly for the Hatchback on 2009 Toyota Yaris?A: You should start installing the Hatchback Center Air Bag Sensor Assembly by confirming that the ignition switch points to OFF while the negative battery terminal gets detached then wait 90 seconds before beginning. Impact on the Air Bag sensor at any time might trigger deployment. It is necessary to wait ninety seconds before beginning the operation after disconnecting the negative battery terminal. The removal process for the Air Bag sensor requires you to unscrew its three mounting bolts while applying 18 Nm (180 kgf-cm, 13 ft-lbf) torque. Use only Air Bag sensors that remain intact except the ones dropped or that received impact. Keep the carpet away from the assembly installation level. The front Air Bag sensor needs to be checked for looseness through gentle shook movements while the connector holder must be installed to verify complete lever locking and uncompromised integrity of the drip-proof sheet and connectors. Installation of Rear Console Box Assembly requires following by Console Box Carpet, Console Box Rear Cover and the Shifting Hole Cover Sub-Assembly for Manual Transaxle and Shift Lever Knob Sub-Assembly for Manual Transaxle. Complete the wiring procedure by fastening the negative cable terminal with 5.4 Nm (55 kgf-cm, 48 in-lbf) torque and inspect the SRS warning light.


