×
ToyotaParts- Hello
- Login or Register
- Quick Links
- Live Chat
- Track Order
- Parts Availability
- RMA
- Help Center
- Contact Us
- Shop for
- Toyota Parts
- Scion Parts
My Garage
My Account
Cart
OEM 2007 Toyota Avalon Brake Booster
Brake Power Booster- Select Vehicle by Model
- Select Vehicle by VIN
Select Vehicle by Model
orMake
Model
Year
Select Vehicle by VIN
For the most accurate results, select vehicle by your VIN (Vehicle Identification Number).
1 Brake Booster found
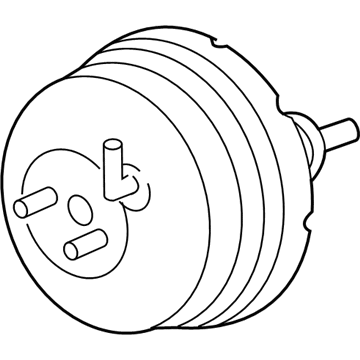
2007 Toyota Avalon Brake Booster
Part Number: 44610-07121$763.28 MSRP: $1118.59You Save: $355.31 (32%)Ships in 1-3 Business DaysProduct Specifications- Other Name: Booster Assembly, Brake; Power Brake Booster; Booster Assembly
- Replaces: 44610-07120
- Item Weight: 7.80 Pounds
- Item Dimensions: 15.3 x 13.3 x 13.5 inches
- Condition: New
- SKU: 44610-07121
- Warranty: This genuine part is guaranteed by Toyota's factory warranty.
2007 Toyota Avalon Brake Booster
Looking for affordable OEM 2007 Toyota Avalon Brake Booster? Explore our comprehensive catalogue of genuine 2007 Toyota Avalon Brake Booster. All our parts are covered by the manufacturer's warranty. Plus, our straightforward return policy and speedy delivery service ensure an unparalleled shopping experience. We look forward to your visit!
2007 Toyota Avalon Brake Booster Parts Q&A
- Q: How to service and repair the vacuum brake booster on 2007 Toyota Avalon?A: You should start brake booster vacuum service and repair by first removing each wiper arm and blade from both sides followed by the windshield ventilator louver and wiper motor assembly before unscrewing the cowl top panel outer through its 4 bolts and 2 nuts. Start by draining brake fluid immediately followed by washing off paint-contacted fluid before using Special Service Tool: 09023-00101 to remove the air cleaner assembly and brake master with plate cylinder sub-assembly. Remove the vacuum hose assembly clip while you use the special service tool to remove front brake tube No.5. The next steps include removing the front door scuff plate, cowl side trim sub-assembly as well as instrument side panel, instrument panel finish lower panel and instrument panel air bag assembly lower No.1. The brake booster assembly can be extracted by removing 4 nuts and pulling it out with caution while maintaining careful protection of brake tubes and wire harnesses. After the brake booster assembly removal complete the installation of a new gasket before retorquing 4 nuts to 13 N m (130 kgf/cm, 9 ft. lbs.). After replacement of the brake booster gasket the assembly gets reinstalled using four 13 N m (130 kgf/cm, 9 ft. lbs.) torque on its 4 nuts. Before tightening the master cylinder push rod clevis alongside its lock nut you should adjust the brake pedal height. Start by coating indicated parts with lithium soap base glycol grease then proceed by installing the push rod pin and clip followed by the brake pedal return spring and instrument panel air bag assembly lower No.1 before adding the instrument panel finish lower panel and instrument side panel and cowl side trim sub-assembly and front door scuff plate. Reinstall front brake tube No.5 by using Special Service Tool: 09023-00101 to torque it at 15 N m (155 kgf/cm, 11 ft. lbs.). Then connect the vacuum hose assembly. The technician will test and set the brake booster push rod by using Special Service Tools: 09023-00101 and 09737-00020 before installing the brake master with plate cylinder sub-assembly followed by fluid addition to the reservoir and master cylinder bleeding procedures and air cleaner installation. Check fluid level in the reservoir followed by leak detection before assembly of the cowl top panel outer with 4 bolts and a nut which requires 80 N m (816 kgf/cm, 59 ft. lbs.) torque and ends with windshield wiper motor and link assembly installation and both windshield wiper arms and blades. Brake pedal height needs to be checked followed by any required adjustments before completing the procedure.


