×
ToyotaParts- Hello
- Login or Register
- Quick Links
- Live Chat
- Track Order
- Parts Availability
- RMA
- Help Center
- Contact Us
- Shop for
- Toyota Parts
- Scion Parts
My Garage
My Account
Cart
OEM 2006 Scion xB Exhaust Pipe
Exhaust Tail Pipe- Select Vehicle by Model
- Select Vehicle by VIN
Select Vehicle by Model
orMake
Model
Year
Select Vehicle by VIN
For the most accurate results, select vehicle by your VIN (Vehicle Identification Number).
2 Exhaust Pipes found
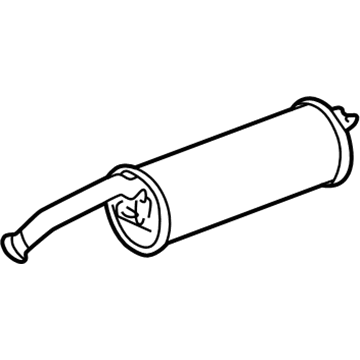
2006 Scion xB Muffler & Pipe
Part Number: 17430-21471$294.27 MSRP: $384.82You Save: $90.55 (24%)Ships in 1-3 Business DaysProduct Specifications- Other Name: Pipe Assembly, Exhaust Tail; Exhaust Muffler; Direct-Fit Exhaust; Exhaust System Kit; Exhaust Pipe; Tail Pipe; Muffler
- Replaces: 17430-21470
- Item Weight: 11.60 Pounds
- Item Dimensions: 44.9 x 12.7 x 9.1 inches
- Condition: New
- SKU: 17430-21471
- Warranty: This genuine part is guaranteed by Toyota's factory warranty.
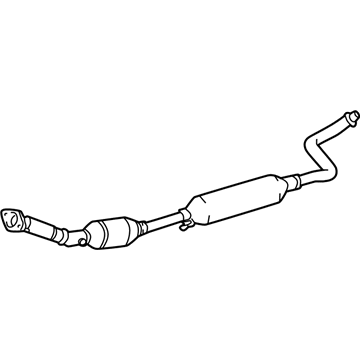
2006 Scion xB Front Pipe
Part Number: 17410-21572$1539.96 MSRP: $2067.07You Save: $527.11 (26%)Ships in 1-3 Business DaysProduct Specifications- Other Name: Pipe Assembly, Exhaust; Catalytic Converter; Exhaust Pipe; Converter & Pipe
- Replaces: 17410-21571, 17410-21570
- Item Weight: 10.20 Pounds
- Item Dimensions: 63.0 x 20.2 x 10.1 inches
- Condition: New
- SKU: 17410-21572
- Warranty: This genuine part is guaranteed by Toyota's factory warranty.
2006 Scion xB Exhaust Pipe
Looking for affordable OEM 2006 Scion xB Exhaust Pipe? Explore our comprehensive catalogue of genuine 2006 Scion xB Exhaust Pipe. All our parts are covered by the manufacturer's warranty. Plus, our straightforward return policy and speedy delivery service ensure an unparalleled shopping experience. We look forward to your visit!
2006 Scion xB Exhaust Pipe Parts Q&A
- Q: How to service the exhaust pipe on 2006 Scion xB?A: Service of the exhaust pipe requires initial action to disconnect the negative battery terminal cable while waiting for at least 90 seconds followed by deactivation of Air Bags and seat belts pretensioners. Take out the two bolts from the shift lever knob for manual transaxle, the rear console box, and the front floor panel brace to perform service. The tailpipe needs removal after dismantling its bolt clamp while splitting the exhaust pipe supports and pulling out both pipe and gasket. Before removing the front exhaust pipe from the exhaust manifold you must first disconnect its 2 heated oxygen sensor connectors and remove the grommet then detach the 2 bolts and 2 compression springs before disconnecting the 2 exhaust pipe supports. The Special Service Tool: 09224-00010 should be utilized to extract Bank 1 Sensor 1 and Bank 1 Sensor 2 heated oxygen sensors from the front exhaust pipe. The procedure for installing the heated oxygen sensor for Bank 1 Sensor 2 requires a wrench tool with 40 Nm (408 kgf-cm, 30 ft. lbs.) torque or without the tool at 44 Nm (449 kgf-cm, 32 ft. lbs.). Use a torque wrench with a 30 cm (11.81 inch) fulcrum length. Perform repeated installation of the heated oxygen sensor that belongs to Bank 1 Sensor 1. To install the front exhaust pipe check the free length of the compression spring using a vernier caliper while validating a minimum 40.5 mm (1.594 inch) length. Replace the spring if it measures shorter than this specification. To install the new gasket on the exhaust manifold you should tap it until it reaches full flush while making sure the direction is correct and avoiding the use of old gaskets. After connecting the exhaust pipe supports you should install the exhaust pipe while tightening the 2 compression springs with 2 bolts at 43 Nm (438 kgf-cm, 32 ft. lbs.) torque level before re-establishing the 2 heated oxygen sensor connections with grommet placement. To install the tailpipe fit a new gasket on the front exhaust pipe before connecting the supports and fastening the pipe using the clamp and bolt tightened to 32 Nm (326 kgf-cm, 24 ft. lbs.). Removal of air from exhaust gas is necessary before installing the front panel brace with 2 bolts torqued to 20 Nm (204 kgf-cm, 14 ft. lbs.) and completing the installation of the rear console box and shift lever knob for manual transaxle and negative battery cable reconnection.


