×
ToyotaParts- Hello
- Login or Register
- Quick Links
- Live Chat
- Track Order
- Parts Availability
- RMA
- Help Center
- Contact Us
- Shop for
- Toyota Parts
- Scion Parts
My Garage
My Account
Cart
OEM 2004 Toyota Sienna Power Steering Pump
Power Steering Pump Unit- Select Vehicle by Model
- Select Vehicle by VIN
Select Vehicle by Model
orMake
Model
Year
Select Vehicle by VIN
For the most accurate results, select vehicle by your VIN (Vehicle Identification Number).
1 Power Steering Pump found

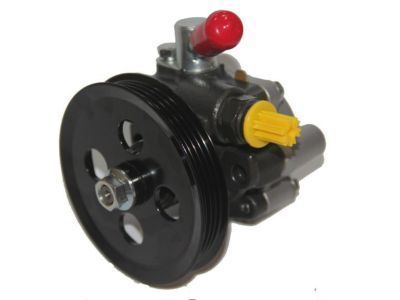
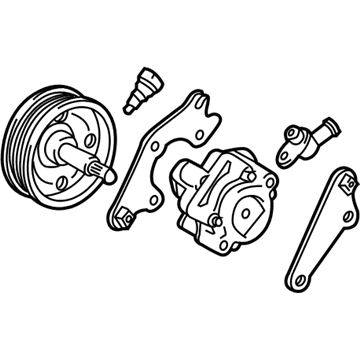
2004 Toyota Sienna Power Steering Pump
Part Number: 44310-08010$366.14 MSRP: $536.58You Save: $170.44 (32%)Product Specifications- Other Name: Pump Assembly, Vane
- Part Name Code: 44320
- Item Weight: 8.30 Pounds
- Item Dimensions: 7.7 x 5.8 x 4.8 inches
- Condition: New
- Fitment Type: Direct Replacement
- SKU: 44310-08010
- Warranty: This genuine part is guaranteed by Toyota's factory warranty.
2004 Toyota Sienna Power Steering Pump
Looking for affordable OEM 2004 Toyota Sienna Power Steering Pump? Explore our comprehensive catalogue of genuine 2004 Toyota Sienna Power Steering Pump. All our parts are covered by the manufacturer's warranty. Plus, our straightforward return policy and speedy delivery service ensure an unparalleled shopping experience. We look forward to your visit!
2004 Toyota Sienna Power Steering Pump Parts Q&A
- Q: How to service and repair the power steering pump on 2004 Toyota Sienna?A: The first step to service or repair the power steering pump requires front wheel removal on the right-hand side together with power steering fluid drainage. Detach the oil reservoir hose from pump No.1 by separating it from the front fender apron seal RH while ensuring to avoid V belt contamination. Separate the power steering oil pressure switch by detaching its connector and switch from the union bolt while watching to prevent a drop - replace any switch that shows damage. A 24mm spanner should hold the pressure port union until removal of the union bolt along with its gasket. You should first loosen the 2 bolts on the vane pump V belt before removing both the vane pump assembly and the power steering suction port union together with its O-ring component. To proceed with the disassembly work start by removing the flow control valve and pressure port union and finally the vane pump bracket rear section. The order of removal then includes the vane pump housing rear part along with its gasket and O-rings. Remove the vane pump side plate back section by using a screwdriver along with the cam ring and shaft snap ring. When assembling the vane pump start by removing its rotor and w/pulley shaft sub-assembly followed by separating the pump bracket front. You should remove the vane pump housing oil seal by carefully extracting it from the bushing without damaging the seal. Check the vane pump shaft and bushing inside the housing front for oil clearance and follow standard and maximum values for replacement when necessary. Check both vane pump plate substance and rotor groove plate clearance measurements then get a new assembly if values exceed standards. The flow control valve needs to pass checks for proper functioning and leakage before a replacement of the assembly can occur. Replacement of the flow control valve compression spring is required because its free length falls under manufacturer-defined minimums. The pressure port union should undergo an inspection for damage and require replacement if needed. Mount a fresh vane pump housing oil seal in its right orientation before adding the pump bracket front section while using the specified torque value. Afterward install the w/pulley shaft sub-assembly with attention to the oil seal lip while positioning the vane pump cam ring and rotor in the correct direction. Add vane pump plates and shaft snap ring while also adding side plate rear to which you should apply O-rings. The vane pump housing rear must have a new gasket applied before bolting it down with appropriate orientation while following the torque specifications. Check the vane pump rotation torque before installing the vane pump bracket rear according to specified torque values. Unguided operation and torque measurements need to be applied to install both the flow control valve and pressure port union. Begin by installing the power steering suction port union where you will apply a new O-ring then proceed with bolting down the vane pump assembly at this moment using temporary bolts. After installing the vane pump V belt you should adjust its tension followed by bolt torquing according to specifications. Proceed to connect the pressure feed tube parts while making sure the stopper reaches the pump bracket front before completing the tightening process. After checking that oil residue is absent from both sides of the connector install the power steering oil pressure switch. Following the completion, pump hose No.1 leads to the oil reservoir while installing both RH front fender apron seal and front wheel RH parts before torquing specifications and bleeding the power steering fluid with leak inspection.


