×
ToyotaParts- Hello
- Login or Register
- Quick Links
- Live Chat
- Track Order
- Parts Availability
- RMA
- Help Center
- Contact Us
- Shop for
- Toyota Parts
- Scion Parts
My Garage
My Account
Cart
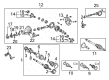
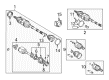
OEM 2004 Toyota RAV4 Axle Shaft
Car Axle Shaft- Select Vehicle by Model
- Select Vehicle by VIN
Select Vehicle by Model
orMake
Model
Year
Select Vehicle by VIN
For the most accurate results, select vehicle by your VIN (Vehicle Identification Number).
18 Axle Shafts found

2004 Toyota RAV4 Axle Shafts, Rear Passenger Side
Part Number: 42370-49215$263.48 MSRP: $376.18You Save: $112.70 (30%)Ships in 1-3 Business DaysProduct Specifications- Other Name: Shaft Set, Rear Drive; Axle Shaft; CV Joint; Outer Joint
- Position: Rear Passenger Side
- Replaces: 42370-49075
- Condition: New
- SKU: 42370-49215
- Warranty: This genuine part is guaranteed by Toyota's factory warranty.
2004 Toyota RAV4 Axle Shafts, Rear Driver Side
Part Number: 42370-19205$263.48 MSRP: $376.18You Save: $112.70 (30%)Ships in 1-3 Business DaysProduct Specifications- Other Name: Shaft Set, Rear Drive; Axle Shaft; CV Joint; Outer Joint
- Position: Rear Driver Side
- Item Weight: 14.50 Pounds
- Item Dimensions: 33.7 x 6.3 x 5.8 inches
- Condition: New
- SKU: 42370-19205
- Warranty: This genuine part is guaranteed by Toyota's factory warranty.

2004 Toyota RAV4 Axle Assembly, Passenger Side
Part Number: 42330-42041$415.66 MSRP: $609.15You Save: $193.49 (32%)Ships in 1-3 Business DaysProduct Specifications- Other Name: Shaft Assembly, Rear Drive; CV Axle Assembly, Rear Right; CV Axle Assembly; GSP Cv Axle; Axle Shaft
- Position: Passenger Side
- Replaces: 42330-42040
- Part Name Code: 42330
- Item Weight: 15.50 Pounds
- Item Dimensions: 28.4 x 8.7 x 7.4 inches
- Condition: New
- SKU: 42330-42041
- Warranty: This genuine part is guaranteed by Toyota's factory warranty.
2004 Toyota RAV4 Axle Assembly, Driver Side
Part Number: 42340-12062$389.75 MSRP: $571.17You Save: $181.42 (32%)Ships in 1-3 Business DaysProduct Specifications- Other Name: Shaft Assembly, Rear Drive; CV Axle Assembly, Rear Left; GSP Cv Axle; Axle Shaft; Shaft Assembly, Rear Drive, Driver Side; CV Axle Assembly
- Manufacturer Note: W(ABS)
- Position: Driver Side
- Replaces: 42340-12061
- Part Name Code: 42340B
- Item Weight: 15.80 Pounds
- Item Dimensions: 27.6 x 8.4 x 7.5 inches
- Condition: New
- Fitment Type: Direct Replacement
- SKU: 42340-12062
- Warranty: This genuine part is guaranteed by Toyota's factory warranty.
2004 Toyota RAV4 Axle Assembly, Driver Side
Part Number: 42340-12052$387.49 MSRP: $567.87You Save: $180.38 (32%)Ships in 1-3 Business DaysProduct Specifications- Other Name: Shaft Assembly, Rear Drive; CV Axle Assembly, Rear Left; CV Axle Assembly; GSP Cv Axle; Axle Shaft
- Position: Driver Side
- Replaces: 42340-12051
- Part Name Code: 42340B
- Item Weight: 15.30 Pounds
- Item Dimensions: 27.9 x 8.6 x 7.5 inches
- Condition: New
- SKU: 42340-12052
- Warranty: This genuine part is guaranteed by Toyota's factory warranty.
2004 Toyota RAV4 Axle Shafts, Passenger Side
Part Number: 42370-49085$279.88 MSRP: $399.60You Save: $119.72 (30%)Ships in 1-3 Business DaysProduct Specifications- Other Name: Shaft Assembly, Rear Drive; Axle Shaft; CV Joint; Outer Joint; Shaft Assembly, Rear Drive Outboard Joint, Passenger Side
- Position: Passenger Side
- Part Name Code: 42370A
- Item Weight: 13.80 Pounds
- Item Dimensions: 33.0 x 6.5 x 5.7 inches
- Condition: New
- Fitment Type: Direct Replacement
- SKU: 42370-49085
- Warranty: This genuine part is guaranteed by Toyota's factory warranty.
2004 Toyota RAV4 Axle Shafts, Driver Side
Part Number: 42370-49105$274.74 MSRP: $392.26You Save: $117.52 (30%)Ships in 1-3 Business DaysProduct Specifications- Other Name: Shaft Assembly, Rear Drive; Axle Shaft; CV Joint; Outer Joint; Shaft Assembly, Rear Drive Outboard Joint, Driver Side
- Position: Driver Side
- Part Name Code: 42380
- Item Weight: 13.80 Pounds
- Item Dimensions: 33.7 x 6.2 x 5.6 inches
- Condition: New
- Fitment Type: Direct Replacement
- SKU: 42370-49105
- Warranty: This genuine part is guaranteed by Toyota's factory warranty.

2004 Toyota RAV4 Axle Assembly, Passenger Side
Part Number: 43410-42070$466.38 MSRP: $683.48You Save: $217.10 (32%)Ships in 1-3 Business DaysProduct Specifications- Other Name: Shaft Assembly, Front Drive; CV Axle Assembly, Front Right; GSP Cv Axle; Axle Shaft; Shaft Assembly, Front Drive, Passenger Side; CV Axle Assembly
- Position: Passenger Side
- Part Name Code: 43410
- Item Weight: 21.20 Pounds
- Item Dimensions: 44.1 x 5.7 x 5.6 inches
- Condition: New
- Fitment Type: Direct Replacement
- SKU: 43410-42070
- Warranty: This genuine part is guaranteed by Toyota's factory warranty.
2004 Toyota RAV4 Axle Assembly, Passenger Side
Part Number: 43410-42090$452.10 MSRP: $662.57You Save: $210.47 (32%)Ships in 1-3 Business DaysProduct Specifications- Other Name: Shaft Assembly, Front Drive; CV Axle Assembly; GSP Cv Axle; Axle Shaft; Shaft Assembly, Front Drive, Passenger Side
- Position: Passenger Side
- Part Name Code: 43410
- Item Weight: 24.40 Pounds
- Item Dimensions: 43.3 x 5.5 x 5.4 inches
- Condition: New
- Fitment Type: Direct Replacement
- SKU: 43410-42090
- Warranty: This genuine part is guaranteed by Toyota's factory warranty.
2004 Toyota RAV4 Axle Assembly, Driver Side
Part Number: 43420-42080$417.74 MSRP: $612.20You Save: $194.46 (32%)Ships in 1-3 Business DaysProduct Specifications- Other Name: Shaft Assembly, Front Drive; CV Axle Assembly; GSP Cv Axle; Axle Shaft; Shaft Assembly, Front Drive, Driver Side
- Position: Driver Side
- Part Name Code: 43420
- Item Weight: 14.00 Pounds
- Item Dimensions: 29.5 x 7.2 x 6.4 inches
- Condition: New
- Fitment Type: Direct Replacement
- SKU: 43420-42080
- Warranty: This genuine part is guaranteed by Toyota's factory warranty.
2004 Toyota RAV4 Axle Assembly, Driver Side
Part Number: 43420-42070$417.74 MSRP: $612.20You Save: $194.46 (32%)Ships in 1-3 Business DaysProduct Specifications- Other Name: Shaft Assembly, Front Drive; CV Axle Assembly; GSP Cv Axle; Axle Shaft; Shaft Assembly, Front Drive, Driver Side
- Manufacturer Note: W(ABS)
- Position: Driver Side
- Part Name Code: 43420
- Item Weight: 14.10 Pounds
- Item Dimensions: 30.1 x 7.5 x 6.4 inches
- Condition: New
- Fitment Type: Direct Replacement
- SKU: 43420-42070
- Warranty: This genuine part is guaranteed by Toyota's factory warranty.
2004 Toyota RAV4 Axle Assembly, Driver Side
Part Number: 43420-42130$419.44 MSRP: $614.70You Save: $195.26 (32%)Ships in 1-3 Business DaysProduct Specifications- Other Name: Shaft Assembly, Front Drive; CV Axle Assembly, Front Left; GSP Cv Axle; Axle Shaft; Shaft Assembly, Front Drive, Driver Side; CV Axle Assembly
- Position: Driver Side
- Part Name Code: 43420
- Item Weight: 18.70 Pounds
- Item Dimensions: 30.4 x 5.3 x 5.3 inches
- Condition: New
- Fitment Type: Direct Replacement
- SKU: 43420-42130
- Warranty: This genuine part is guaranteed by Toyota's factory warranty.
2004 Toyota RAV4 Axle Assembly, Driver Side
Part Number: 43420-42120$419.71 MSRP: $615.09You Save: $195.38 (32%)Ships in 1-3 Business DaysProduct Specifications- Other Name: Shaft Assembly, Front Drive; CV Axle Assembly, Front Left; GSP Cv Axle; Axle Shaft; Shaft Assembly, Front Drive, Driver Side; CV Axle Assembly
- Manufacturer Note: W(ABS)
- Position: Driver Side
- Part Name Code: 43420
- Item Weight: 17.30 Pounds
- Item Dimensions: 30.4 x 5.2 x 5.2 inches
- Condition: New
- Fitment Type: Direct Replacement
- SKU: 43420-42120
- Warranty: This genuine part is guaranteed by Toyota's factory warranty.
2004 Toyota RAV4 Axle Assembly, Driver Side
Part Number: 43420-42060$395.80 MSRP: $580.05You Save: $184.25 (32%)Ships in 1-3 Business DaysProduct Specifications- Other Name: Shaft Assembly, Front Drive; CV Axle Assembly, Front Left; GSP Cv Axle; Axle Shaft; Shaft Assembly, Front Drive, Driver Side; CV Axle Assembly
- Position: Driver Side
- Part Name Code: 43420
- Item Weight: 17.50 Pounds
- Item Dimensions: 31.3 x 5.2 x 5.1 inches
- Condition: New
- Fitment Type: Direct Replacement
- SKU: 43420-42060
- Warranty: This genuine part is guaranteed by Toyota's factory warranty.
- Product Specifications
- Other Name: Shaft Assembly, Rear Drive; CV Axle Assembly, Rear Right; GSP Cv Axle; Axle Shaft; Shaft Assembly, Rear Drive, Passenger Side; CV Axle Assembly
- Manufacturer Note: W(ABS)
- Position: Passenger Side
- Replaces: 42330-42030
- Part Name Code: 42330
- Item Weight: 15.50 Pounds
- Item Dimensions: 28.4 x 8.6 x 7.4 inches
- Condition: New
- Fitment Type: Direct Replacement
- SKU: 42330-42031
- Warranty: This genuine part is guaranteed by Toyota's factory warranty.
- Product Specifications
- Other Name: Shaft Assembly, Front Drive; CV Axle Assembly; GSP Cv Axle; Axle Shaft; Shaft Assembly, Front Drive, Passenger Side
- Manufacturer Note: W(ABS)
- Position: Passenger Side
- Part Name Code: 43410
- Item Weight: 22.20 Pounds
- Item Dimensions: 42.4 x 5.5 x 5.6 inches
- Condition: New
- Fitment Type: Direct Replacement
- SKU: 43410-42080
- Warranty: This genuine part is guaranteed by Toyota's factory warranty.
- Product Specifications
- Other Name: Shaft Assembly, Front Drive; CV Axle Assembly, Front Left; GSP Cv Axle; Axle Shaft; Shaft Assembly, Front Drive, Driver Side; CV Axle Assembly
- Manufacturer Note: W(ABS)
- Position: Driver Side
- Part Name Code: 43420
- Item Weight: 17.20 Pounds
- Item Dimensions: 29.8 x 5.1 x 5.2 inches
- Condition: New
- Fitment Type: Direct Replacement
- SKU: 43420-42050
- Warranty: This genuine part is guaranteed by Toyota's factory warranty.
- Product Specifications
- Other Name: Shaft Assembly, Front Drive; CV Axle Assembly, Front Right; GSP Cv Axle; Axle Shaft; Shaft Assembly, Front Drive, Passenger Side; CV Axle Assembly
- Manufacturer Note: W(ABS)
- Position: Passenger Side
- Part Name Code: 43410
- Item Weight: 20.60 Pounds
- Item Dimensions: 43.3 x 5.7 x 5.5 inches
- Condition: New
- Fitment Type: Direct Replacement
- SKU: 43410-42060
- Warranty: This genuine part is guaranteed by Toyota's factory warranty.
2004 Toyota RAV4 Axle Shaft
Looking for affordable OEM 2004 Toyota RAV4 Axle Shaft? Explore our comprehensive catalogue of genuine 2004 Toyota RAV4 Axle Shaft. All our parts are covered by the manufacturer's warranty. Plus, our straightforward return policy and speedy delivery service ensure an unparalleled shopping experience. We look forward to your visit!
2004 Toyota RAV4 Axle Shaft Parts Q&A
- Q: How to Service and Repair an Axle Shaft on 2004 Toyota RAV4?A: Service and repair of the axle shaft begins with drive shaft disassembly but outboard shaft removal is not necessary. Verify the outboard joint has no loose movements and confirm smooth movements of the inboard joint forwards with intact boots. Use a screwdriver to remove the boot clamps of the inboard and outboard joints then proceed to free both dynamic damper clamps. Drive the inboard boot towards the outboard joint before marking the inboard joint shaft as well as the tripod and outboard joint shaft for removal without scribbling the matchmarks. A snap ring expander assists in removing the snap ring from the tripod while matchmarks are applied to the outboard joint shaft and tripod before using a brass bar with hammer to extract the tripod without striking the roller. First remove the inboard joint boot followed by the dynamic damper before proceeding to take off the outboard joint boot and boot clamps. The first step for RH 2WD servicing involves using a press to remove the No. 1 dust cover before unfastening the bearing case with a screwdriver to remove the large snap ring. After pressing out the case, finish installation by using a pin punch along with a hammer to remove the straight pin. Use Special Service Tool: 09950-00020 with a press to take out the No.2 dust cover before pressing out the bearing by expanding the small snap ring with the proper tool. The reassembly procedure for the inboard joint shaft starts with using a pin punch and hammer to install the straight pin into the bearing case and continuing with the use of Special Service Tool: 09950-60020 (09951-00720), 09950-70010 (09951-07150) and a press to install a new bearing and a new large snap ring with a screwdriver. Install the bearing case through Special Service Tool: 09710-04081 with a press before putting a new small snap ring using a snap ring expander. Place Special Service Tool: 09710-04081 into the press for installing new Number 2 dust cover followed by new Number 1 dust cover installation. The installation of new dust covers requires a press for all models except the No. 1. First step is to put new outboard joint boot (dynamic damper) and inboard joint boot alongside new boot clamps in place before wrapping the drive shaft spline with vinyl tape to guarantee boot safety. First install the outboard joint boot with its clamps before applying the dynamic damper accompanied by its clamp. Apply new boot clamps onto the new inboard boot while installing it to the outboard joint shaft. Put the tripod axial spline's beveled section forward when facing the outboard joint then secure the tripod to the drive shaft by using a brass bar and hammer on the matchmarks while avoiding the roller area. Fitting a new snap ring requires the assistance of a snap ring expander. Application of yellow grease should be performed to a total amount of 190 - 200 grams before covering the outboard joint with its boot. Afterwards, the inboard joint shaft needs packing with ocher yellow grease in an amount of 185 - 195 grams until the boot is placed over it. Secure both boot clamps to standard drive shaft length by making sure the boots have proper seating and avoid being stretched or contracted. The specified sliding distance for the dynamic damper models should be 155.9 - 159.9 millimeters (6.14 - 6.30 inches) before tightening the boot clamps and the dynamic damper clamp using a screwdriver.
Related 2004 Toyota RAV4 Parts
 2004 Toyota RAV4 Control Arm
 2004 Toyota RAV4 Control Arm Bushing
 2004 Toyota RAV4 Axle Beam Mount
 2004 Toyota RAV4 Bump Stop
 2004 Toyota RAV4 CV Boot
 2004 Toyota RAV4 Coil Spring Insulator
 2004 Toyota RAV4 Coil Springs
 2004 Toyota RAV4 Crossmember Bushing
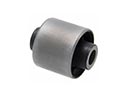 2004 Toyota RAV4 Differential Mount
 2004 Toyota RAV4 Shock Absorber
 2004 Toyota RAV4 Trailing Arm
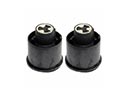 2004 Toyota RAV4 Trailing Arm Bushing