×
ToyotaParts- Hello
- Login or Register
- Quick Links
- Live Chat
- Track Order
- Parts Availability
- RMA
- Help Center
- Contact Us
- Shop for
- Toyota Parts
- Scion Parts
My Garage
My Account
Cart
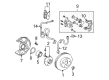
OEM 2002 Toyota Celica Brake Pad Set
Disc Brake Pad Set- Select Vehicle by Model
- Select Vehicle by VIN
Select Vehicle by Model
orMake
Model
Year
Select Vehicle by VIN
For the most accurate results, select vehicle by your VIN (Vehicle Identification Number).
2 Brake Pad Sets found


2002 Toyota Celica Brake Pads, Front
Part Number: 04465-2B010$46.47 MSRP: $64.61You Save: $18.14 (29%)Ships in 1 Business DayProduct Specifications- Other Name: Pad Kit, Disc Brake; Disc Brake Pad Set, Front; Brake Pad Set, Disc Brake; Disc Brake Pad Kit; Front Pads; Pad Kit, Disc Brake, Front; Disc Brake Pad Set
- Position: Front
- Part Name Code: 04465
- Item Weight: 3.10 Pounds
- Item Dimensions: 4.8 x 2.5 x 2.9 inches
- Condition: New
- Fitment Type: Direct Replacement
- SKU: 04465-2B010
- Warranty: This genuine part is guaranteed by Toyota's factory warranty.


2002 Toyota Celica Brake Pads, Rear
Part Number: 04466-20090$38.71 MSRP: $53.81You Save: $15.10 (29%)Ships in 1-2 Business DaysProduct Specifications- Other Name: Pas Kit, Disc Brake; Disc Brake Pad Set, Rear; Brake Pad Set, Disc Brake; Disc Brake Pad Kit; Rear Pads; Pad Kit, Disc Brake, Rear; Disc Brake Pad Set
- Manufacturer Note: MARK AK PA544
- Position: Rear
- Part Name Code: 04466
- Item Weight: 1.70 Pounds
- Item Dimensions: 3.5 x 3.0 x 3.0 inches
- Condition: New
- Fitment Type: Direct Replacement
- SKU: 04466-20090
- Warranty: This genuine part is guaranteed by Toyota's factory warranty.
2002 Toyota Celica Brake Pad Set
Looking for affordable OEM 2002 Toyota Celica Brake Pad Set? Explore our comprehensive catalogue of genuine 2002 Toyota Celica Brake Pad Set. All our parts are covered by the manufacturer's warranty. Plus, our straightforward return policy and speedy delivery service ensure an unparalleled shopping experience. We look forward to your visit!
2002 Toyota Celica Brake Pad Set Parts Q&A
- Q: How to replace the front Brake Pad Set on 2002 Toyota Celica?A: You must inspect pad linings through the caliper inspection hole after removing the front wheel to determine whether pads need replacement since the minimum acceptable thickness is 1.0 mm (0.039 inch). The caliper lift requires you to hold the sliding pin while removing the bottom installation bolt but you should not detach the flexible hose. Securely suspend the caliper before removing its two pads and four anti-squeal shims together with pad wear indicator plates. Proceed to take out the two pad support plates and only reinstall them if they exhibit no damage or rust and dirt along with being free from deformation and cracking. Double-check the disc surface thickness and check for runout before adding the two pad support plates to each other ensuring they do not get installed backwards. The correct pad installation process involves replacing both anti-squeal shims along with the pads and wear indicator plates. The pad wear indicator plates should be installed on each pad of the 2ZZ-GE engine while disc brake grease needs application to both sides of every inner anti-squeal shim. In the 1ZZ-FE engine maintenance procedure you should apply disc brake grease to the exterior side of both inner anti-squeal shim positions. Each pad should receive two anti-squeal shims then the pads need to be placed into position with the pad wear indicator plate facing upward while making sure that no oil or grease touches the friction surfaces. Remove a small amount of fluid from the reservoir and use a hammer handle or similar tool to push the piston inward while conducting this step. The process requires loosening of the bleeder plug to release some fluid when the piston push is difficult. Install the caliper by torquing the installation bolts to 34 Nm (350 kgf-cm, 25 ft. lbs. while holding the sliding pin. Replace the front wheel by torquing it to 103 Nm (1,050 kgf-cm, 76 ft. lbs.). Press the brake pedal several times before verifying that the fluid reaches the maximum line on the gauge.
Related 2002 Toyota Celica Parts
 2002 Toyota Celica Speed Sensor
 2002 Toyota Celica Wheel Bearing
 2002 Toyota Celica Brake Master Cylinder
 2002 Toyota Celica Brake Booster
 2002 Toyota Celica Brake Caliper
 2002 Toyota Celica Brake Drum
 2002 Toyota Celica Brake Line
 2002 Toyota Celica Brake Master Cylinder Reservoir
 2002 Toyota Celica Brake Shoe Set
 2002 Toyota Celica Master Cylinder Repair Kit
 2002 Toyota Celica Parking Brake Shoe
 2002 Toyota Celica Spindle Nut