My Garage
Cart
Make sure this part fits

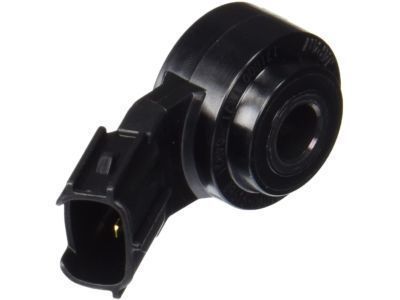
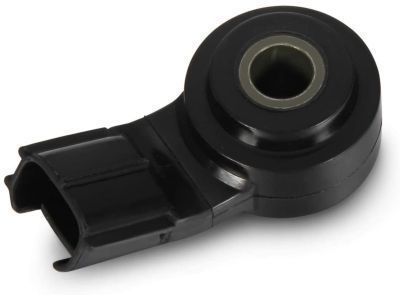
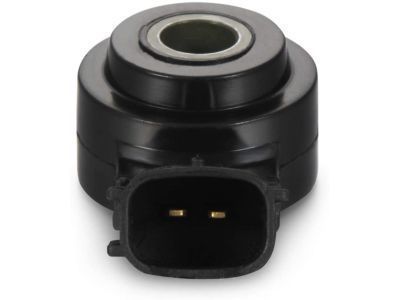
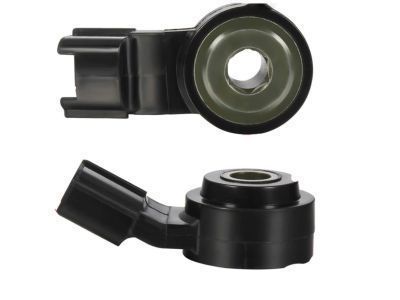
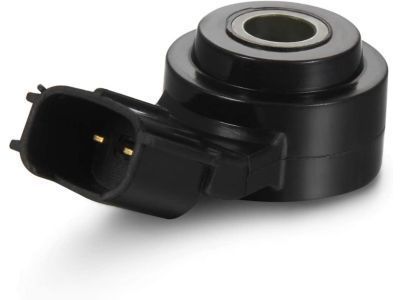
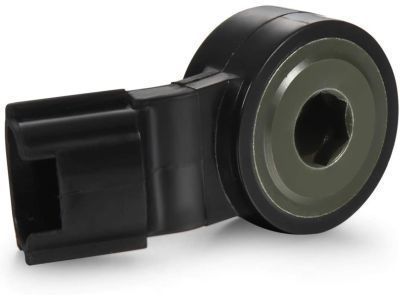
Toyota 89615-06010
Knock Sensor

2002-2024 Toyota 8961506010

Customer Questions & Expert Answers (94)
Toyota 89615-06010 Knock Sensor
  • Part Description
    Sensor, Knock Control; Ignition Knock (Detonation) Sensor
  • Part Name Code
    89615
  • Replaces
    89615-BZ030, 89615-20090, 89615-BZ040
  • Manufacturer
    Toyota
Make sure this part fits
$138.05 MSRP: $195.42
You Save: $57.37 (30%)
Ships in 1-3 Business Days
1
ADD TO CART
  • Related Parts
  • Product Specifications
  • Vehicle Fitment
  • Customer Questions & Expert Answers
  • Product Specifications

    BrandGenuine Toyota
    Part Name Code89615
    Manufacturer Part Number89615-06010
    Part DescriptionSensor, Knock Control; Ignition Knock (Detonation) Sensor
    Item Dimensions4.1 x 1.9 x 1.4 inches
    Item Weight0.40 Pounds
    ConditionNew
    Fitment TypeDirect Replacement
    Replaces89615-BZ030, 89615-20090, 89615-BZ040
    ManufacturerToyota
    SKU89615-06010
    WarrantyThis genuine Toyota part is guaranteed by Toyota's factory warranty.
    Shipping & ReturnShipping Policy Return Policy
    Warning: California's Proposition 65
  • Vehicle Fitment

    Year Make Model Trim Engine
    2016 Scion iMBase4 Cyl 1.8 L GAS
    2012-2015 Scion iQBase4 Cyl 1.3 L GAS
    2005-2016 Scion tCBase, Spec4 Cyl 2.4 L GAS, 4 Cyl 2.5 L GAS
    2006 Scion xABase4 Cyl 1.5 L GAS
    2008-2015, 2006 Scion xBBase4 Cyl 1.5 L GAS, 4 Cyl 2.4 L GAS
    2008-2014 Scion xDBase4 Cyl 1.8 L GAS
    2003-2023 Toyota 4Runner40th Anniversary Edition, Limited, Nightshade, Sport, SR5, SR5 Premium, Trail, TRD Off-Road, TRD Off-Road Premium, TRD Pro, TRD Sport, Venture4 Cyl 2.7 L GAS, 6 Cyl 4.0 L GAS, 8 Cyl 4.7 L GAS
    2005-2022 Toyota AvalonBase, Hybrid Limited, Hybrid XLE, Hybrid XLE Plus, Hybrid XLE Premium, Hybrid XLE Touring, Hybrid XSE, Hybrid XSE Nightshade, Limited, Touring, TRD, XL, XLE, XLE Plus, XLE Premium, XLE Touring, XLE Touring SE, XLS, XSE, XSE Nightshade4 Cyl 2.5 L FULL HYBRID EV-GAS (FHEV), 6 Cyl 3.5 L GAS
    2018-2022 Toyota C-HRLE, Limited, Nightshade, XLE, XLE Premium4 Cyl 2.0 L GAS
    2003-2024 Toyota CamryBase, CE, Hybrid, Hybrid LE, Hybrid SE, Hybrid SE Nightshade, Hybrid XLE, Hybrid XSE, L, LE, SE, SE Nightshade, SE Sport, Special Edition, TRD, XLE, XSE4 Cyl 2.4 L FULL HYBRID EV-GAS (FHEV), 4 Cyl 2.4 L GAS, 4 Cyl 2.5 L FULL HYBRID EV-GAS (FHEV), 4 Cyl 2.5 L GAS, 6 Cyl 3.3 L GAS, 6 Cyl 3.5 L GAS
    View More
  • Customer Questions & Expert Answers

    Q:
    Can you provide the right 89615-06010 for my car? Posted by ToyotaPartsNow Specialist
    A:
    Find out if part number 89615-06010 is the right fit for your car by Selecting Your Vehicle model.
    Posted by ToyotaPartsNow Specialist
    Q:
    How to remove the Knock Sensor on Scion tC? Posted by Customer
    A:
    Before removing the Knock Sensor from the 2AZ-FE engine control system one must discharge all fuel system pressure. Users need to empty their coolant before breaking the negative battery terminal connection while waiting no less than 90 seconds to stop seat belt pretensioner and Air Bag activation. Begin the knock sensor removal procedure by taking out the front wiper arm head cap and front wiper arms from both sides and then removing the hood to cowl top seal and cowl top ventilator louver on the left side. Remove the wiper link along with the cowl top panel outer after disengaging the wire harness clamp and unfastening the 7 bolts which secure the panel. Use a wrench to take out the bolt from the cowl body mounting bracket lower (LH) followed by the clip then bracket. You must remove the engine cover and the air cleaner cap after which you must take out the throttle body and the fuel delivery pipe. Inspection of the fuel tube start with disconnecting the fuel tube clamp and then pinching the retainer to remove the fuel pipe connector from its housing without allowing any dirt or foreign materials to contaminate the connector. Take off the tubes connecting the heater water inlet and heater water outlet from the vehicle. Remove the union to check valve hose from brake booster and camshaft timing oil control valve connector by disconnecting it from vacuum hose clamp. The five bolts together with two nuts and the intake manifold need to be removed along with the gasket that seals the intake manifold. First remove the insulator on the intake manifold from the cylinder block before disconnecting the sensor connector followed by sensor removal with its nut to proceed.
    Posted by ToyotaPartsNow Specialist
    Q:
    How to remove the knock sensor on Scion xD? Posted by Customer
    A:
    The first step to remove the knock sensor from the 2ZR-FE engine control system requires fuel system pressure discharge. Begin the procedure by disconnecting the cable from the negative terminal and then remove both sides of engine under covers. Users must begin their operation by draining engine coolant and then removing the No. 2 cylinder head cover. The first step comprises removing the air cleaner cap sub-assembly with its hose while also separating the engine wire harness and disconnecting the harness bracket. A technician first disconnects the vacuum hose and No.1 fuel vapor feed hose then unclamps the fuel pipe followed by completion of the fuel tube sub-assembly removal. Unscrew and eliminate the combination of the fuel delivery pipe sub-assembly and the No.1 delivery pipe spacer. Start by removing three separate assemblies that include the flywheel housing side cover and the injector vibration isolator and the starter assembly. The first step is to eliminate the engine oil level dipstick as well as the oil cooler tube (for automatic transaxle) and the transmission oil level gauge sub-assembly (also for automatic transaxle). Follow these steps to remove the intake manifold by first disconnecting the four wire harness clamps together with the ventilation hose, throttle body connector and water by-pass hoses and afterwards remove the four bolts and two nuts which will detach the intake manifold and its stay. The knock sensor installation ends by first disconnecting its connector then removing the bolt before removing the sensor.
    Posted by ToyotaPartsNow Specialist
    Q:
    How to replace the Knock Sensor on Toyota 4Runner? Posted by Customer
    A:
    The first step for Knock Sensor replacement involves removing the cylinder head sub-assembly together with disconnecting the heater water inlet hose A. The next step involves taking off water outlet pipe N0.1 by first disconnecting wire harness clamps before using a tool to remove its bolt and 2 nuts. First disconnect the knock sensor connectors while unscrewing two bolts that will let you remove the two knock sensors. Install the 2 knock sensors by refitting them with their 2 bolts which should be torqued to 20 N.m (204 kgf.cm, 15 ft.lbf) before connecting the 2 knock sensor connectors. Secure N0.1 water outlet pipe by tightening bolts and 2 nuts to 9.0 N.m while securing the 4 wire harness clamps. The heater water inlet hose A needs to be reconnected before putting back the cylinder head sub-assembly.
    Posted by ToyotaPartsNow Specialist
    Q:
    How to service the knock sensor on Scion xB? Posted by Customer
    A:
    Before servicing the knock sensor users must disconnect the negative battery cable for at least 90 seconds to stop Air Bag and seat belt pretensioners from activating. Start by removing both LH and RH engine under covers followed by the starter assembly. The first step to servicing the sensor requires disconnecting its connector before extracting the nut then sensor. Install the knock sensor with its nut by applying 20 N.m (204 kgf.cm, 15 ft.lbf) torque and connect the sensor connector. The process ends with reinstalling the starter assembly followed by both engine under covers RH and LH and concluding with reconnecting the negative cable to the battery terminal.
    Posted by ToyotaPartsNow Specialist
    Q:
    How to service the knock sensor on Scion xA? Posted by Customer
    A:
    Service of the knock sensor starts with a 90-second wait after disconnecting the negative cable from the battery terminal to avoid Air Bag and seat belt pretensioner activation. Start by removing the engine under cover from both left-hand and right-hand sides of the vehicle and then remove the starter assembly. The sensor connector should be disconnected and the nut and sensor need to be removed. The installation process starts with torquing the new knock sensor and its nut to 20 N.m (204 kgf.cm, 15 ft.lbf) before connecting the sensor connector. Reinstall the starter assembly before installing the engine under covers RH and LH and ending with reconnection of the cable to the negative battery terminal. Users should conduct an initialization process after the cable because some systems need it when disconnecting and reconnecting cables.
    Posted by ToyotaPartsNow Specialist
    Q:
    How to replace the Knock Sensor on Toyota Camry? Posted by Customer
    A:
    The first step before replacing the Knock Sensor (from July 2003) requires draining the engine coolant. You must start by removing the air cleaner cap then the air cleaner hose before taking out the throttle body assembly then the intake manifold through the removal of 5 bolts and 2 nuts and both the intake manifold and the gasket. The knock sensor needs to have its connector detached before extracting the sensor with its retaining nut. The new knock sensor requires installation with its nut tightened to 20 N.m (204 kgf.cm, 15 ft.lbf) before reconnecting its connector. Mount the new gasket before placing the intake manifold using its 5 bolts and 2 nuts which need torquing to 30 N.m (306 kgf.cm, 22 ft.lbf). The installation process includes placing back the throttle body assembly as well as the air cleaner cap after securing the air cleaner hose. Complete the vacuum hose check before you add engine coolant and perform a final leak test for engine coolant.
    Posted by ToyotaPartsNow Specialist
    Q:
    How to replace the knock sensor on Scion tC? Posted by Customer
    A:
    Replacement of the knock sensor requires technicians to empty both fuel system pressure and engine coolant before they disconnect the battery negative terminal. The service includes removing the front wiper arm head cap and both wiper arms together with the hood to cowl top seal and the louver of cowl top ventilator on the LH side. This process requires removal of the wiper link assembly and cowl top panel sub-assembly outer after unclipping the wire harness and dislodging 7 bolts. Take off the cowl body mounting bracket lower LH by removing its bolt and clip and proceed by taking out the engine cover sub-assembly No.1, air cleaner cap sub-assembly, throttle body assembly, fuel delivery pipe sub-assembly and fuel tube sub-assembly while carefully clearing any dirt from the fuel tube connector and avoiding scratching. The heater water inlet hose A along with heater water outlet hose A need to be disconnected before removing the intake manifold and insulator No.1. Remove the knock sensor by disconnecting its connector while removing the nut. Secure the nut to the new knock sensor while placing it in a proper orientation before connecting the knock sensor connector. Use new gasket to install the intake manifold and its insulator No.1 while fastening them using 5 bolts combined with 2 nuts. Rejoin the check valve hose union to both the brake booster and the camshaft timing oil control valve while making sure that the hose clamp and paint mark show exact alignment. Secure both hoses A which connect heater water outlet and inlet through hose clamps. Fully install the fuel tube sub-assembly when the connector matches the pipe and it clicks into place before checking the joint connection. After reinstalling the fuel delivery pipe sub-assembly first follows by the throttle body assembly then the air cleaner cap sub-assembly along with the cowl body mounting bracket lower LH using its bolt and clip. Reinstall the seven bolts on the cowl top panel sub-assembly outer while installing the wiper link assembly before reconnecting the battery negative terminal. The procedure ends with adding engine coolant while checking for leaks before reinstalling the engine cover sub-assembly No.1 followed by the cowl top ventilator louver LH, hood to cowl top seal and both front wiper arms with the front wiper arm head cap.
    Posted by ToyotaPartsNow Specialist
    Q:
    How to replace the Knock Sensor on Toyota 4Runner? Posted by Customer
    A:
    The first step to change the Knock Sensor involves detaching both the Cylinder Head Sub-Assembly and Heater Water Inlet Hose A. Proceed by removing Water Outlet Pipe No.1 through wire harness clamp detachment and bolt removal that secures the pipe. Begin by removing both knock sensor connectors followed by removing the bolts to uninstall the two knock sensors. Reattach the 2 knock sensors using the 2 bolts which should be torqued to 20 N.m (204 kgf.cm, 15 ft.lbf) after connecting their respective connectors. Begin by torquing Water Outlet Pipe No.1 to 10 N.m (102 kgf.cm, 7 ft.lbf) and completing Heater Water Inlet Hose A reinstallation followed by Cylinder Head Sub-Assembly reinstallation.
    Posted by ToyotaPartsNow Specialist
    Q:
    How to service the knock sensor on Toyota Avalon? Posted by Customer
    A:
    Service of the knock sensor starts by sealing off gasoline from spreading and disconnecting the negative battery terminal cable. The engine coolant drainage sequence includes removing the windshield wipers along with their motor and link assembly, cowl top panel outer and V-bank cover sub-assembly before moving on to the air cleaner cap, and connection to its air cleaner hose and intake air surge tank, and finally the intake manifold. The knock control sensor requires removal of its two connectors followed by dislodging two bolts while removing the two sensors. Begin by installing the 2 knock control sensors with their 2 bolts which need to be tightened to a torque value of 20 N.m (204 kgf.cm, 15 ft.lbf). Then reconnect the 2 knock control sensor connectors. The sequence requires installation of intake manifold followed by intake air surge tank and air cleaner cap with air cleaner hose and adding the negative battery cable back to its terminal. Add engine coolant while inspecting both engine coolant and fuel system leakages. In the last step install the V-bank cover sub-assembly followed by the cowl top panel outer and the windshield wiper motor & link assembly, after system initialization test the throttle body function when needed.
    Posted by ToyotaPartsNow Specialist
    Q:
    How to replace the Knock Sensor on Toyota Highlander? Posted by Customer
    A:
    The ignition process begins with emptying engine coolant before starting the replacement of the Knock Sensor. To begin the process disconnect the air cleaner cap then peel away the air cleaner hose before proceeding to the throttle body assembly and intake manifold by detaching 5 bolts and 2 nuts followed by removal of the intake manifold and gasket. A technician should remove the knock sensor by disconnecting its sensor connector while uninstalling both the nut and the sensor. Place the new sensor with its nut before torquing to 20 N.m (199 kgf.cm, 14 ft.lbf) at a knock sensor angle below the horizontal (below 0 degrees). The intake manifold should be reinstalled alongside its new gasket while tightening 5 bolts and 2 nuts to achieve 30 N.m (305 kgf.cm, 22 ft.lbf) torque. You should install both the throttle body assembly and the air cleaner cap with its associated air cleaner hose. Before concluding the process add engine coolant to the system while checking for any leaking components.
    Posted by ToyotaPartsNow Specialist
    Q:
    How to remove the knock sensor on Toyota Corolla? Posted by Customer
    A:
    The procedure for knock sensor replacement in the 2ZR-FE engine requires draining the engine coolant first. Begin with removing the No. 2 cylinder head cover and then disconnect the air cleaner cap sub-assembly. Start by disconnecting the throttle body connector before working on the two water by-pass hoses while also separating the wire harness clamp then removing the bolt and wire harness bracket. The process requires users to disconnect all components starting from the two hoses through the ventilation hose before removing each of the two wire harness clamps. The procedure requires removal of the four bolts and two nuts to detach the intake manifold stay together with the intake manifold and throttle body while also removing the gasket attached to the intake manifold. Running the process entails breaking the connection to the knock sensor and removing the bolt and knock sensor itself from the system.
    Posted by ToyotaPartsNow Specialist
    Q:
    How to install the knock sensors and complete the assembly process on Toyota FJ Cruiser? Posted by Customer
    A:
    Start by installing the 2 knock sensors through 2 bolts secured with 20 Nm (204 kgf-cm, 15 ft-lbf) torque while connecting the 2 knock sensor connectors. The installation process requires you to attach the No. 1 water outlet pipe using 3 bolts at 10 Nm (102 kgf-cm, 7.4 ft-lbf) torque and to connect 4 wire harness clamps. The heater water inlet hose must be joined to the water outlet pipe. Start with checking the cylinder head set bolt before installing the cylinder head gasket followed by the cylinder head sub-assembly. After installing the No. 2 camshaft bearing you should mount the Bank 1 camshafts before moving on to the No. 2 chain tensioner assembly. After the Bank 1 camshaft timing gears and the No. 2 chain install the mechanic should proceed to mount the water by-pass joint RR next along with the intake manifold. Take necessary steps to connect both the No. 2 fuel pipe sub-assembly and the No. 1 fuel pipe sub-assembly. The service procedure begins by installing exhaust manifold sub-assembly RH and manifold stay before adding the front exhaust pipe assembly and completing with the No. 2 front exhaust pipe assembly. Exhaust pipe stopper brackets along with the No.1 cool air inlet should be installed on 4WD models. The chain sub-assembly needs to be installed before checking fuel leaks and exhaust gas leaks while inspecting ignition timing alongside engine idling speed checks and compression and CO/HC examinations and front wheel alignment assessment.
    Posted by ToyotaPartsNow Specialist
    Q:
    How to remove the knock sensor on Toyota Matrix? Posted by Customer
    A:
    You need to discharge fuel system pressure before you can begin removing the knock sensor of the 2AZ-FE engine. Next, drain the coolant. Proceed by removing the front wiper arm head caps before taking off both front wiper arm and blade assemblies from left and right sides. Continue by removing the hood to cowl top seal followed by detaching the cowl top ventilator louvers from both right and left sides. The next step is to detach the windshield wiper motor assembly together with the link components followed by separating the outer cowl top panel. The suspension tower damper assembly becomes removable when the vehicle has front strut bars. You need to remove the No. 1 engine cover sub-assembly together with the air cleaner cap sub-assembly that includes a hose. First remove the throttle body assembly before disconnecting the fuel tube sub-assembly to take away the fuel delivery pipe sub-assembly with its fuel tube sub-assembly. The procedure for intake manifold removal consists of disconnecting ventilation hose and union to check valve hose and separating wire harness clamp from the intake manifold. Detach the five bolts together with two nuts and the intake manifold gasket and the intake manifold. Remove the No. 1 intake manifold insulator as the final step. To finish remove the connector of the sensor then unfasten its mounting nut and sensor.
    Posted by ToyotaPartsNow Specialist
    Q:
    How to remove the knock sensor on Toyota Sienna? Posted by Customer
    A:
    The first step to remove the knock sensor from 2GR-FE engine control system requires fuel system pressure discharge. The first step requires removal of the V-bank cover sub-assembly before draining engine coolant and uninstalling the windshield wiper motor assembly. The next step involves removing the front outer cowl top panel sub-assembly together with the air cleaner cap sub-assembly and the air cleaner case sub-assembly. Begin intake air surge tank assembly removal by disconnecting the 2 water by-pass hoses from the throttle body followed by separate disconnection of the vapor feed hose then the throttle body connector and clamp before taking off the ventilation hose and the union to check valve hose and connector. A 5 mm socket hexagon wrench should be used to remove the 4 bolts followed by taking off the 2 nuts, 2 bolts, and the intake air surge tank. Remove the gasket from the intake air surge tank afterward. Following that step remove the fuel main tube sub-assembly together with the intake manifold. To finish the procedure disconnect the 2 knock sensor connectors while using a 10 mm socket to remove the 2 bolts before pulling out both knock control sensors.
    Posted by ToyotaPartsNow Specialist
    Q:
    How to service and repair the knock sensor on Toyota Sequoia? Posted by Customer
    A:
    A visor with two manifolds and an air connector requires removal before servicing knock sensors. Check the resistance between knock sensor terminals using an ohmmeter after disconnected connector wires because proper measurement should fall between 120 to 280 kOhm at ambient temperature of 20 degrees Celsius (68 degrees Fahrenheit). The sensor needs replacement when the resistance reading rests outside of this specified range. The installation process starts by disconnecting the two knock sensor connectors followed by removing the two nuts which enables appropriate removal of the two knock sensors. Sensors can be installed with the two nuts according to 20 N.m torque requirements (204 kgf.cm, 15 ft.lbf) followed by connecting the two knock sensor connectors. To complete the repair process reinstall the throttle body cover together with the intake air connector as well as the intake manifold assembly.
    Posted by ToyotaPartsNow Specialist
    Q:
    How to service the Knock Sensor on Toyota Land Cruiser? Posted by Customer
    A:
    The start of Knock Sensor service requires removing fuel system pressure followed by disconnecting the negative battery cable terminal while waiting 90 seconds to stop Air Bag and seat belt pretensioner activation. The service begins with draining engine coolant and removing the V-bank cover sub-assembly before disconnecting the fuel return hose, fuel main hose and taking off the intake air connector pipe and intake manifold assembly. Beginning installation requires dropping both the air pump assembly and knock control sensor by first disconnecting the two knock sensor connectors and unthreading the nut while detaching the two knock sensors. You should install the 2 knock sensors by tightening their 2 nuts to 20 N.m (204 kgf.cm, 15 ft.lbf) torque values before connecting the 2 knock sensor connectors. Set up the sequence of installation with the air pump assembly first along with the intake manifold assembly and reconnect the fuel main and return hoses before attaining the intake air connector pipe and V-bank cover sub-assembly. You must perform system initialization after reconnecting the cable because some control systems need it following the cable connection to the negative battery terminal. Engine coolant must be added to the system before performing leak checks on engine coolant and fuel systems.
    Posted by ToyotaPartsNow Specialist
    Q:
    How to replace the Knock Sensor on Toyota Prius? Posted by Customer
    A:
    Starting the Knock Sensor replacement requires removal of three components which are radiator support opening cover, engine under cover LH, and draining the engine coolant. Next, remove rear floor board No. 2, deck floor box rear, and rear floor board No. 3. The engine wire number 3 and driver side battery terminal need disconnecting before removing the air cleaner assembly together with the oil level gauge guide which requires removal of its gauge and wire harness clamp and bolt. Use T10 torx bits to disconnect hoses while removing wire harness clamps throughout the process until the intake manifold along with its gasket can be removed from the cylinder head. The knock sensor requires connector disconnect and nut removal before extracting it from its position. Attach the new knock sensor while installing the appropriate nut before securely putting back the knock sensor connector. Place the intake manifold on the engine block using a fresh gasket then fasten three bolts and two nuts followed by connecting all previously separated hoses and connectors. Install the oil level gauge guide using new engine oil on an unbroken O-ring and tighten it with the bolt. Place the oil level gauge and air cleaner assembly on their positions before reconnecting engine wire No. 3. After engine coolant addition check for any leakages in both engine coolant and engine oil systems. Rephrase this instruction by justifying the sequence of installation that ends with power window control initialization.
    Posted by ToyotaPartsNow Specialist
    Q:
    How to remove the Knock Sensor on Toyota Tacoma? Posted by Customer
    A:
    You must disconnect the negative battery terminal cable as the first step when removing the Knock Sensor. After disconnecting the negative terminal cable you should proceed to remove the engine under cover sub-assembly that exists on 4WD and Pre-Runner vehicles. First drain engine coolant before removing the intake air connector. Secondly step is to take off the throttle with motor body assembly. Erase all connections from the fuel hose and fuel hose No.2. Unscrew the fuel vapor feed hose at the VSV along with the vacuum hose and clamp bracket bolt before the intake manifold can be taken off. The maintenance technician should first disconnect water by-pass hose No. 2 followed by ventilation hose No. 3 and VSV connector. The engine wire harness clamp and compressor magnetic clutch connector need to be separated when using air conditioning. Follow the illustration by removing the nut together with the bolt and harness clamp bracket then detach the three connectors. Apply sequence to disconnect the relay block first then release the intake manifold by removing five bolts along with two nuts. The knock control sensor removal process requires disconnecting its connector followed by removing the bolt until the sensor can be extracted.
    Posted by ToyotaPartsNow Specialist
    Q:
    How to install the knock sensor and related components on Toyota Yaris? Posted by Customer
    A:
    You must tighten the knock sensor using a 20 Nm (204 kgf-cm, 15 ft-lbf) torque while connecting its knock sensor connector afterward. You should install the intake manifold gasket with new material before tightening 3 bolts and 2 nuts to a torque value of 30 Nm (304 kgf-cm, 22 ft-lbf). Mount the union as it connects the ventilation hose to the connector tube hose as well as fitting water by-pass hose No. 2. Drive the engine wire harness to its position on the intake manifold. First install the throttle assembly with motor body while connecting water by-pass hose No. 2 as well as the water by-pass hose. Fit the air cleaner cap sub-assembly by connecting it to air cleaner hose No. 1 and tighten the cable to the negative battery terminal at 5.4 Nm (55 kgf-cm, 48 in-lbf). Engine coolant needs to be added before testing for any coolant leaks on the system. To finish the installation, you should put on cylinder head cover Number 2.
    Posted by ToyotaPartsNow Specialist
    Q:
    How to remove the Knock Sensor on Toyota Tacoma? Posted by Customer
    A:
    The first step to remove the Knock Sensor from the 2TR-FE engine control system begins with disconnecting the negative battery cable. For 4WD and Pre-Runner models remove the engine under cover sub-assembly to start the drain of engine coolant. Start the process by taking off the intake air connector followed by the throttle with motor body assembly. Before proceeding remove the fuel hose along with fuel hose No.2. Start by detaching the fuel vapor feed hose from the VSV followed by the vacuum hose and bolt and clamp bracket and water by-pass hose No. 2 and ventilation hose No. 3 and VSV connector from the intake manifold. Users must unfasten the engine wire harness clamp in addition to disconnecting the magnetic compressor connector when air conditioning is present. First disconnect three connectors while removing the bolt and harness clamp bracket. Then remove the nut which is shown in the illustration. Merely disconnect the engine wire harness from the relay block followed by removing the intake manifold through five bolts and two nuts. Completion of the knock control sensor removal requires disconnecting its connector and removing the securing bolt.
    Posted by ToyotaPartsNow Specialist
    Q:
    How to service and repair the Knock Sensor on Toyota Tundra? Posted by Customer
    A:
    The Knock Sensor service requires cylinder head removal followed by unclipping the heater water inlet hose. Service of the Knock Sensor begins with disconnecting the water outlet pipe N0.1 by first removing the 3 bolts holding it in place and then detached 4 wire harness clamps. Proceed with disconnecting both knock sensor connectors before removing two associated bolts and sensors. Install the 2 knock sensors with their 2 bolts while positioning the sensor center to rest 15 degrees from the bolt center and torque it to 20 Nm (204 kgf.cm, 15 ft.lbf). Use the 2 knock sensor connectors after then install the water outlet pipe N0.1 with its 3 bolts secured to 9.0 Nm (92 kgf.cm, 80 in.lbf) and restore the 4 wire harness clamps. When installing the cylinder head you should begin by reattaching the heater water inlet hose.
    Posted by ToyotaPartsNow Specialist
    Q:
    How to replace the Knock Sensor on Toyota Solara? Posted by Customer
    A:
    The first step when changing a Knock Sensor includes draining engine coolant before beginning the replacement process. Start by removing the air cleaner cap together with the attached air cleaner hose and subsequently remove the throttle body assembly and intake manifold after removing 5 bolts and 2 nuts and taking out the intake manifold and gasket. Begin by disconnecting the knock sensor connector and then remove both the nut and the knock sensor from place. Ensure the new knock sensor receives a torque of 20 N.m (199 kgf.cm, 14 ft.lbf) when installing it with the nut. It is advised to mount the sensor at an angle under 0 degrees below horizontal. The first step involves connecting the sensor connector before you put on a new gasket along with the intake manifold by tightening 5 bolts and 2 nuts to 30 N.m (306 kgf.cm, 22 ft.lbf). After mounting the throttle body assembly users should install the air cleaner cap along with its hose. After checking the vacuum hose connection you need to install engine coolant before searching for any coolant leakages.
    Posted by ToyotaPartsNow Specialist
    Q:
    How to remove the knock sensor on Toyota RAV4? Posted by Customer
    A:
    The first step for removing the 2AR-FE engine controller knock sensor requires disassembly of the intake manifold followed by removal of needed parts. Begin by disconnecting the sensor connector and afterwards remove the bolt followed by the sensor.
    Posted by ToyotaPartsNow Specialist
    Q:
    How to remove the knock sensor on Toyota Venza? Posted by Customer
    A:
    The removal process of the knock sensor from the 1AR-FE engine control system starts by taking off the intake manifold from the engine. After disconnecting the sensor connector you should detach the bolt to extract the sensor from its position.
    Posted by ToyotaPartsNow Specialist
    Q:
    What components should be installed last for the 2007 Scion tC? Posted by Customer
    A:
    Install the engine cover, cowl top ventilator louver (LH), hood to cowl top seal, both front wiper arms (LH and RH), and remove the front wiper arm head cap, concluding with the initialization of certain systems after reconnecting the battery.
    Posted by ToyotaPartsNow Specialist
    See expert answers on similar Knock Sensor
    Q:
    What are the steps for connecting the heater water hoses for the 2009 Scion tC? Posted by Customer
    A:
    Connect the heater water outlet hose to the water by-pass pipe and heater radiator unit, followed by the heater water inlet hose to the cylinder head and heater radiator unit, securing it with a hose clamp while maintaining the correct angle.
    Posted by ToyotaPartsNow Specialist
    See expert answers on similar Knock Sensor
    Q:
    What should be done after removing the No. 1 intake manifold insulator for the 2009 Scion xB? Posted by Customer
    A:
    Disconnect the sensor connector and remove the nut and knock sensor.
    Posted by ToyotaPartsNow Specialist
    See expert answers on similar Knock Sensor
    Q:
    What is the final step after reinstalling all components for the 2005 Toyota Avalon? Posted by Customer
    A:
    Reinstall the V-bank cover sub-assembly, cowl top panel outer, and windshield wiper motor & link assembly, perform initialization for any systems that require it after disconnecting the battery terminal, and check the function of the throttle body.
    Posted by ToyotaPartsNow Specialist
    See expert answers on similar Knock Sensor
    Q:
    What should be done after removing the fuel components for the 2010 Scion xB? Posted by Customer
    A:
    Remove the intake manifold by disconnecting the ventilation hose, the union to check valve hose, and separating the wire harness clamp from the intake manifold.
    Posted by ToyotaPartsNow Specialist
    See expert answers on similar Knock Sensor
    Q:
    What components need to be installed after connecting the throttle body assembly for the 2010 Scion xD? Posted by Customer
    A:
    Install the transmission oil level gauge sub-assembly, the oil cooler tube, the engine oil level dipstick, and the starter assembly.
    Posted by ToyotaPartsNow Specialist
    See expert answers on similar Knock Sensor
    Q:
    What connections need to be disconnected next for the 2010 Scion tC? Posted by Customer
    A:
    Disconnect the union to check valve hose from the brake booster, the camshaft timing oil control valve connector, and the wire harness clamp, then remove the union to check valve hose from the vacuum hose clamp.
    Posted by ToyotaPartsNow Specialist
    See expert answers on similar Knock Sensor
    Q:
    What is the next step after removing the intake manifold for the 2004 Toyota Camry? Posted by Customer
    A:
    Remove the water outlet by disconnecting the radiator hose inlet, ECT sensor connector, and clamp, then remove the 2 bolts, 2 nuts, and 2 washers.
    Posted by ToyotaPartsNow Specialist
    See expert answers on similar Knock Sensor
    Q:
    What is the next step after installing the new sensors for the 2006 Toyota Avalon? Posted by Customer
    A:
    Reinstall the intake manifold, intake air surge tank, air cleaner cap with air cleaner hose, and connect the cable to the negative battery terminal.
    Posted by ToyotaPartsNow Specialist
    See expert answers on similar Knock Sensor
    Q:
    What is the next step after disconnecting the fuel tube for the 2006 Scion tC? Posted by Customer
    A:
    Remove the heater water inlet and outlet hoses, followed by the intake manifold, disconnecting the union to check valve hose from the brake booster, and the camshaft timing oil control valve connector.
    Posted by ToyotaPartsNow Specialist
    See expert answers on similar Knock Sensor
    Q:
    What should be added and inspected after reconnecting the battery for the 2009 Toyota Avalon? Posted by Customer
    A:
    Add engine coolant and inspect for any coolant leaks, as well as for fuel leaks.
    Posted by ToyotaPartsNow Specialist
    See expert answers on similar Knock Sensor
    Q:
    How do you connect the fuel tube for the 2008 Scion tC? Posted by Customer
    A:
    Align the fuel tube connector with the pipe and push until a "click" indicates a secure connection, checking for scratches or foreign objects beforehand and ensuring a secure connection by pulling them.
    Posted by ToyotaPartsNow Specialist
    See expert answers on similar Knock Sensor
    Q:
    What is the next step in the process for the 2009 Scion xD? Posted by Customer
    A:
    Remove the intake manifold by disconnecting the four wire harness clamps, the ventilation hose, the throttle body connector, and the water by-pass hoses.
    Posted by ToyotaPartsNow Specialist
    See expert answers on similar Knock Sensor
    Q:
    What additional components need to be removed from the cylinder heads and intake manifold for the 2008 Toyota 4Runner? Posted by Customer
    A:
    Remove the 2 bolts and ground cables from the RH and LH cylinder heads, the bolt and V-bank cover bracket from the intake manifold, disconnect the engine wire from the engine hanger and wire bracket, and remove the bolt and wire bracket from the intake manifold along with the 6 bolts, 4 nuts, intake manifold assembly, and 2 gaskets.
    Posted by ToyotaPartsNow Specialist
    See expert answers on similar Knock Sensor
    Q:
    What needs to be disconnected to access the knock sensors for the 2007 Toyota 4Runner? Posted by Customer
    A:
    Disconnect the 2 knock sensor connectors.
    Posted by ToyotaPartsNow Specialist
    See expert answers on similar Knock Sensor
    Q:
    What is the final step in the installation process for the 2009 Toyota 4Runner? Posted by Customer
    A:
    Proceed to install the cylinder head sub-assembly.
    Posted by ToyotaPartsNow Specialist
    See expert answers on similar Knock Sensor
    Q:
    What is the first step to replace the knock sensor for the 2006 Toyota Camry? Posted by Customer
    A:
    First, drain the engine coolant.
    Posted by ToyotaPartsNow Specialist
    See expert answers on similar Knock Sensor
    Q:
    How do you remove the knock sensor for the 2007 Toyota Camry? Posted by Customer
    A:
    Disconnect the knock sensor connector and remove the nut and knock sensor.
    Posted by ToyotaPartsNow Specialist
    See expert answers on similar Knock Sensor
    Q:
    How do you remove the cowl top panel outer sub-assembly for the 2010 Toyota Camry? Posted by Customer
    A:
    Remove the 4 bolts and 4 nuts securing it.
    Posted by ToyotaPartsNow Specialist
    See expert answers on similar Knock Sensor
    Q:
    How do you remove the No. 1 water outlet pipe for the 2008 Toyota FJ Cruiser? Posted by Customer
    A:
    Take off the 4 wire harness clamps and the 3 bolts.
    Posted by ToyotaPartsNow Specialist
    See expert answers on similar Knock Sensor
    Q:
    What should be disconnected next for the 2009 Toyota FJ Cruiser? Posted by Customer
    A:
    Disconnect the No. 1 and No. 2 fuel pipe sub-assemblies.
    Posted by ToyotaPartsNow Specialist
    See expert answers on similar Knock Sensor
    Q:
    What is the next step in the process for the 2008 Scion xD? Posted by Customer
    A:
    Remove the intake manifold by disconnecting the four wire harness clamps, the ventilation hose, the throttle body connector, and the water by-pass hoses.
    Posted by ToyotaPartsNow Specialist
    See expert answers on similar Knock Sensor
    Q:
    What is the next step after removing the throttle body assembly for the 2008 Scion xB? Posted by Customer
    A:
    Remove the fuel tube sub-assembly and the fuel delivery pipe sub-assembly with the fuel tube sub-assembly.
    Posted by ToyotaPartsNow Specialist
    See expert answers on similar Knock Sensor
    Q:
    What is the procedure for disconnecting the heater water inlet hose for the 2007 Toyota FJ Cruiser? Posted by Customer
    A:
    Disconnect the heater water inlet hose from the water outlet pipe, then remove the No. 1 water outlet pipe by taking off the 4 wire harness clamps and the 3 bolts.
    Posted by ToyotaPartsNow Specialist
    See expert answers on similar Knock Sensor
    Q:
    What needs to be taken off next for the 2009 Toyota Camry? Posted by Customer
    A:
    Take off the windshield wiper arm and blade assembly on both the left and right sides, followed by the front fender to cowl side seals on both sides.
    Posted by ToyotaPartsNow Specialist
    See expert answers on similar Knock Sensor
    Q:
    What should be done after reinstalling the intake manifold for the 2006 Toyota Highlander? Posted by Customer
    A:
    Reinstall the throttle body assembly, the air cleaner cap with the air cleaner hose, add engine coolant, and finally check for any engine coolant leakage.
    Posted by ToyotaPartsNow Specialist
    See expert answers on similar Knock Sensor
    Q:
    What should be done after installing the knock sensor for the 2009 Toyota Corolla? Posted by Customer
    A:
    Next, connect the knock sensor connector.
    Posted by ToyotaPartsNow Specialist
    See expert answers on similar Knock Sensor
    Q:
    How do you install the new knock sensors for the 2005 Toyota 4Runner? Posted by Customer
    A:
    Place the 2 knock sensors back with the 2 bolts, ensuring a torque of 20 Nm (204 kgf.cm, 15 ft.lbf), and reconnect the 2 knock sensor connectors.
    Posted by ToyotaPartsNow Specialist
    See expert answers on similar Knock Sensor
    Q:
    What is the final step before disconnecting the knock control sensor connectors for the 2008 Toyota Avalon? Posted by Customer
    A:
    Remove the intake manifold.
    Posted by ToyotaPartsNow Specialist
    See expert answers on similar Knock Sensor
    Q:
    What should be done after removing the intake manifold for the 2009 Toyota Highlander? Posted by Customer
    A:
    Disconnect the sensor connector.
    Posted by ToyotaPartsNow Specialist
    See expert answers on similar Knock Sensor
    Q:
    What is the process for installing the intake manifold for the 2008 Toyota Camry? Posted by Customer
    A:
    Install a new gasket, then attach the manifold using 5 bolts and 2 nuts, torquing to 30 Nm (306 kgf-cm, 22 ft-lbf).
    Posted by ToyotaPartsNow Specialist
    See expert answers on similar Knock Sensor
    Q:
    What is the final step in the installation process for the 2009 Toyota RAV4? Posted by Customer
    A:
    Install the intake manifold as required.
    Posted by ToyotaPartsNow Specialist
    See expert answers on similar Knock Sensor
    Q:
    What is the first step to remove the Knock Sensor from the 1NZ-FXE engine control system for the 2009 Toyota Prius? Posted by Customer
    A:
    Disconnect the cable from the negative battery terminal and wait at least 90 seconds to prevent airbag and seat belt pretensioner activation.
    Posted by ToyotaPartsNow Specialist
    See expert answers on similar Knock Sensor
    Q:
    What is the order of installation after the knock control sensor for the 2007 Toyota Land Cruiser? Posted by Customer
    A:
    Install the air pump assembly, intake manifold assembly, reconnect the fuel main and return hoses, followed by the intake air connector pipe and V-bank cover sub-assembly.
    Posted by ToyotaPartsNow Specialist
    See expert answers on similar Knock Sensor
    Q:
    What is the first step to install the Knock Sensor on the 3UR-FE engine for the 2008 Toyota Land Cruiser? Posted by Customer
    A:
    First, install the 4 sensors using the 4 bolts, ensuring the sensors are angled between 10° upward and downward from the horizontal position, with a torque of 20 Nm (204 kgf-cm, 15 ft-lbf).
    Posted by ToyotaPartsNow Specialist
    See expert answers on similar Knock Sensor
    Q:
    What is the procedure for attaching the intake manifold for the 2008 Toyota Prius? Posted by Customer
    A:
    Place a new gasket on the cylinder head, then attach the manifold using 3 bolts and 2 nuts, also at a torque of 20 Nm (204 kgf-cm, 15 ft-lbf).
    Posted by ToyotaPartsNow Specialist
    See expert answers on similar Knock Sensor
    Q:
    What is the last step in removing the knock sensors for the 2009 Toyota Land Cruiser? Posted by Customer
    A:
    Then remove the 4 bolts and the 4 knock sensors.
    Posted by ToyotaPartsNow Specialist
    See expert answers on similar Knock Sensor
    Q:
    What is the first step to service the knock sensor for the 2007 Toyota Highlander? Posted by Customer
    A:
    First, drain the engine coolant.
    Posted by ToyotaPartsNow Specialist
    See expert answers on similar Knock Sensor
    Q:
    How do you install the Knock Sensor for the 2AZ-FE engine control system for the 2008 Toyota RAV4? Posted by Customer
    A:
    First, install the sensor with the nut, ensuring it is positioned correctly, and torque it to 20 Nm (205 kgf-cm, 15 ft-lbf). Next, connect the sensor connector.
    Posted by ToyotaPartsNow Specialist
    See expert answers on similar Knock Sensor
    Q:
    What components need to be removed before accessing the Knock Sensor for the 2007 Toyota Prius? Posted by Customer
    A:
    Remove the radiator support opening cover, engine under cover LH, and drain the engine coolant.
    Posted by ToyotaPartsNow Specialist
    See expert answers on similar Knock Sensor
    Q:
    What steps are involved in removing the intake manifold for the 2007 Toyota RAV4? Posted by Customer
    A:
    Disconnect the union to check valve hose from the brake booster, the camshaft timing oil control valve connector, and the wire harness clamp, then remove the union to check valve hose from the vacuum hose clamp, and remove the 5 bolts, 2 nuts, and the intake manifold along with the gasket.
    Posted by ToyotaPartsNow Specialist
    See expert answers on similar Knock Sensor
    Q:
    What components need to be removed next for the 2008 Toyota Highlander? Posted by Customer
    A:
    Remove the front wiper arm and blade assembly on both the left and right sides, followed by the cowl top ventilator louver sub-assembly, windshield wiper motor and link assembly, and the outer cowl top panel sub-assembly.
    Posted by ToyotaPartsNow Specialist
    See expert answers on similar Knock Sensor
    Q:
    What should be done after installing the knock sensors for the 2009 Toyota Sequoia? Posted by Customer
    A:
    Next, connect the 2 knock sensor connectors.
    Posted by ToyotaPartsNow Specialist
    See expert answers on similar Knock Sensor
    Q:
    What final checks should be performed after the installation for the 2006 Toyota RAV4? Posted by Customer
    A:
    Add engine coolant, check for engine coolant and fuel leakage, and finally install the No. 1 engine cover.
    Posted by ToyotaPartsNow Specialist
    See expert answers on similar Knock Sensor
    Q:
    How do you remove the intake manifold for the 2006 Toyota Tacoma? Posted by Customer
    A:
    Disconnect the fuel vapor feed hose from the VSV, the vacuum hose, the bolt and clamp bracket, the water by-pass hose No. 2, the ventilation hose No. 3, the VSV connector, disengage the engine wire harness clamp, disconnect the compressor magnetic clutch connector (if equipped with air conditioning), and remove the necessary bolts and nuts.
    Posted by ToyotaPartsNow Specialist
    See expert answers on similar Knock Sensor
    Q:
    What should be removed after discharging the fuel system pressure for the 2008 Toyota Sienna? Posted by Customer
    A:
    Remove the V-bank cover sub-assembly, drain the engine coolant, and then remove the windshield wiper motor assembly.
    Posted by ToyotaPartsNow Specialist
    See expert answers on similar Knock Sensor
    Q:
    What is the first step to service the knock sensor on the 2AZ-FE engine control system for the 2008 Toyota Solara? Posted by Customer
    A:
    First, drain the engine coolant.
    Posted by ToyotaPartsNow Specialist
    See expert answers on similar Knock Sensor
    Q:
    What is the next step after installing the cowl top components for the 2009 Toyota Matrix? Posted by Customer
    A:
    Install the hood to cowl top seal, then the front wiper arm and blade assemblies for both the right and left sides, and finally the front wiper arm head cap.
    Posted by ToyotaPartsNow Specialist
    See expert answers on similar Knock Sensor
    Q:
    How do you install the intake manifold for the 2007 Toyota Tacoma? Posted by Customer
    A:
    Install the intake manifold with the 5 bolts and 2 nuts, torquing them to 25 N.m.
    Posted by ToyotaPartsNow Specialist
    See expert answers on similar Knock Sensor
    Q:
    What is the final step in the process for the 2008 Toyota Tundra? Posted by Customer
    A:
    Finally, disconnect the 2 sensor connectors and remove the 2 bolts to take out the 2 sensors.
    Posted by ToyotaPartsNow Specialist
    See expert answers on similar Knock Sensor
    Q:
    What are the final steps to complete the assembly for the 2005 Toyota Sienna? Posted by Customer
    A:
    Reinstall the intake air surge tank, emission control valve set, air cleaner cap sub-assembly, add engine coolant, check for fuel and engine coolant leaks, and then reinstall the V-bank cover sub-assembly, cowl top panel sub-assembly outer front, cowl top to cowl brace inner No.1, windshield wiper motor assembly, cowl top ventilator louver sub-assembly, and both front wiper arms, finishing with the front wiper arm head cap.
    Posted by ToyotaPartsNow Specialist
    See expert answers on similar Knock Sensor
    Q:
    What is the first step to service the knock sensor for the 2006 Toyota Prius? Posted by Customer
    A:
    Disconnect the cable from the negative battery terminal and wait at least 90 seconds to prevent airbag and seat belt pretensioner activation.
    Posted by ToyotaPartsNow Specialist
    See expert answers on similar Knock Sensor
    Q:
    What are the final steps to complete the installation for the 2005 Toyota Tacoma? Posted by Customer
    A:
    Connect the VSV connector, connect the ventilation hose No.3, connect the water bypass hose No.2, install the clamp bracket with the bolt torqued to 19 N.m (194 kgf.cm, 14 in.lbf), connect the vacuum hose, connect the fuel vapor feed hose to the VSV, connect the fuel hoses, install the throttle w/motor body assembly, install the intake air connector, reconnect the cable to the negative battery terminal torqued to 3.9 N.m (40 kgf.cm, 35 in.lbf), add engine coolant, check for engine coolant and fuel leakage, and reinstall the engine under cover sub-assembly No.1 (pre runner and 4WD type).
    Posted by ToyotaPartsNow Specialist
    See expert answers on similar Knock Sensor
    Q:
    What components need to be removed after draining the coolant for the 2007 Toyota Solara? Posted by Customer
    A:
    Remove the air cleaner cap along with the air cleaner hose, followed by the throttle body assembly and the intake manifold by taking out 5 bolts and 2 nuts.
    Posted by ToyotaPartsNow Specialist
    See expert answers on similar Knock Sensor
    Q:
    Is there any special instruction regarding the bolts during installation for the 2009 Toyota Sienna? Posted by Customer
    A:
    Ensure not to apply oil to the bolts.
    Posted by ToyotaPartsNow Specialist
    See expert answers on similar Knock Sensor
    Q:
    What components need to be removed to access the knock sensor for the 2004 Toyota Sienna? Posted by Customer
    A:
    Remove the front wiper arm head cap, both front wiper arms (LH and RH), the cowl top ventilator louver sub-assembly, the windshield wiper motor assembly, the cowl top to cowl brace inner No.1, the cowl top panel sub-assembly outer front, the V-bank cover sub-assembly, the air cleaner cap sub-assembly, the emission control valve set, the intake air surge tank, and the intake manifold.
    Posted by ToyotaPartsNow Specialist
    See expert answers on similar Knock Sensor
    Q:
    What should be removed after discharging the fuel system pressure for the 2007 Toyota Sienna? Posted by Customer
    A:
    Remove the V-bank cover sub-assembly.
    Posted by ToyotaPartsNow Specialist
    See expert answers on similar Knock Sensor
    Q:
    What should be done after removing the No. 4 air injection system hose for the 2008 Toyota Sequoia? Posted by Customer
    A:
    Finally, disconnect the 2 knock sensor connectors, and remove the 2 nuts along with the 2 knock sensors.
    Posted by ToyotaPartsNow Specialist
    See expert answers on similar Knock Sensor
    Q:
    What is the next step after installing the water outlet pipe for the 2007 Toyota Tundra? Posted by Customer
    A:
    Install the cylinder head sub-assembly RH for Bank 1.
    Posted by ToyotaPartsNow Specialist
    See expert answers on similar Knock Sensor
    Q:
    What is the next step after installing the knock sensor for the 2010 Toyota Yaris? Posted by Customer
    A:
    Place a new gasket onto the intake manifold and install it using 3 bolts and 2 nuts, ensuring a torque of 30 Nm (304 kgf-cm, 22 ft-lbf).
    Posted by ToyotaPartsNow Specialist
    See expert answers on similar Knock Sensor
    Q:
    What is the required torque setting for the Knock Sensor for the 2009 Toyota Venza? Posted by Customer
    A:
    The torque should be set to 20 Nm (204 kgf-cm, 15 ft-lbf).
    Posted by ToyotaPartsNow Specialist
    See expert answers on similar Knock Sensor
    Q:
    What are the final steps to complete the installation for the 2008 Toyota Tacoma? Posted by Customer
    A:
    Connect the cable to the negative battery terminal with a torque of 3.9 Nm (40 kgf-cm, 35 in-lbf), add engine coolant, check for engine coolant leakage, check for fuel leakage, and install the engine under cover sub-assembly No.1 for 4WD and Pre-Runner models.
    Posted by ToyotaPartsNow Specialist
    See expert answers on similar Knock Sensor
    Q:
    What is the procedure for the intake manifold for the 2009 Toyota Tacoma? Posted by Customer
    A:
    Place a new gasket and attach it using 5 bolts and 2 nuts, torquing to 25 Nm (255 kgf-cm, 18 ft-lbf).
    Posted by ToyotaPartsNow Specialist
    See expert answers on similar Knock Sensor
    Q:
    What is the first step to install the knock sensor for the 2008 Toyota Yaris? Posted by Customer
    A:
    Secure it with the nut, ensuring a torque of 20 Nm (204 kgf-cm, 15 ft-lbf).
    Posted by ToyotaPartsNow Specialist
    See expert answers on similar Knock Sensor
    Q:
    How should the engine mounting stay RH be installed for the 2006 Toyota Sienna? Posted by Customer
    A:
    Install it with a torque of 23 N.m (235 kgf.cm, 17 ft.lbf).
    Posted by ToyotaPartsNow Specialist
    See expert answers on similar Knock Sensor
    Q:
    What components need to be removed after draining the coolant for the 2007 Toyota Yaris? Posted by Customer
    A:
    Remove the cylinder head cover No. 2, then take off the air cleaner cap sub-assembly along with air cleaner hose No. 1.
    Posted by ToyotaPartsNow Specialist
    See expert answers on similar Knock Sensor
    Q:
    How should the intake manifold be installed for the 2006 Toyota Solara? Posted by Customer
    A:
    Use the 5 bolts and 2 nuts, torqued to 30 N.m (306 kgf.cm, 22 ft.lbf).
    Posted by ToyotaPartsNow Specialist
    See expert answers on similar Knock Sensor
    Q:
    What is the next step after connecting the sensor connectors for the 2009 Toyota Tundra? Posted by Customer
    A:
    Install the No. 1 water outlet pipe with the bolt and 2 nuts, applying a torque of 10 Nm (102 kgf-cm, 7 ft-lbf), and install the 4 wire harness clamps.
    Posted by ToyotaPartsNow Specialist
    See expert answers on similar Knock Sensor
    Q:
    What is the next step after draining the coolant for the 2009 Toyota Yaris? Posted by Customer
    A:
    Remove the cylinder head cover No. 2.
    Posted by ToyotaPartsNow Specialist
    See expert answers on similar Knock Sensor
    If you have any questions about this product, please don't hesitate to ask us. We will be happy to help you!

OEM Toyota 89615-06010, Excellent Performance and Perfect Fitment

To ensure reliability, purchase Toyota part # 89615-06010 Knock Sensor. It is sometimes referred to as Toyota Knock Sensor. OEM parts are unrivaled in terms of quality. They go through extensive quality control inspections and are produced in accordance with Toyota's official factory specifications. All of these remove defects and imperfections. So you can relax knowing they promise exceptional lifespan and flawless fitment.

ToyotaPartsNow.com is a leading supplier of genuine Toyota parts such as Toyota 8961506010 Knock Sensor. At ToyotaPartsNow.com, we have a wide variety of OEM Toyota parts available at competitive prices. Our comprehensive range of genuine Toyota parts come with a manufacturer's warranty for peace of mind. We also prioritize customer satisfaction, providing a hassle-free return policy and expedited delivery for all our parts. For detailed Toyota parts information, click here.
Choose ToyotaPartsNow for discounted prices, exceptional service and fast delivery