My Garage
Cart
Make sure this part fits

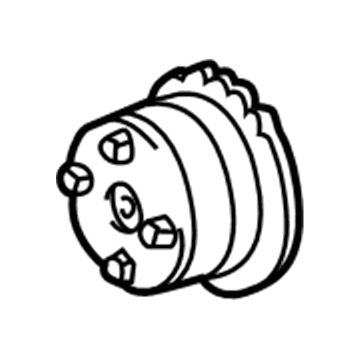
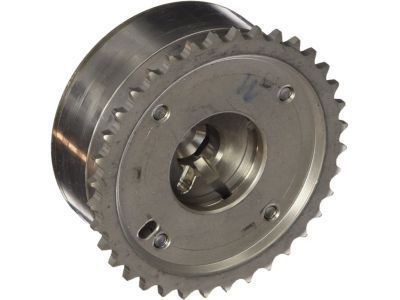
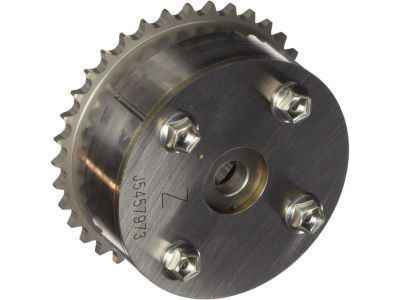
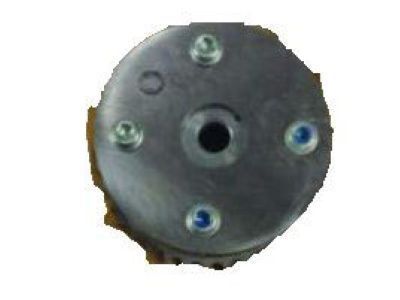
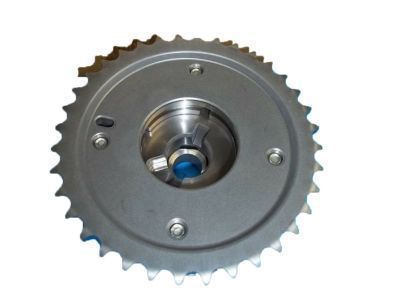
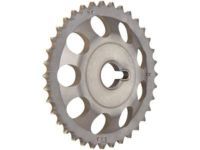
Toyota 13050-0D010
Timing Gear, Driver Side

1998-2008 Toyota 130500D010

Customer Questions & Expert Answers (4)
Toyota 13050-0D010 Timing Gear, Driver Side
  • Part Description
    Gear Assembly, Camshaft; Engine Timing Camshaft Sprocket, Left; VVT Sprocket; Timing Sprocket; Cam Gear
  • Position
    Driver Side
  • Replaces
    13050-22011, 13050-22010, 13050-22012
  • Manufacturer
    Toyota
Make sure this part fits
$286.46 MSRP: $409.01
You Save: $122.55 (30%)
Ships in 1-3 Business Days
1
ADD TO CART
  • Related Parts
  • Product Specifications
  • Vehicle Fitment
  • Customer Questions & Expert Answers
  • Product Specifications

    BrandGenuine Toyota
    Manufacturer Part Number13050-0D010
    Part DescriptionGear Assembly, Camshaft; Engine Timing Camshaft Sprocket, Left; VVT Sprocket; Timing Sprocket; Cam Gear
    Other NamesCamshaft Gear; Intake Gear
    Item Dimensions4.5 x 4.5 x 2.0 inches
    Item Weight2.40 Pounds
    PositionDriver Side
    ConditionNew
    Replaces13050-22011, 13050-22010, 13050-22012
    ManufacturerToyota
    SKU13050-0D010
    WarrantyThis genuine Toyota part is guaranteed by Toyota's factory warranty.
    Shipping & ReturnShipping Policy Return Policy
    Warning: California's Proposition 65
  • Vehicle Fitment

    Year Make Model Trim Engine
    2000-2005 Toyota CelicaGT, GTS4 Cyl 1.8 L GAS
    2005-2006, 1998-2002 Toyota CorollaCE, LE, S, VE, XRS4 Cyl 1.8 L GAS
    2000-2005 Toyota MR2 SpyderBase4 Cyl 1.8 L GAS
    2003-2008 Toyota MatrixBase, XR, XRS4 Cyl 1.8 L GAS
  • Customer Questions & Expert Answers

    Q:
    Is 13050-0D010 a good match for my car? Posted by ToyotaPartsNow Specialist
    A:
    Find out if part number 13050-0D010 is the right fit for your car by Selecting Your Vehicle model.
    Posted by ToyotaPartsNow Specialist
    Q:
    How do you install the valve timing controller assembly and Cam Gear on Toyota Celica? Posted by Customer
    A:
    Start by application of engine oil to a 16 millimeter zone beginning at the intake camshaft tip then install the valve timing controller assembly after aligning its timing mark to the knock pin and fitting onto the camshaft without applying excessive force. Align the knock pin opening of the camshaft timing sprocket to the knock pin and exhaust the sprocket by placing it on the camshaft before attaching the timing sprocket bolt for now. Use a wrench to hold the hexagon wrench head of the camshaft while tightening the timing sprocket bolt with 45 Nm for 1ZZ-FE and 54 Nm for 2ZZ-GE. The mechanic positions No. 1 cylinder at TDC/compression through hexagonal wrench head camshaft adjustment until both camshaft timing sprocket point marks align. A crankshaft pulley bolt subsequently sets the key at its highest point. Attach both bolts to secure the chain vibration damper and tighten them to 11 Nm (113 kgf-cm, 8 ft. lbs.) for 1ZZ-FE or 20.5 Nm (209 kgf-cm, 15 ft. lbs.) for 2ZZ-GE. When installing the chain in the crankshaft timing sprocket position the yellow link against the timing mark while using Special Service Tool: 09223-22010 if needed, also note that 1ZZ-FE requires the yellow links on camshaft timing sprockets alignment while 2ZZ-GE needs orange links alignment. Before proceeding install the chain-grip slipper with its bolt by tightening it to 18.5 Nm for 1ZZ-FE or 20.5 Nm for 2ZZ-GE. Additionally make sure the slipper can move to catch on the cylinder head stopper without spinning the crankshaft. Position the crank angle sensor plate with its "F" mark pointed toward the front side. 1ZZ-FE owners must replace the old packing material (FIPG) from the timing chain cover before inserting new packing material (Part No. 08826-00100 or equivalent) with a nozzle opening size of 1.5 mm for a 3-minute assembly period. Mount pieces of Sealing Packing (Part No. 08826-00080 or equivalent) at two locations on the unit before installing the timing chain cover along with the O-ring and water pump that contains 17 bolts and nut and ensure uniform torquing to specified values. The installation of timing chain covers and water pumps for 2ZZ-GE must follow the same procedure as before but with proper seal packing application and 19 bolt uniform tightening. The RH engine mounting bracket installation requires precise torque values for both engine types before adding the drive belt tensioner where leaks should be checked followed by torquing to the specified value. Mount the crankshaft position sensor along with the crankshaft pulley through the use of Special Service Tools 09213-70011 and 09330-00021 with two nuts while tightening them to their specified torque points. The chain tensioner installation includes placement of its O-ring in proper position followed by crankshaft rotation to establish the slipper position. Use the crankshaft pulley groove to check valve timing alignment at timing mark "0" while confirming the camshaft timing sprocket alignment. Installation of cylinder head cover must occur using proper torque values while connecting PCV hoses and adding the ignition coil to 1ZZ-FE. The process of installing the cylinder head cover for 2ZZ-GE requires ventilation hose connection and ignition coil assembly while maintaining the same installation sequence. The mounting insulator for the RH engine must be installed with the correct torque values before the PS pump and generator receive their installation alongside new drive belt and under cover and front wheel and engine coolant filling and seal installation before starting the engine for leak testing.
    Posted by ToyotaPartsNow Specialist
    Q:
    How do you install the valve timing controller assembly and Cam Gear on Toyota Celica? Posted by Customer
    A:
    Oiling the intake camshaft tip and extending it 16mm allows for correct installation of the valve timing controller assembly by setting its timing mark to match the knock pin before mounting onto the camshaft without excessive force. Set the knock pin hole on the camshaft timing sprocket to align with the camshaft knock pin before you use the sprocket to exhaust the camshaft and then install a temporary timing sprocket bolt. Use a wrench to hold the hexagon wrench head of the camshaft before tightening the timing sprocket bolt to 54 Nm (551 kgf-cm, 40 ft-lbf). To position the No.1 cylinder at TDC/compression stage the hexagonal wrench head portion of camshafts needs adjustment for point mark alignment on camshaft timing sprockets which enables continuous rotation of the crankshaft using a crankshaft pulley bolt until the key on the crankshaft faces upwards. Wind the chain vibration damper into place using two bolts which should reach a torque of 9.0 Nm (92 kgf-cm, 80 in.-lbf) for 1ZZ-FE and 20.5 Nm (209 kgf-cm, 15 ft-lbf) for 2ZZ-GE. The timing chain installation for the crankshaft sprocket requires alignment of the yellow link to the timing mark while using Special Service Tool: 09223-22010 only when needed. For 1ZZ-FE engines align the yellow links on camshaft timing sprockets while 2ZZ-GE engines need to align the orange links. Install the chain tensioner slipper with bolt to achieve a torque value of 18.5 Nm (189 kgf-cm, 14 ft-lbf) for 1ZZ-FE or 20.5 Nm (209 kgf-cm, 15 ft-lbf) for 2ZZ-GE. While doing this check that the slipper moves to engage on the cylinder head stopper while avoiding crankshaft rotation. Installation of the crank angle sensor plate requires "F" facing forward while for 1ZZ-FE you must replace packing material from the timing chain cover and water pump contact areas before cleaning thoroughly with 1.5 mm nozzle seal packing (Part No. 08826-00100 or equivalent). Assembly must complete within 3 minutes. Secure the timing chain cover alongside the O-ring by using 16 bolts and 2 nuts which need uniform tightening to appropriate torque values while applying Part No. 08826-00080 or equivalent seal packing at 2 locations. The 2ZZ-GE installation process for timing chain cover and water pump requires the same method as before with proper seal packing techniques and balanced bolt tightening process. Fitting up 2ZZ-GE requires the exhaust manifold alongside the exhaust manifold stay and front exhaust pipe while 1ZZ-FE uses the RH engine mounting bracket which needs seal packing (Part No. 08826-00080 or equivalent) before torque reaches 47 Nm (479 kgf-cm, 35 ft-lbf). For 2ZZ-GE mount the normal right engine bracket by using 4 bolts that require 49 Nm (500 kgf-cm, 36 ft-lbf) torque. The drive belt tensioner should receive inspection for leakage and cracking before its bolts and nut receive their specified torque values. Use Special Service Tool 09960-10010 (or its equivalent tools 09962-01000, 09963-01000) for installing the crankshaft pulley bolt and achieve the specified torque measurements. Install the chain tensioner while achieving correct tension before performing valve timing checks by positioning the crankshaft pulley at mark "0" with synchronized camshaft timing sprocket marks. To install the cylinder head cover of 1ZZ-FE, use seal packing (Part No. 08826-00080 or equivalent) and secure it properly while torquing all bolts and nuts before connecting PCV hoses and the ignition coil. The installation process for the 2ZZ-GE cylinder head cover should proceed similarly with careful attention given to proper torques and connections. The RH engine mounting insulator requires installation in both engine types with torque set to 52 Nm (530 kgf-cm, 38 ft-lbf). The installation process includes attaching the PS pump to the generator and drive belt and air switching valve for 2ZZ-GE and RH engine under cover before the RH front wheel goes on. In conclusion, add the motor coolant before installing front fender apron seals and upper radiator support seals while testing for any coolant leakage when starting the engine.
    Posted by ToyotaPartsNow Specialist
    Q:
    How do you check valve timing for the 2004 Toyota Celica? Posted by Customer
    A:
    Align the crankshaft pulley groove with timing mark "0" and ensure the camshaft timing sprockets are in a straight line.
    Posted by ToyotaPartsNow Specialist
    See expert answers on similar Cam Gear
    If you have any questions about this product, please don't hesitate to ask us. We will be happy to help you!

OEM Toyota 13050-0D010, Excellent Performance and Perfect Fitment

To ensure reliability, purchase Toyota part # 13050-0D010 Timing Gear, Driver Side. It is sometimes referred to as Toyota Cam Gear, Toyota Variable Timing Sprocket. OEM parts are unrivaled in terms of quality. They go through extensive quality control inspections and are produced in accordance with Toyota's official factory specifications. All of these remove defects and imperfections. So you can relax knowing they promise exceptional lifespan and flawless fitment.

ToyotaPartsNow.com is a leading supplier of genuine Toyota parts such as Toyota 130500D010 Timing Gear, Driver Side. At ToyotaPartsNow.com, we have a wide variety of OEM Toyota parts available at competitive prices. Our comprehensive range of genuine Toyota parts come with a manufacturer's warranty for peace of mind. We also prioritize customer satisfaction, providing a hassle-free return policy and expedited delivery for all our parts. For detailed Toyota parts information, click here.
Choose ToyotaPartsNow for discounted prices, exceptional service and fast delivery