My Garage
Cart
Make sure this part fits

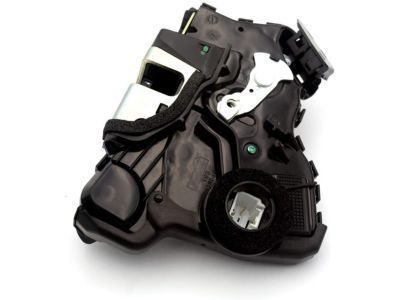
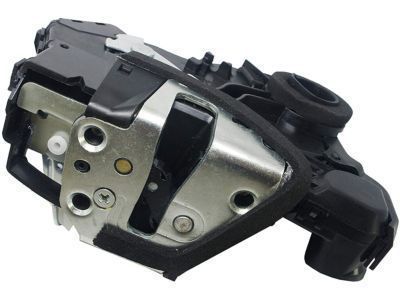
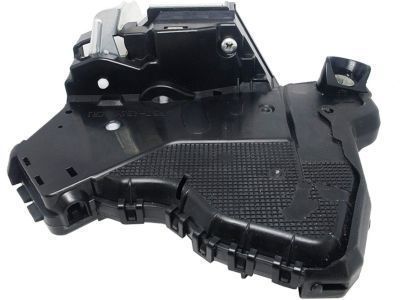
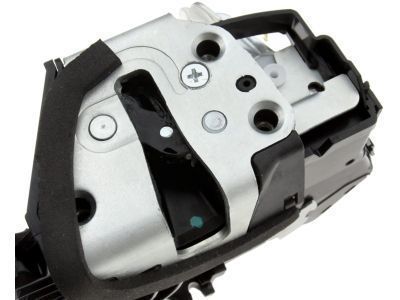
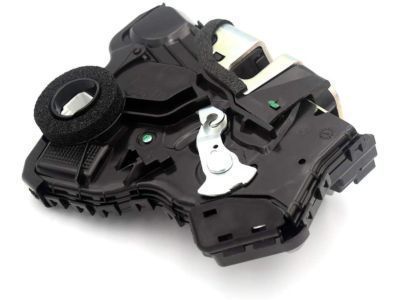
Toyota 69030-0C050
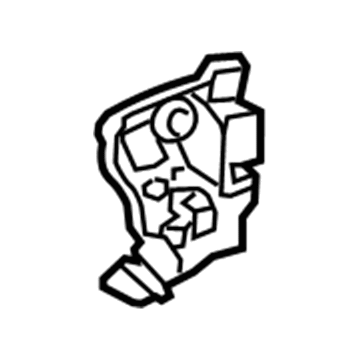
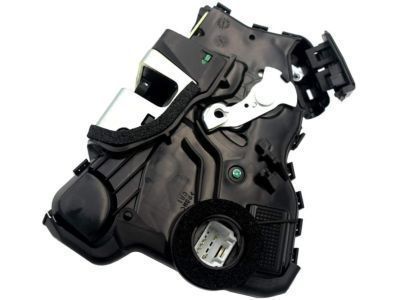
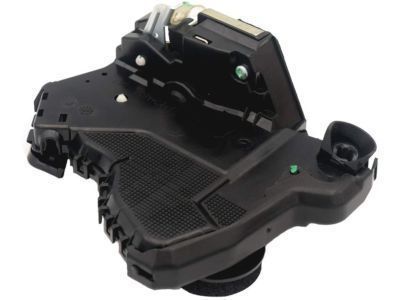
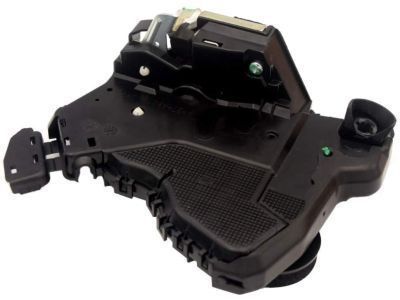
Lock Assembly, Front Door W/Motor, Passenger Side

2007-2022 Toyota 690300C050

Customer Questions & Expert Answers (34)
Toyota 69030-0C050 Lock Assembly, Front Door W/Motor, Passenger Side
  • Part Description
    Lock Assembly, Front Door W; Passenger Side; Door Lock Actuator Motor; Actuator; Lock
  • Position
    Passenger Side
  • Replaces
    69030-06200
  • Manufacturer
    Toyota
Make sure this part fits
$248.02 MSRP: $354.11
You Save: $106.09 (30%)
1
ADD TO CART
  • Related Parts
  • Product Specifications
  • Vehicle Fitment
  • Customer Questions & Expert Answers
  • Product Specifications

    BrandGenuine Toyota
    Manufacturer Part Number69030-0C050
    Part DescriptionLock Assembly, Front Door W; Passenger Side; Door Lock Actuator Motor; Actuator; Lock
    Item Dimensions8.2 x 5.7 x 5.7 inches
    Item Weight1.90 Pounds
    PositionPassenger Side
    ConditionNew
    Fitment TypeDirect Replacement
    Replaces69030-06200
    ManufacturerToyota
    SKU69030-0C050
    WarrantyThis genuine Toyota part is guaranteed by Toyota's factory warranty.
    Shipping & ReturnShipping Policy Return Policy
    Warning: California's Proposition 65
  • Vehicle Fitment

    Year Make Model Trim Engine
    2007-2017 Toyota CamryBase, CE, Hybrid, Hybrid LE, Hybrid SE, Hybrid XLE, L, LE, SE, SE Sport, Special Edition, XLE, XSE4 Cyl 2.4 L FULL HYBRID EV-GAS (FHEV), 4 Cyl 2.4 L GAS, 4 Cyl 2.5 L FULL HYBRID EV-GAS (FHEV), 4 Cyl 2.5 L GAS, 6 Cyl 3.5 L GAS
    2009-2013 Toyota CorollaBase, L, LE, S, XLE, XRS4 Cyl 1.8 L GAS, 4 Cyl 2.4 L GAS
    2010-2013 Toyota HighlanderBase, Limited, Plus, SE, Sport4 Cyl 2.7 L GAS, 6 Cyl 3.5 L GAS
    2009-2013 Toyota MatrixBase, S, XRS4 Cyl 1.8 L GAS, 4 Cyl 2.4 L GAS
    2009-2018 Toyota RAV4Adventure, Base, Hybrid Limited, Hybrid SE, Hybrid XLE, LE, Limited, Platinum, SE, Sport, XLE4 Cyl 2.5 L FULL HYBRID EV-GAS (FHEV), 4 Cyl 2.5 L GAS, 6 Cyl 3.5 L GAS
    2008-2022 Toyota SequoiaLimited, Nightshade, Platinum, SR5, TRD Pro, TRD Sport8 Cyl 4.6 L GAS, 8 Cyl 4.7 L GAS, 8 Cyl 5.7 L FLEX, 8 Cyl 5.7 L GAS
    2011-2014 Toyota SiennaBase, L, LE, Limited, SE, XLE4 Cyl 2.7 L GAS, 6 Cyl 3.5 L GAS
    2007-2021 Toyota Tundra1794 Edition, Base, Limited, Nightshade, Platinum, SR, SR5, Trail, TRD Pro6 Cyl 4.0 L GAS, 8 Cyl 4.6 L GAS, 8 Cyl 4.7 L GAS, 8 Cyl 5.7 L FLEX, 8 Cyl 5.7 L GAS
    2009-2015 Toyota VenzaBase, LE, Limited, XLE4 Cyl 2.7 L GAS, 6 Cyl 3.5 L GAS
  • Customer Questions & Expert Answers

    Q:
    Is 69030-0C050 a good match for my car? Posted by ToyotaPartsNow Specialist
    A:
    Find out if part number 69030-0C050 is the right fit for your car by Selecting Your Vehicle model.
    Posted by ToyotaPartsNow Specialist
    Q:
    How to service and repair the power door lock actuator for the luggage compartment door on Toyota Camry? Posted by Customer
    A:
    Service personnel should begin power door lock actuator work on the luggage compartment door by taking off the door cover. The luggage compartment door lock assembly must be detached through a rod and connector disconnection procedure followed by removal of two securing bolts.
    Posted by ToyotaPartsNow Specialist
    Q:
    How to install the front door lock assembly on Toyota Camry? Posted by Customer
    A:
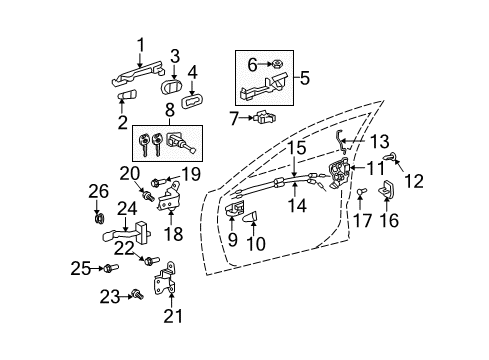
    Start by replacing the door lock wiring harness seal with a new one before front door lock assembly installation only if using a previously removed assembly. During this step remove all trace of grease and dust from the surface where the seal attaches to prevent water damage and equipment failure. Start the installation with the front door inside locking cable assembly before securing the 3 claws on the assembly and proceed with adding the front door lock remote control cable assembly. The sliding parts of the front door lock assembly require application of MP grease before installing a new door lock wiring harness seal. The front door lock open rod should be inserted into the assembly before placing it into the front door outside handle frame to achieve proper locking. The front door lock assembly should receive three screws through use of a "torx" socket wrench (T30) which needs torquing to 5.0 Nm (51 kgf-cm, 44 in-lbf) before installer connects it to the cable routing. The installation process includes the sequence of front door outside handle cover, front door rear lower frame sub-assembly, front door glass sub-assembly, front door service hole cover, front No. 1 speaker assembly, front door inner glass Weather Strip, front door inside handle sub-assembly, front door trim board sub-assembly, courtesy light assembly, assist grip cover, front door inside handle bezel plug and front door lower frame bracket garnish.
    Posted by ToyotaPartsNow Specialist
    Q:
    How to install the front door lock components on Toyota Corolla? Posted by Customer
    A:
    Installing front door lock components should start by installing the front door inside locking cable assembly for both configurations. The application of the 3 claws should only happen if the configuration includes this feature. Proceed to install the front door lock remote control cable assembly according to both configuration types. Insert the front door lock open rod then apply the "TORX" socket wrench (T30) to tighten all three screws with 5.0 Nm (51 kgf-cm, 44 in-lbf) torque. Before installing this assembly, apply MP grease to all sliding elements. When using a front door lock assembly equipped with power door lock capabilities the door lock wiring harness needs a new seal which should be placed properly while the surface remains free of grease and dust to block water intrusion and power lock malfunction. Install the front door lock open rod after applying MP grease and then connect it securely before tightening the assembly with the mentioned torque specifications. Begin by installing the front door outside handle cover and the rear lower frame sub-assembly and glass run and No. 2 stiffener cushion together with the glass sub-assembly, service hole cover, trim bracket, inner glass Weather Strip, inside handle sub-assembly, trim board sub-assembly, front armrest upper base panel for both configurations according to sequence. Complete this task by installing the front door inside handle bezel and the rear door window regulator handle assembly if needed.
    Posted by ToyotaPartsNow Specialist
    Q:
    How to remove the front door lock actuator on Toyota Matrix? Posted by Customer
    A:
    The first step to disassemble the front door lock actuator requires removal of the front door window regulator handle assembly for vehicles without power windows. Driveouts start with the front door bezel on the inside before proceeding to detach the upper base panel from the front armrest either with or without power windows enabled. The maintenance process begins with separating the front door trim board sub-assembly along with the front door inside handle sub-assembly. Next you should take out the front door inner glass Weather Strip followed by the front door service hole cover only when applicable even when the power door lock is present. Start by removing the front door glass sub-assembly while taking into account power window configuration then proceed with front door glass run followed by the front door rear lower frame sub-assembly. You must first eliminate the outside handle cover from the front door exterior and afterward detach both the outside handle assembly from the front door. The front door lock assembly can be separated with the cables by sliding the assembly down after using a "TORX" socket wrench (T30) to unscrew the 3 screws. While removing the door lock wiring harness seal must be done only when the vehicle has power door lock capabilities. The front door lock remote control cable assembly needs to be taken off without considering the presence of a power door lock. After taping the screwdriver tip, use it to disengage 3 claws from the inside locking cable assembly before extracting the assembly component.
    Posted by ToyotaPartsNow Specialist
    Q:
    How to remove the front door lock actuator on Toyota Sequoia? Posted by Customer
    A:
    The first step to remove the front door lock actuator requires front door lower frame bracket garnish separation along with front door lower frame bracket garnish for 14 speakers. After the front door inside handle bezel plug comes out you need to detach the front armrest base upper panel. The next step involves separating both the front door trim sub-assembly from the front door trim bracket No. 1. The service hole cover and glass run and glass sub-assembly of the front door need to be taken off first. Remove the front door frame rear lower sub-assembly as the next step. A "TORX" socket wrench T30 allows users to remove the front door lock by unscrewing three screws before pulling down the lock to extract the open rod from the handle frame and separating the front door lock and cables as one unit. The installation starts with removing the front door lock wire harness seal then unplugging the remote control cable from the door lock and using a taped screwdriver to unlock the 3 claw-mounted cover. Take out the front door inside locking cable as the last step.
    Posted by ToyotaPartsNow Specialist
    Q:
    How to remove the front door lock actuator for the LH side of a Double Cab on Toyota Tundra? Posted by Customer
    A:
    The first step to remove the LH front door lock actuator in a Double Cab requires disconnecting the negative battery terminal cable then waiting for 90 seconds after shutting off the ignition to let the navigation system record its memory and settings before starting. The first step requires removal of the front door inside handle bezel plug together with the front armrest upper base panel and front door lower frame bracket garnish. The next step is removal of the courtesy light assembly together with the front door armrest cover and front door trim board sub-assembly. The first step requires removal of the front No. 1 door trim bracket and the front door service hole cover before taking out the front door rear lower frame sub-assembly. The work sequence includes removing the front door glass sub-assembly then following with removal of the front door lock assembly and front door lock remote control cable assembly and finishing with the front door inside locking cable assembly.
    Posted by ToyotaPartsNow Specialist
    Q:
    How to install the front door lock assembly on Toyota Venza? Posted by Customer
    A:
    The installation process for front door lock assembly starts with installing a new water-resisting seal on the connector to protect against failures related to moisture intake. Establish the front door inside locking cable assembly to the front door lock assembly before hooking the 3 claws together. The front door lock remote control cable assembly needs to be put in place on the front door lock assembly while applying MP grease to its sliding components. The new door lock wiring harness seal and the front door lock open rod should be installed while ensuring a secure connection of the rod. Install three bedded bolts to the front door lock assembly using a T30 "TORX" socket wrench tool and tighten them to 5.0 Nm (51 kgf-cm, 44 in-lbf). The application of Toyota Genuine Adhesive 1324, Three Bond 1324, or the equivalent product must be done to the bolt thread followed by tightening the bolts. At this stage, fix first the front door outside handle cover with lock cylinder assembly before installing the front door rear lower frame sub-assembly and then proceed with installing the front door glass run and front door glass sub-assembly and finally the front door service hole cover. The service procedure requires installation of the door side Air Bag sensor together with the front door inside handle sub-assembly and front door trim board sub-assembly. After installing the door armrest base panels you should add the power window regulator master switch assembly followed by the power window regulator switch assembly to the front passenger side. To complete the installation you must plug in the front door inside handle bezel while connecting the cable to the negative terminal then run an initialization of the power window control before checking the SRS warning light.
    Posted by ToyotaPartsNow Specialist
    Q:
    How to remove the front door lock actuator for the LH side of a Regular Cab on Toyota Tundra? Posted by Customer
    A:
    The front door lock actuator removal process for the LH side of Regular Cab starts with negative battery terminal cable removal followed by a minimum 90-second delay after the ignition switch operation ends to allow the navigation system to store memory and settings. You must remove the front door inside handle bezel plug LH followed by the front armrest upper base panel LH and the front door window regulator handle assembly (without power window). The team should remove the front door lower frame bracket garnish LH followed by the courtesy light assembly and front door armrest cover LH. The following sequence requires you to eliminate the front door trim board sub-assembly LH followed by the front No. 1 door trim bracket before you take out the front door service hole cover LH and front door rear lower frame sub-assembly LH. The technician needs to remove the front door glass sub-assembly LH followed by the front door lock assembly LH and the front door lock remote control cable assembly LH before handling the front door inside locking cable assembly LH.
    Posted by ToyotaPartsNow Specialist
    Q:
    What should be done after removing the initial components for the 2010 Toyota Camry? Posted by Customer
    A:
    Disconnect the connector from the front door lock assembly, then use a "torx" socket wrench (T30) to remove the 3 screws.
    Posted by ToyotaPartsNow Specialist
    See expert answers on similar Door Lock Actuator
    Q:
    What is the next step after removing the luggage compartment door cover for the 2009 Toyota Camry? Posted by Customer
    A:
    Next, remove the luggage compartment door lock assembly by disconnecting the rod and the connector.
    Posted by ToyotaPartsNow Specialist
    See expert answers on similar Door Lock Actuator
    Q:
    What is the next step after removing the outside handle cover for the 2009 Toyota Camry? Posted by Customer
    A:
    Disconnect the connector from the front door lock assembly.
    Posted by ToyotaPartsNow Specialist
    See expert answers on similar Door Lock Actuator
    Q:
    What is the next component to remove after the rear door inside handle bezel for the 2009 Toyota Corolla? Posted by Customer
    A:
    Remove the rear door armrest upper base panel.
    Posted by ToyotaPartsNow Specialist
    See expert answers on similar Door Lock Actuator
    Q:
    What should be done after connecting the connector for the 2010 Toyota Camry? Posted by Customer
    A:
    Proceed to install the front door outside handle cover, front door rear lower frame sub-assembly, front door glass sub-assembly, front door service hole cover, front No. 1 speaker assembly, front door inner glass weatherstrip, front door inside handle sub-assembly, front door trim board sub-assembly, courtesy light assembly, assist grip cover, front door inside handle bezel plug, and front door lower frame bracket garnish.
    Posted by ToyotaPartsNow Specialist
    See expert answers on similar Door Lock
    Q:
    What should be done after removing the assembly and cables for the 2008 Toyota Camry? Posted by Customer
    A:
    Detach the front door lock open rod from the lock assembly, take off the door lock wiring harness seal, and remove the front door lock remote control cable assembly.
    Posted by ToyotaPartsNow Specialist
    See expert answers on similar Door Lock Actuator
    Q:
    What components should be installed after the rear door lock assembly for the 2009 Toyota Corolla? Posted by Customer
    A:
    Proceed to install the rear door glass run, rear door glass sub-assembly, rear door quarter window glass, rear door window division bar sub-assembly, rear door weatherstrip, rear door service hole cover, door trim bracket, rear door inner glass weatherstrip, rear door inside handle sub-assembly, rear door trim board sub-assembly, rear door armrest upper base panel for both configurations, rear door inside handle bezel, and rear door window regulator handle assembly for the non-power window version.
    Posted by ToyotaPartsNow Specialist
    See expert answers on similar Door Lock
    Q:
    What should be done after ensuring the seal is properly prepared for the 2009 Toyota Camry? Posted by Customer
    A:
    Begin by installing the front door inside locking cable assembly and engaging the 3 claws.
    Posted by ToyotaPartsNow Specialist
    See expert answers on similar Door Lock
    Q:
    What tool is needed to install the assembly for the 2008 Toyota Camry? Posted by Customer
    A:
    A "torx" socket wrench (T30).
    Posted by ToyotaPartsNow Specialist
    See expert answers on similar Door Lock
    Q:
    How do you remove the front door lock assembly for the 2009 Toyota Corolla? Posted by Customer
    A:
    Use a "TORX" socket wrench (T30) to remove the 3 screws, slide the assembly downward, and take out the front door lock assembly and cables as a unit.
    Posted by ToyotaPartsNow Specialist
    See expert answers on similar Door Lock Actuator
    Q:
    What is the first step to install the rear door lock components for the 2009 Toyota Matrix? Posted by Customer
    A:
    Begin by installing the rear door inside locking cable assembly for both configurations, with or without the power door lock, ensuring to engage the 3 claws if applicable.
    Posted by ToyotaPartsNow Specialist
    See expert answers on similar Door Lock
    Q:
    What should be removed after the rear door service hole cover for the 2009 Toyota Matrix? Posted by Customer
    A:
    Continue by removing the rear door glass run, rear door rear window guide sub-assembly, rear door rear guide seal, and the rear door glass sub-assembly.
    Posted by ToyotaPartsNow Specialist
    See expert answers on similar Door Lock Actuator
    Q:
    What should be placed onto the rear door lock before inserting it for the 2009 Toyota Sequoia? Posted by Customer
    A:
    A new door lock wire harness seal.
    Posted by ToyotaPartsNow Specialist
    See expert answers on similar Door Lock
    Q:
    What should be done for the front door lock assembly without the power door lock for the 2009 Toyota Matrix? Posted by Customer
    A:
    Apply MP grease to the sliding parts, insert the front door lock open rod, confirm its secure connection, and use a "TORX" socket wrench (T30) to install the assembly with 3 screws, torqued to 5.0 Nm (51 kgf-cm, 44 in-lbf).
    Posted by ToyotaPartsNow Specialist
    See expert answers on similar Door Lock
    Q:
    What should be removed after the rear door frame garnish for the 2008 Toyota Sequoia? Posted by Customer
    A:
    Remove the rear door armrest base upper panel.
    Posted by ToyotaPartsNow Specialist
    See expert answers on similar Door Lock Actuator
    Q:
    What should be applied to the threads of the screws before installation for the 2009 Toyota Sequoia? Posted by Customer
    A:
    Adhesive using Toyota Genuine Adhesive 1324, Three Bond 1324, or an equivalent.
    Posted by ToyotaPartsNow Specialist
    See expert answers on similar Door Lock
    Q:
    What is the next step after applying grease for the 2008 Toyota Sequoia? Posted by Customer
    A:
    Install the rear door inside locking cable.
    Posted by ToyotaPartsNow Specialist
    See expert answers on similar Door Lock
    Q:
    What components are removed after the service hole cover for the 2009 Toyota Tundra? Posted by Customer
    A:
    Remove the front door rear lower frame sub-assembly and the front door glass sub-assembly.
    Posted by ToyotaPartsNow Specialist
    See expert answers on similar Door Lock Actuator
    Q:
    What should be done after removing the screws from the rear door lock for the 2009 Toyota Sequoia? Posted by Customer
    A:
    Move the rear door lock downward and pull the release plate out of the rear door outside handle frame.
    Posted by ToyotaPartsNow Specialist
    See expert answers on similar Door Lock Actuator
    Q:
    What are the next components to remove for the 2008 Toyota Tundra? Posted by Customer
    A:
    Remove the rear No. 2 door trim bracket, the rear door service hole cover LH, the rear door glass run LH, and the rear door window rear lower frame sub-assembly LH.
    Posted by ToyotaPartsNow Specialist
    See expert answers on similar Door Lock Actuator
    Q:
    What is the first step to install the rear door lock for the LH side of a Double Cab for the 2008 Toyota Tundra? Posted by Customer
    A:
    Begin by installing the rear door inside locking cable assembly LH.
    Posted by ToyotaPartsNow Specialist
    See expert answers on similar Door Lock
    Q:
    What is the next step after detaching the wiring harness seal for the 2009 Toyota Venza? Posted by Customer
    A:
    Disengage the claw with a screwdriver (taping the tip for protection).
    Posted by ToyotaPartsNow Specialist
    See expert answers on similar Door Lock Actuator
    Q:
    What is the final step after all components are installed for the 2008 Toyota Tundra? Posted by Customer
    A:
    Connect the cable to the negative battery terminal, noting that some systems may require initialization after reconnection.
    Posted by ToyotaPartsNow Specialist
    See expert answers on similar Door Lock
    Q:
    What should be done after disconnecting the battery for the 2009 Toyota Venza? Posted by Customer
    A:
    Some systems may require initialization after reconnection.
    Posted by ToyotaPartsNow Specialist
    See expert answers on similar Door Lock Actuator
    Q:
    What components should be installed after the rear door lock assembly for the 2009 Toyota Venza? Posted by Customer
    A:
    Install the rear door glass sub-assembly, rear door window division bar sub-assembly, rear door glass run, rear door service hole cover, rear door inside handle sub-assembly, rear door trim board sub-assembly, and rear power window regulator switch assembly with the rear door armrest base panel.
    Posted by ToyotaPartsNow Specialist
    See expert answers on similar Door Lock
    If you have any questions about this product, please don't hesitate to ask us. We will be happy to help you!

OEM Toyota 69030-0C050, Excellent Performance and Perfect Fitment

To ensure reliability, purchase Toyota part # 69030-0C050 Lock Assembly, Front Door W/Motor, Passenger Side. It is sometimes referred to as Toyota Door Lock, Toyota Door Lock Actuator. OEM parts are unrivaled in terms of quality. They go through extensive quality control inspections and are produced in accordance with Toyota's official factory specifications. All of these remove defects and imperfections. So you can relax knowing they promise exceptional lifespan and flawless fitment.

ToyotaPartsNow.com is a leading supplier of genuine Toyota parts such as Toyota 690300C050 Lock Assembly, Front Door W/Motor, Passenger Side. At ToyotaPartsNow.com, we have a wide variety of OEM Toyota parts available at competitive prices. Our comprehensive range of genuine Toyota parts come with a manufacturer's warranty for peace of mind. We also prioritize customer satisfaction, providing a hassle-free return policy and expedited delivery for all our parts. For detailed Toyota parts information, click here.
Choose ToyotaPartsNow for discounted prices, exceptional service and fast delivery