My Garage
Cart
Make sure this part fits

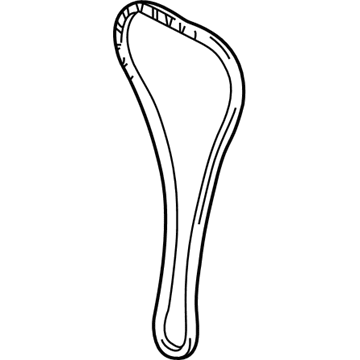
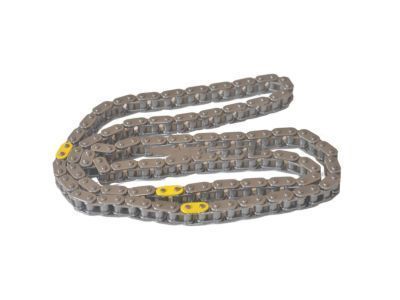
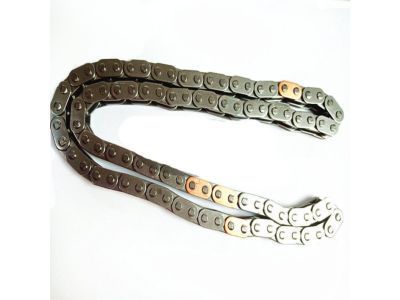
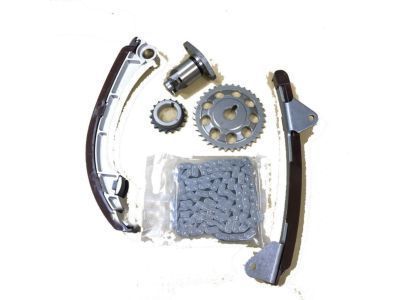
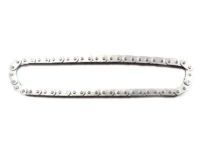
Toyota 13506-0D010
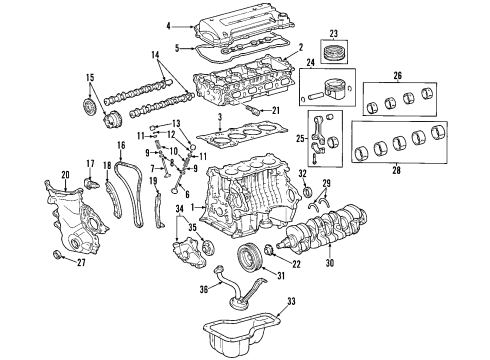
Timing Chain

1998-2008 Toyota 135060D010

Customer Questions & Expert Answers (33)
Toyota 13506-0D010 Timing Chain
  • Part Description
    Chain Sub-Assembly; Engine Timing Chain
  • Part Name Code
    13506
  • Replaces
    13506-22030, 13506-0D020
  • Manufacturer
    Toyota
Make sure this part fits
$260.60 MSRP: $372.07
You Save: $111.47 (30%)
Ships in 1-3 Business Days
1
ADD TO CART
  • Related Parts
  • Product Specifications
  • Vehicle Fitment
  • Customer Questions & Expert Answers
  • Product Specifications

    BrandGenuine Toyota
    Part Name Code13506
    Manufacturer Part Number13506-0D010
    Part DescriptionChain Sub-Assembly; Engine Timing Chain
    Manufacturer NoteENGINE NO.=5001001-9XXXXXX OR CXXXXXX
    Item Dimensions12.5 x 12.1 x 8.1 inches
    Item Weight1.20 Pounds
    ConditionNew
    Fitment TypeDirect Replacement
    Replaces13506-22030, 13506-0D020
    ManufacturerToyota
    SKU13506-0D010
    WarrantyThis genuine Toyota part is guaranteed by Toyota's factory warranty.
    Shipping & ReturnShipping Policy Return Policy
    Warning: California's Proposition 65
  • Vehicle Fitment

    Year Make Model Trim Engine
    2000-2005 Toyota CelicaGT4 Cyl 1.8 L GAS
    1998-2008 Toyota CorollaCE, LE, S, VE4 Cyl 1.8 L GAS
    2000-2005 Toyota MR2 SpyderBase4 Cyl 1.8 L GAS
    2003-2008 Toyota MatrixBase, XR4 Cyl 1.8 L GAS
  • Customer Questions & Expert Answers

    Q:
    Is 13506-0D010 a good match for my car? Posted by ToyotaPartsNow Specialist
    A:
    Find out if part number 13506-0D010 is the right fit for your car by Selecting Your Vehicle model.
    Posted by ToyotaPartsNow Specialist
    Q:
    How to inspect and replace the timing chain, sprockets, and oil seal on Toyota Celica? Posted by Customer
    A:
    You should check the timing chain length through full chain extension using vernier calipers to determine if replacement is needed. The measurement of 16 links should not exceed 122.6 mm (4.827 inch). Measuring the timing sprocket requires the chain placed around it while measuring its diameter with vernier calipers that touch chain rollers. New chain and sprocket replacements are necessary if the camshaft measures under 97.3 mm (3.831 inch) or the crankshaft measures under 51.6 mm (2.031 inch). The chain tensioner slipper and vibration damper should be replaced if wear measurement rises above 1.0 mm (0.039 inch). The plunger movement in the chain tensioner should be smooth when raising the ratchet pawl then stay locked after release. Install new oil seals on the timing chain cover by using Special Service Tool 09309-37010 to tap them into place until they reach the edge of the cover while applying MP grease to the lip of the seal. Remove the cover first if necessary. Use Special Service Tool: 09309-37010 to install the new oil seal by tapping it until it reaches the timing chain cover edge when the cover is installed. Before doing this, trim the old seal and pry out the damaged seal using a screwdriver while avoiding damage to the crankshaft.
    Posted by ToyotaPartsNow Specialist
    Q:
    How to service and repair the timing chain on Toyota Corolla? Posted by Customer
    A:
    The first step for timing chain repairs and services includes draining the engine coolant followed by the washer tank removal along with the right-hand front wheel and right-hand engine under cover and drive belt and generator. To proceed with pump detachment disconnect power steering from the engine and unscrew the pulley bolt using Special Service Tool: 09960-10010 (09962-01000, 09963-01000). The right-hand engine mounting insulator requires removal using a jack which must rest on a wooden or rubber block placed between the jack and the oil pan, while bolt removal of the A/C piping clamp should be done only if the vehicle has A/C. Start by removing the cylinder head cover with its bolts and clips and ignition coil connectors and proceed to set the No. 1 cylinder at TDC/compression by positioning the crankshaft pulley groove on the timing mark. With Special Service Tool: 09213-70011, 09330-00021 use it to remove the crankshaft pulley followed by detaching the crankshaft position sensor wiring. Continue working by taking out the drive belt tensioner right-hand engine mounting bracket chain tensioner water pump and timing chain cover while maintaining the contact surface quality. Discard the crank angle sensor plate together with the chain tensioner slipper and timing chain, crankshaft timing sprocket and chain vibration damper. Check the timing chain system for wear symptoms while you also inspect the sprocket components. Replace any faulty components. When replacing the crankshaft front oil seal Special Service Tools 09309-37010 and 09308-10010 should be used depending on whether the timing chain cover is already removed or not. Secure the chain vibration damper together with the timing chain following proper mark alignment. The installation process also requires proper sprocket alignment and No. 1 cylinder positioning at TDC/compression. Install the chain tensioner slipper while using the crank angle sensor plate and timing chain cover with water pump application of appropriate seal packing (Part No. 08826-00100 or equivalent). Secure all bolts at their specified torque values while maintaining correct placement of both the slipper and the chain. User the necessary special service tools to reinstall the right-hand engine bracket together with drive belt tensioner, crankshaft sensor, and crankshaft pulley based on torque specifications. Finish the procedure by installing the cylinder head cover along with the right-hand engine mounting insulator and power steering pump and generator plus drive belt before putting on the right-hand engine under cover right-hand front wheel and washer tank and refilling engine coolant for an engine start to search for any leaks.
    Posted by ToyotaPartsNow Specialist
    Q:
    How to install the timing chain on Toyota Corolla? Posted by Customer
    A:
    Before installing the timing chain on the 1ZZ-FE engine technicians must set the No. 1 cylinder at TDC/compression by rotating camshafts with hexagonal wrenches until camshaft timing gears point marks match then using the crankshaft pulley bolt to position the timing gear key against the oil pump point mark. Insert the timing chain onto the crankshaft timing gear so that the yellow mark link rests at the timing mark position and install the crankshaft timing gear after using Special Service Tool 09223-22010. Install the chain on the camshaft timing gears keeping the yellow mark links directly above their corresponding timing marks. A bolt should fasten the chain tensioner slipper at 18.5 Nm (189 kgf-cm, 14 ft-lbf) while installing the crankshaft position sensor plate facing forward with the "F" mark exposed. A gentle application of multipurpose grease should be used to treat the lip of a new oil seal. Then position the timing chain cover on wooden blocks after placing the tool 09223-22010 to slowly tap the oil seal until it reaches the timing chain cover edge leaving the lip clear from any foreign objects. Install the 10 bolts and 2 nuts while torquing Bolt A and nut A to 13 Nm (133 kgf-cm, 10 ft-lbf) and Bolt B to 18.5 Nm (189 kgf-cm, 14 ft-lbf). Remove any old packing material before applying a continuous bead of seal packing with a diameter between 3.5 to 4.5 mm. Fasten the stud bolt using tool "TORX" wrench socket (E8) at 9.5 Nm (97 kgf-cm, 84 in-lbf). Install the chain tensioner assembly with two 9.0 Nm tightened nuts keeping an eye on the O-ring to avoid twisting it while the tensioner receives engine oil on its O-ring which needs to be clean to begin with. While aligning the pulley set key with its key groove you should slide on the crankshaft pulley before torquing the crankshaft pulley bolt to 138 Nm (1,407 kgf-cm, 102 ft-lbf) using Special Service Tools: 09960-10010, 09962-01000, 09963-01000. To disconnect the plunger knock pin from its hook turn the crankshaft counterclockwise while clockwise motion pushes the slipper toward the plunger. The crankshaft position sensor needs a thin oil layer on its O-ring before assembly with 2 bolts reaching 9.0 Nm (92 kgf-cm, 80 in-lbf) torque specification and water pump mounting. Both the engine mounting bracket RH and V-ribbed belt tensioner assembly need these torque settings: bracket at 47 Nm (479 kgf-cm, 35 ft-lbf) and tensioner assembly with bolt secured at 69 Nm (704 kgf-cm, 51 ft-lbf) while using a nut torque of 29 Nm (296 kgf-cm, 21 ft-lbf). Place seal packing on designated locations of the cylinder head cover before installing it along with 3 clamp brackets and 9 bolts and 2 seal washers and 2 nuts. Torque Bolt A and nut A to 11 Nm (112 kgf-cm, 8 ft-lbf) and Bolt B to 9.0 Nm (92 kgf-cm, 80 in-lbf). The wiring clamps need installation followed by ventilation hose connection before adding an ignition coil assembly which requires 4 bolts torqued to 9.0 Nm (92 kgf-cm, 80 in-lbf) and an engine wire needs 2 nuts torqued to 9.0 Nm (92 kgf-cm, 80 in-lbf). Fasten the engine mounting insulator RH through 4 bolts and 2 nuts while torquing them to 52 Nm (530 kgf-cm, 38 ft-lbf) together with the oil reservoir bracket No. 1 using 2 bolts torqued to 7.8 Nm (80 kgf-cm, 69 in-lbf). Reassemble the vane pump assembly with the generator unit before placing the fan alongside installing the generator V belt. Before continuing install the battery negative terminal with 5.4 Nm of torque (55 Kg-fcm, 48 in-lbf) while inspecting for both engine coolant and oil leaks. Then add engine coolant to the system. Install the front wheel RH while using 103 Nm (1,050 kgf-cm, 76 ft-lbf) torque and cylinder head cover No. 2 with 2 clips and nuts that should be torqued to 7.0 Nm (71 kgf-cm, 62 in-lbf).
    Posted by ToyotaPartsNow Specialist
    Q:
    How to remove the timing chain on Toyota Celica? Posted by Customer
    A:
    The first step to remove the timing chain requires upper front fender apron seal removal along with upper radiator support seal and engine coolant drainage before taking off the RH front wheel and RH engine under cover. Start by removing the air switching valve from 2ZZ-GE models and then proceed to take off the drive belt along with the generator. Detaching the PS pump requires disconnecting the PS oil pressure switch connector followed by removing two nuts and through bolts before hanging the pump using a string. Uninstall the RH engine mounting insulator after first placing a jack under the engine with wood support. The 1ZZ-FE requires removing 4 bolts and 2 nuts while the 2ZZ-GE needs the removal of 5 bolts and 2 nuts. The 1ZZ-FE requires removal of its cylinder head cover by first unfastening 2 nuts, 2 clips, 4 ignition coils, 2 PCV hoses and 9 bolts with their paired seal washers and 2 nuts. The 2ZZ-GE requires removal of 4 bolts and ignition coils and 2 PCV hoses and 2 nuts and bolt and No.3 ventilation hose before taking out the No.1 ventilation pipe and gasket and completing the process by removing 9 bolts and wire harness protector. Turn the crankshaft pulley until its groove matches the timing mark "0" and verify that the camshaft timing sprocket marks also align to determine the TDC/compression of No.1 cylinder. Use Special Service Tool: 09960-10010 (09962-01000, 09963-01000) to remove the crankshaft pulley before detaching the crankshaft position sensor from the timing chain cover by taking out its two bolts. Workers should begin removal of the drive belt tensioner then proceed to detach the RH engine mounting bracket (3 bolts for 1ZZ-FE or 4 bolts for 2ZZ-GE). For the 2ZZ-GE performers must also extract the front exhaust pipe, exhaust manifold stay and exhaust manifold components. You will remove the chain tensioner and water pump from the vehicle but for the 1ZZ-FE model you must also remove the timing chain cover through 11 bolt and nut removal while using Torx(R) wrench socket (E8) to remove the stud bolt then carefully pry the cover away. The 2ZZ-GE timing chain cover removal procedure requires socket E8 as well as removal of 13 bolts and the stud bolt to access the two gaskets. Stop the crank angle sensor plate and chain tensioner slipper before using two screwdrivers to remove both timing chain and crankshaft timing sprocket items while placing shop rags to stop damage. To complete the procedure remove two bolts securing the chain vibration damper before you can take out the valve timing controller assembly and camshaft timing sprocket by holding the hexagonal head wrench portion of the camshaft with a wrench and taking necessary care to avoid harm to the cylinder head and valve lifter.
    Posted by ToyotaPartsNow Specialist
    Q:
    How to remove the timing chain on Toyota Matrix? Posted by Customer
    A:
    Begin timing chain removal on the 1ZZ-FE engine by removing the negative terminal from the battery followed by separating the front wheel right side with the removal of the engine under cover on the right side. Remove the cylinder head cover No. 2 by unfastening its two nuts and two clips. First drain the engine coolant before removing both the fan along with the generator V belt. You should dismantle the van pump unit while extracting the generator unit. Start by removing 2 bolts from the engine mounting insulator RH followed by bracket No. 1 from the oil reservoir then put a wooden block with a jack to support the engine and take out 4 bolts along with 2 nuts. To remove the ignition coil assembly disconnect the 4 ignition coil connectors, remove 2 nuts then separate the engine wire and take out 4 bolts. The cylinder head cover sub-assembly removal requires disconnecting ventilation hoses followed by removing 3 clamps from the engine wire and unfastening 9 bolts, 2 seal washers, 2 nuts with 3 clamp brackets. You can start the V-ribbed belt tensioner assembly removal process by undoing bolt and nut attachments, afterward raise and lower the motor to help remove bolts before fully taking out the engine mounting bracket RH with three bolt removals. Crank the engine until the No. 1 cylinder reaches TDC/compression position while ensuring camshaft timing gears are properly aligned. Then detach the water pump assembly before disconnecting the crankshaft position sensor through its 2 bolts. Service tools 09960-10010 09962-01000 09963-01000 enable complete removal of the crankshaft pulley bolt which then allows the lift of the crankshaft pulley. Open the chain tensioner assembly No.1 through using a wrench on two nuts except turning the crankshaft during the operation. The timing chain or belt cover sub-assembly removal begins with extracting ten bolts and two nuts before using a "TORX" socket wrench (E8) to remove the stud bolt and carefully prying the cover away without damaging contact surfaces. Use a screwdriver to remove the timing chain or belt cover oil seal before taking off the crankshaft position sensor plate No.1 then remove the chain tensioner slipper by uninstalling its bolt and finally use two screwdrivers to pull out the chain with the crankshaft timing gear while wrapping the engine in a shop rag or cloth before turning the crankshaft 1/4 revolution if rotating the camshafts without the chain on the gears to avoid piston contact with valves.
    Posted by ToyotaPartsNow Specialist
    Q:
    How to service and repair the timing chain on Toyota MR2 Spyder? Posted by Customer
    A:
    The timing chain servicing process starts by draining engine coolant before removing the rear suspension upper brace along with the engine under covers, drive belt and generator and the drive belt idler through removal of 2 bolts and 2 nuts and the idler itself. A wooden or rubber block placed between the oil pan will accept a jack while you remove three bolts along with three nuts and one right-hand engine mounting insulator. The procedure includes disconnecting 2 PCV hoses and the noise filter and heated oxygen sensor (bank 1 sensor 1) connector before you remove 9 bolts, 2 nuts and 2 seal washers along with the cylinder head cover. For servicing the cylinder head start by disconnecting the engine wire along with its 3 brackets and remove the cylinder head cover while also taking off its gasket. Use the crankshaft pulley to turn the engine until the No.1 cylinder reaches TDC/compression while aligning its groove with timing mark 0 on the timing chain cover and ensuring both sprocket point marks run parallel; adjust the crankshaft if necessary by turning it one revolution for alignment. The crankshaft pulley requires removal through the use of Special Service Tools: 09213-70011, 09330-00021 and if needed requires assistance from Special Service Tool: 09950-50013 (09951-05010, 09952-05010, 09953-05020, 09950-05021). The drive belt tensioner along with the right-hand engine mounting bracket and chain tensioner and water pump and crankshaft position sensor need to be extracted through the removal of 11 bolts and a nut while requiring gentle prying to protect contact surfaces. To access the sprockets it is essential to first remove the crankshaft position sensor plate combined with the chain tensioner slipper, timing chain, crankshaft timing sprocket and VVT timing sprocket by firmly holding the hexagonal head wrench portion of the camshaft when loosening the sprocket. Check the timing chain and sprockets for elongation which must not reach 122.6 mm (4.827 inch) and verify drive belt idler rotation smoothness then replace the bearing when necessary. Check the plunger movement of the chain tensioner as well as the slipper and vibration damper wear which should not exceed 1.0 mm (0.039 inch). Use Special Service Tool: 09309-37010 to put on the crankshaft front oil seal when the timing chain cover is taken off. The Special Service Tool: 09308-10010 is needed if the timing chain cover stays in position. Install the drive belt idler bearing using Special Service Tool: 09950-60010 (09951-00240), 09950-70010 (09951-07100) for correct installation steps. When installing bolt the camshaft timing sprocket and VVT timing sprocket along their knock pin and timing marks before tightening to 54 Nm (551 kgf-cm, 40 ft. lbs.). Reposition the timing chain damper on the TDC/compression of No. 1 cylinder and fasten it with two bolts tightened to 9 Nm (92 kgf-cm, 80 inch lbs.). Then place the timing chain on the crankshaft and camshaft timing sprockets while ensuring correct alignment. The repair requires installation of the timing chain cover together with water pump while using Part No. 08826-00100 seal packing on the cover and tightening all bolts to their proper torque values. Following the mounting of the right-hand engine bracket with seal packing (Part No. 08826-00080 or equivalent) on the threads, install the drive belt tensioner then the crankshaft position sensor, crankshaft pulley, and chain tensioner before torquing all components at specified values. The procedure ends with valve timing inspection after which you should add the oil dipstick and guide and cylinder head cover with new gasket before installing the right-hand engine mounting insulator and ignition coils and drive belt idler. Finally replace generator assemblies followed by engine under covers and suspension upper brace then fill with engine coolant and start the engine to verify leak-free performance.
    Posted by ToyotaPartsNow Specialist
    Q:
    What should you check for wear on the chain tensioner slipper and vibration damper for the 2005 Toyota Celica? Posted by Customer
    A:
    Check for wear with a maximum allowable wear of 1.0 mm (0.039 inch); if wear exceeds this, replace the slipper or damper.
    Posted by ToyotaPartsNow Specialist
    See expert answers on similar Timing Chain
    Q:
    What is involved in removing the cylinder head cover sub-assembly for the 2003 Toyota Corolla? Posted by Customer
    A:
    Take out 9 bolts, 2 seal washers, 2 nuts, and 3 clamp brackets.
    Posted by ToyotaPartsNow Specialist
    See expert answers on similar Timing Chain
    Q:
    How do you remove the cylinder head cover No.2 for the 2004 Toyota Corolla? Posted by Customer
    A:
    Remove the 2 nuts, 2 clips, and the cover itself.
    Posted by ToyotaPartsNow Specialist
    See expert answers on similar Timing Chain
    Q:
    How do you remove the V-ribbed belt tensioner assembly for the 2007 Toyota Corolla? Posted by Customer
    A:
    Unfasten the bolt and nut, jack the engine to assist in bolt removal.
    Posted by ToyotaPartsNow Specialist
    See expert answers on similar Timing Chain
    Q:
    How do you remove the cylinder head cover for the 1ZZ-FE for the 2003 Toyota Celica? Posted by Customer
    A:
    Take out 4 bolts, remove 4 ignition coils, disconnect 2 PCV hoses, and remove 9 bolts, 2 seal washers, 2 nuts, the cylinder head cover, and gasket.
    Posted by ToyotaPartsNow Specialist
    See expert answers on similar Timing Chain
    Q:
    What should be done after tightening the bolts and nuts to specified torque values for the 2001 Toyota Corolla? Posted by Customer
    A:
    Install the right-hand engine mounting bracket, drive belt tensioner, crankshaft position sensor, and crankshaft pulley.
    Posted by ToyotaPartsNow Specialist
    See expert answers on similar Timing Chain
    Q:
    What should be done after draining the engine coolant for the 2005 Toyota Corolla? Posted by Customer
    A:
    Remove the fan and generator V belt, separate the vane pump assembly, and take out the generator assembly.
    Posted by ToyotaPartsNow Specialist
    See expert answers on similar Timing Chain
    Q:
    What additional steps are required for the 2ZZ-GE when removing the timing chain cover for the 2001 Toyota Celica? Posted by Customer
    A:
    Remove the additional bolts and gaskets.
    Posted by ToyotaPartsNow Specialist
    See expert answers on similar Timing Chain
    Q:
    What is the process for removing the right-hand engine mounting insulator for the 2000 Toyota Celica? Posted by Customer
    A:
    Use a jack with a wooden block for support; for the 1ZZ-FE, take out four bolts and two nuts, and for the 2ZZ-GE, remove five bolts and two nuts.
    Posted by ToyotaPartsNow Specialist
    See expert answers on similar Timing Chain
    Q:
    How do you remove the cylinder head cover for the 2000 Toyota Corolla? Posted by Customer
    A:
    Take out the bolts, clips, and ignition coils, disconnect the ignition coil connectors and PCV hoses, and finally remove the cover and gasket.
    Posted by ToyotaPartsNow Specialist
    See expert answers on similar Timing Chain
    Q:
    What is the torque specification for the chain tensioner slipper for the 2006 Toyota Corolla? Posted by Customer
    A:
    Ensure a torque of 18.5 Nm (189 kgf-cm, 14 ft. lbs.) when installing the chain tensioner slipper with the bolt.
    Posted by ToyotaPartsNow Specialist
    See expert answers on similar Timing Chain
    Q:
    What is the first step in servicing and repairing the timing chain for the 2002 Toyota Celica? Posted by Customer
    A:
    Begin by removing the upper front fender apron seal and upper radiator support seal, draining the engine coolant, and removing the right-hand front wheel and engine under cover.
    Posted by ToyotaPartsNow Specialist
    See expert answers on similar Timing Chain
    Q:
    What components need to be disconnected to remove the ignition coils and cylinder head cover for the 2001 Toyota MR2 Spyder? Posted by Customer
    A:
    Disconnect 2 PCV hoses, the noise filter, and the heated oxygen sensor (bank 1 sensor 1) connector.
    Posted by ToyotaPartsNow Specialist
    See expert answers on similar Timing Chain
    Q:
    What assembly should be removed after the engine mounting bracket for the 2008 Toyota Corolla? Posted by Customer
    A:
    Remove the water pump assembly.
    Posted by ToyotaPartsNow Specialist
    See expert answers on similar Timing Chain
    Q:
    How do you ensure proper alignment during installation for the 2004 Toyota MR2 Spyder? Posted by Customer
    A:
    Set the No. 1 cylinder to TDC/compression and ensure proper alignment of the timing marks.
    Posted by ToyotaPartsNow Specialist
    See expert answers on similar Timing Chain
    Q:
    What components need to be removed from the engine mounting insulator for the 2000 Toyota MR2 Spyder? Posted by Customer
    A:
    Use a jack with a wooden or rubber block for support, then remove 3 bolts and 3 nuts.
    Posted by ToyotaPartsNow Specialist
    See expert answers on similar Timing Chain
    Q:
    What is the torque specification for the oil reservoir bracket No. 1 for the 2008 Toyota Matrix? Posted by Customer
    A:
    Torque it to 7.8 Nm (80 kgf-cm, 69 in-lbf).
    Posted by ToyotaPartsNow Specialist
    See expert answers on similar Timing Chain
    Q:
    What is the next step after removing the crankshaft pulley for the 2003 Toyota Matrix? Posted by Customer
    A:
    Remove the water pump pulley using Special Service Tool: 09960-10010.
    Posted by ToyotaPartsNow Specialist
    See expert answers on similar Timing Chain
    Q:
    What tool is used to install the crankshaft timing sprocket for the 2004 Toyota Matrix? Posted by Customer
    A:
    Special Service Tool: 09223-22010.
    Posted by ToyotaPartsNow Specialist
    See expert answers on similar Timing Chain
    Q:
    What is the process for removing the timing chain or belt cover sub-assembly for the 2007 Toyota Matrix? Posted by Customer
    A:
    Take off 10 bolts and 2 nuts, use a "TORX" socket wrench (E8) to remove the stud bolt, and pry off the cover carefully.
    Posted by ToyotaPartsNow Specialist
    See expert answers on similar Timing Chain
    Q:
    How do you set the No.1 cylinder to TDC/compression for the 2004 Toyota Celica? Posted by Customer
    A:
    Align the crankshaft pulley groove with the timing mark "0" and ensure the camshaft timing sprocket marks are aligned.
    Posted by ToyotaPartsNow Specialist
    See expert answers on similar Timing Chain
    Q:
    What is the first step to replace the timing chain for the 2005 Toyota Matrix? Posted by Customer
    A:
    Disconnect the battery negative terminal.
    Posted by ToyotaPartsNow Specialist
    See expert answers on similar Timing Chain
    Q:
    What is the next step after removing the water pump assembly for the 2006 Toyota Matrix? Posted by Customer
    A:
    Separate the crankshaft position sensor by removing 2 bolts.
    Posted by ToyotaPartsNow Specialist
    See expert answers on similar Timing Chain
    Q:
    What should be done to the fan and generator V-belt for the 2003 Toyota Matrix? Posted by Customer
    A:
    Loosen the fan and generator V-belt by turning the V-ribbed belt tensioner clockwise, then remove the belt and carefully reset the tensioner.
    Posted by ToyotaPartsNow Specialist
    See expert answers on similar Timing Chain
    Q:
    What tools are needed to remove the crankshaft pulley for the 2002 Toyota MR2 Spyder? Posted by Customer
    A:
    Use Special Service Tool: 09213-70011, 09330-00021, and if necessary, Special Service Tool: 09950-50013.
    Posted by ToyotaPartsNow Specialist
    See expert answers on similar Timing Chain
    Q:
    What tools are needed to remove the crankshaft pulley for the 2005 Toyota MR2 Spyder? Posted by Customer
    A:
    Special Service Tool: 09213-70011, 09330-00021, and if necessary, Special Service Tool: 09950-50013.
    Posted by ToyotaPartsNow Specialist
    See expert answers on similar Timing Chain
    If you have any questions about this product, please don't hesitate to ask us. We will be happy to help you!

OEM Toyota 13506-0D010, Excellent Performance and Perfect Fitment

To ensure reliability, purchase Toyota part # 13506-0D010 Timing Chain. It is sometimes referred to as Toyota Timing Chain. OEM parts are unrivaled in terms of quality. They go through extensive quality control inspections and are produced in accordance with Toyota's official factory specifications. All of these remove defects and imperfections. So you can relax knowing they promise exceptional lifespan and flawless fitment.

ToyotaPartsNow.com is a leading supplier of genuine Toyota parts such as Toyota 135060D010 Timing Chain. At ToyotaPartsNow.com, we have a wide variety of OEM Toyota parts available at competitive prices. Our comprehensive range of genuine Toyota parts come with a manufacturer's warranty for peace of mind. We also prioritize customer satisfaction, providing a hassle-free return policy and expedited delivery for all our parts. For detailed Toyota parts information, click here.
Choose ToyotaPartsNow for discounted prices, exceptional service and fast delivery