My Garage
Cart
Make sure this part fits

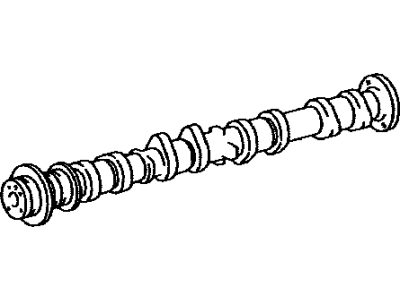
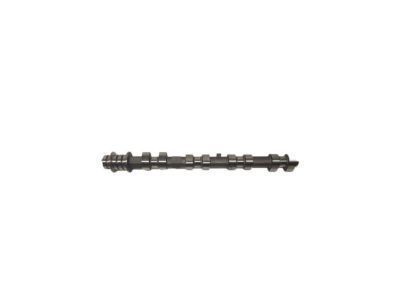
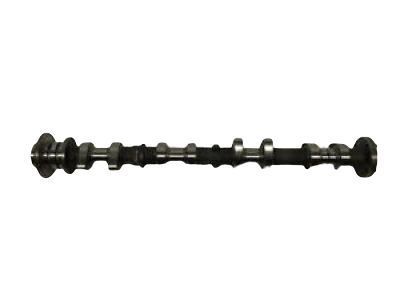
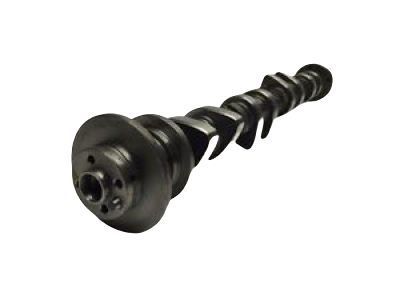
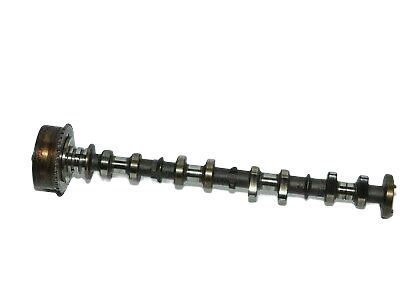
Toyota 13501-28060
Camshaft

2006-2015 Toyota 1350128060

Customer Questions & Expert Answers (16)
Toyota 13501-28060 Camshaft
  • Part Description
    Camshaft Sub-Assembly
  • Part Name Code
    13511
  • Replaces
    13501-0H040, 13501-0H050
  • Manufacturer
    Toyota
Make sure this part fits
$325.61 MSRP: $464.89
You Save: $139.28 (30%)
1
ADD TO CART
  • Related Parts
  • Product Specifications
  • Vehicle Fitment
  • Customer Questions & Expert Answers
  • Product Specifications

    BrandGenuine Toyota
    Part Name Code13511
    Manufacturer Part Number13501-28060
    Part DescriptionCamshaft Sub-Assembly
    Item Dimensions21.7 x 3.4 x 3.0 inches
    Item Weight1.40 Pounds
    ConditionNew
    Fitment TypeDirect Replacement
    Replaces13501-0H040, 13501-0H050
    ManufacturerToyota
    SKU13501-28060
    WarrantyThis genuine Toyota part is guaranteed by Toyota's factory warranty.
    Shipping & ReturnShipping Policy Return Policy
    Warning: California's Proposition 65
  • Vehicle Fitment

    Year Make Model Trim Engine
    2007-2010 Scion tCBase, Spec4 Cyl 2.4 L GAS
    2008-2015 Scion xBBase4 Cyl 2.4 L GAS
    2007-2009 Toyota CamryBase, CE, LE, SE, XLE4 Cyl 2.4 L GAS, 6 Cyl 3.5 L GAS
    2009-2010 Toyota CorollaXRS4 Cyl 2.4 L GAS
    2009-2013 Toyota MatrixS, XRS4 Cyl 2.4 L GAS
    2006-2008 Toyota RAV4Base, Limited, Sport4 Cyl 2.4 L GAS
    2007-2008 Toyota SolaraSE, SLE, Sport4 Cyl 2.4 L GAS
  • Customer Questions & Expert Answers

    Q:
    Is 13501-28060 a good match for my car? Posted by ToyotaPartsNow Specialist
    A:
    Find out if part number 13501-28060 is the right fit for your car by Selecting Your Vehicle model.
    Posted by ToyotaPartsNow Specialist
    Q:
    How to remove the camshaft on Scion xB? Posted by Customer
    A:
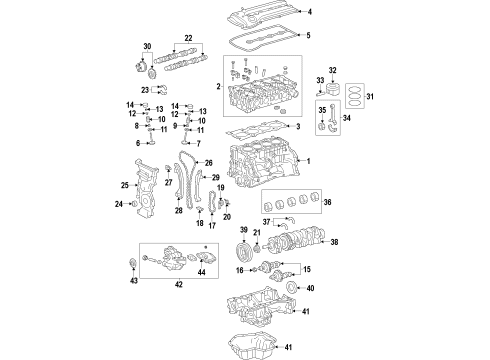
    The procedure of removing the camshaft from a 2AZ-FE engine begins with removing the rear engine under cover RH and then proceeding to take away the No. 1 engine cover sub-assembly and ignition coil assembly followed by the spark plug. After disconnecting the two ventilation hoses the technician should remove two wire harness bracket bolts before removing the eight bolts and two nuts holding the head cover and gasket. To set the No. 1 cylinder at TDC/compression position use the crankshaft pulley until you see the groove match timing mark "0" on the timing chain cover. Ensure the timing marks on the camshaft timing gear and sprocket show correct alignment with the No. 1 and No. 2 bearing caps; otherwise repeat the preceding manual turn of the crankshaft pulley. Use a marker to mark the chain at the position of its alignment with both timing marks. Use a wrench to hold the No. 2 camshaft before loosening the No. 2 camshaft timing gear or sprocket through the timing set bolt. Uniformly loosen and remove the specified sequence of 10 bearing cap bolts to access the No.2 camshaft and its components. Remove the 5 bearing caps and then the camshaft timing sprocket set bolt before separating the sprocket from the attached timing chain. When taking out the camshaft you must first evenly loosen and detach the 10 bearing cap bolts after that remove the 5 bearing caps and the camshaft along with camshaft timing gear when maintaining control of the timing chain. Secure the timing chain with string matter to stop it from falling inside the timing chain cover. The correct method to remove the camshaft timing gear assembly requires clamping the camshaft in a vise to stop rotation, taping all ports except the advance side port and applying 150 kPa (1.5 kgf/cm2, 22 psi) air pressure to the oil path and manually turning the gear counterclockwise. Maintain a piece of cloth to minimize oil drops while working with the paths. The procedure ends with the removal of the single flange bolt for the camshaft timing gear while keeping the 4 remaining bolts in place. Before reuse of the timing gear it is essential to free the straight pin lock.
    Posted by ToyotaPartsNow Specialist
    Q:
    How to remove the camshaft on Toyota Camry? Posted by Customer
    A:
    The first step for camshaft removal from the 2AZ-FE engine requires removal of front wheel RH, engine under cover LH, engine under cover RH and front fender apron seal RH as well as No. 1 engine cover sub-assembly, ignition coil assembly and cylinder head cover sub-assembly. Use the crankshaft pulley to find TDC/compression of the No. 1 cylinder by aligning the groove with the timing mark "0" on the timing chain cover. Verify the alignment of camshaft timing gear marks with those on the bearing caps of the No. 1 and No. 2 cylinders and the sprocket marks (if not aligned complete one revolution). Place a mark on the chain at its position relative to the timing marks. Begin by removing the No. 1 chain tensioner assembly followed by the removal of the No. 2 camshaft through the application of a wrench to loosen its camshaft timing set bolt then proceed with uniform bolt removal of the specified 10 bearing cap bolts and subsequent bearing cap removal to end the procedure. Remove the camshaft timing sprocket set bolt from its position on the No. 2 camshaft and then proceed to take out the camshaft timing sprocket when it still maintains connection with the timing chain. Rephrase the following sentence. For camshaft removal begin by loosening the 10 bearing cap bolts in sequence then remove the 5 bearing caps before extracting the camshaft and camshaft timing gear when holding the timing chain. Standby the timing chain with string support to keep it from falling off the crankshaft sprocket but shield against dropping anything within the timing chain cover. The camshaft timing gear assembly procedure involves vise-clamping of the camshaft to stop rotation along with covering all oil ports except the advance side port with vinyl tape while applying 100 kPa (1.0 kgf/cm2, 14 psi) air pressure on the open oil path through rotating the camshaft timing gear counterclockwise by hand. Protect the paths by applying a cloth before the start to prevent oil from spraying this area. To remove the camshaft timing gear flange bolt perform the operation while avoiding the removal of other 4 bolts and prepare the straight pin lock for reuse if you plan to reinstall the gear in the future.
    Posted by ToyotaPartsNow Specialist
    Q:
    How to remove the camshaft on Scion xB? Posted by Customer
    A:
    The process of camshaft removal from the 2AZ-FE engine starts with removing rear engine under cover RH followed by No.1 engine cover sub-assembly and ignition coil assembly and spark plug. The procedure starts by removing: two ventilation hoses, two bolts separating wire harness brackets, and eight bolts connected to two nuts for detaching both cover and gasket. Use the crankshaft pulley to rotate to the TDC position where the guide fits the timing mark "0" on the timing chain cover. At this stage confirm that all camshaft timing gear indications line up with indicator points on the No. 1 and No. 2 bearing caps before you switch the pulley once. Apply a mark to the timing chain at the points corresponding to the timing marks. Through this procedure loosen the No. 2 camshaft timing gear or sprocket by using a wrench to hold the No. 2 camshaft while the mechanic gradually loosens the timing bolt. Next proceed to remove the No. 1 chain tensioner assembly. One must start the No. 2 camshaft removal process by equally loosening and then removing the specified sequence of 10 bearing cap bolts followed by removing five bearing caps and maintaining grip on the No. 2 camshaft to take out the camshaft timing sprocket set bolt and sprocket as well as timing chain. During camshaft removal follow the previous steps of 10 bearing cap bolt loosening, subsequent bolt removal, then 5 bearing cap removal while holding the timing chain before securing it with a thread before entering the timing chain cover. A vise should clamp the camshaft to prevent spinning as users wrap vinyl tape around all oil ports except the advance side port before directing 150 kPa (1.5 kgf/cm2, 22 psi) air pressure through the oil path while turning the camshaft timing gear counterclockwise manually. Set a cloth across the paths to prevent oil drops while working. When dealing with the camshaft timing gear flange bolt consumers must take off just the single bolt yet they must keep the remaining 4 bolts in place and those reusing the timing gear should first unlock the straight pin before reinstalling.
    Posted by ToyotaPartsNow Specialist
    Q:
    How to install the camshaft timing gear assembly and related components for the camshaft, including timing chain alignment, bearing cap tightening, chain tensioner setup, valve clearance adjustment, cylinder head cover installation, and final inspections on Toyota Matrix? Posted by Customer
    A:
    Start by orienting the camshaft timing gear and camshaft with their straight pin at an angle to the key groove before applying gentle force to the gear while turning it against the camshaft. During installation keep the direction of gear rotation pointed toward advancement (counter-clockwise). Verify that the timing gear and camshaft flange do not have clearance before torquing the flange bolt to 54 Nm (551 kgf-cm, 40 ft-lbf). The assembly should then move to the retarded position and lock in place. The journal portion of the camshaft needs a light coating of oil before installing the timing chain onto the camshaft timing gear with paint marks matching timing marks. Place bearing caps in the cylinder head after verifying their front marks and numbers. Correctly apply engine oil on all bearing cap bolt threads and bolt heads before implementing a distribution of torque force beginning with 30 Nm (301 kgf-cm, 22 ft-lbf) on No. 1 bearing bolt and 9.0 Nm (92 kgf-cm, 80 in-lbf) for No. 3 bearing bolt. First apply engine oil to the journal portion then align the paint mark on the chain with the timing mark on the camshaft timing sprocket and temporarily fasten the camshaft timing sprocket set bolt before installing bearing caps while checking front mark and number order. Before tightening, apply engine oil to the threads and under the heads of the bearing cap bolts. Then uniformly torque the 10 bearing cap bolts with No. 2 bearing at 30 Nm (301 kgf-cm, 22 ft-lbf) and No. 3 bearing at 9.0 Nm (92 kgf-cm, 80 in-lbf), after which tighten the camshaft timing sprocket set bolt to 54 Nm (551 kgf-cm, 40 ft-lbf) while holding the camshaft with a wrench. The chain paint marks need to match the timing marks on the camshaft timing gear and sprocket and the crankshaft pulley groove should align with the timing mark "0" on the timing mark chain cover. The procedure for the No. 1 chain tensioner assembly begins with releasing the ratchet pawl along with pushing the plunger into position and setting the hook onto the pin. Next, install a new gasket and the chain tensioner with two nuts tightened to 9.0 Nm (92 kgf-cm, 80 in-lbf). Proceed by turning the crankshaft counterclockwise to remove the hook and finally check plunger extension by turning the crankshaft clockwise. Set the No. 1 cylinder to TDC/compression, check and adjust valve clearance, install the cylinder head cover sub-assembly after removing old packing material and applying seal packing (Toyota Genuine Seal Packing Black, Three Bond 1207B or equivalent) to the specified locations, install the cylinder head cover gasket and sub-assembly with 8 bolts and 2 nuts at the specified torque values, install the engine wire harness brackets, connect the ventilation hoses, and proceed to install the spark plug, ignition coil assembly, inspect for oil leaks, inspect ignition timing, install the No. 1 engine cover sub-assembly, and finally install the engine under cover RH.
    Posted by ToyotaPartsNow Specialist
    Q:
    How to Install the Camshaft Timing Gear Assembly, Timing Chain, Tensioner, and Cylinder Head Cover During Camshaft Installation on Toyota Solara? Posted by Customer
    A:
    Install the camshaft timing gear assembly by putting it in position next to the camshaft and perform a gentle turning motion according to directions until the pin meets the groove while maintaining awareness of not flexing towards the retarded angle area. Next, verify the gear fringe does not create any space with the camshaft before fastening the bolt with 54 Nm torque (551 kgc-m, 40 ft-lbf). Make sure the camshaft timing gear can proceed to the extreme retarded angle and maintain this position. First place the timing chain on the camshaft timing gear, position the painted link mark to the timing marks. Then install the bearing caps correctly while torquing bearing cap Number 1 to 30 Nm (301 kgf-cm, 22 ft-lbf) and bearing cap Number 3 to 9.0 Nm (92 kgf-cm, 80 in-lbf). To set the No.2 camshaft properly install the bearing caps by screwing bearing cap No.2 to 30 Nm (301 kgf-cm, 22 ft-lbf) and bearing cap No.3 to 9.0 Nm (92 kgf-cm, 80 in-lbf) while also tightening the sprocket bolt to 54 Nm (551 kgf-cm, 40 ft-lbf) since the valve lifter remains sensitive during this operation. Check the correct alignment between paint marks which should be present on the timing chain, camshaft timing gear, camshaft timing sprocket, and the pulley groove which should face the timing mark of the chain cover. When installing the No.1 chain tensioner assembly first raise the ratchet pawl and push the plunger before securing it with the hook while adding new gasket material and securing the chain tensioner and its two nuts to 9.0 Nm (92 kgf-cm, 80 in-lbf). Turn the crankshaft counterclockwise first so the plunger knock pin separates from the hook and then clock-wise to confirm the slipper is pushed by the plunger. Apply Toyota Genuine Adhesive 1344 or Three Bond 1344 or their equivalent at the specified cover locations after cleaning the contact surfaces of all oil residue and install the cover time-wise within five minutes while keeping the engine oil away from touching the parts for more than 2 hours post-assembling. Install and fasten the cylinder head cover with its combination of 8 bolts and 2 nuts by applying 11 Nm (110 kgf-cm, 8 ft-lbf) torque. The engine wire needs connection for the installation of the spark plug at 19 Nm torque (194 kgf-cm or 14 ft-lbf) followed by front wheel RH mounting then checking for oil leaks.
    Posted by ToyotaPartsNow Specialist
    Q:
    How do you install the camshaft timing gear assembly for the 2008 Toyota Camry? Posted by Customer
    A:
    Align the camshaft timing gear and camshaft with the straight pin and key groove misaligned, then turn the camshaft timing gear while gently pushing it against the camshaft until the pin fits into the groove, ensuring not to turn it to the retard angle side. Check for no clearance between the gear and camshaft, then tighten the flange bolt to a torque of 54 Nm (551 kgf-cm, 40 ft-lbf) and confirm that the camshaft timing gear can move to the retard angle side and is locked in the most retarded position.
    Posted by ToyotaPartsNow Specialist
    See expert answers on similar Camshaft
    Q:
    What should you check after aligning the camshaft for the 2008 Scion xB? Posted by Customer
    A:
    Check for no clearance between the gear fringe and camshaft, then tighten the flange bolt to a torque of 54 Nm (551 kgf-cm, 40 ft-lbf).
    Posted by ToyotaPartsNow Specialist
    See expert answers on similar Camshaft
    Q:
    How do you tighten the bearing cap bolts for the No. 2 camshaft for the 2009 Toyota Camry? Posted by Customer
    A:
    Apply engine oil to the threads and under the heads of the bearing cap bolts, then uniformly tighten the 10 bearing cap bolts with No. 2 Bearing cap at 30 Nm (301 kgf-cm, 22ft-lbf) and No. 3 Bearing cap at 9.0 Nm (92 kgf-cm, 80in-lbf).
    Posted by ToyotaPartsNow Specialist
    See expert answers on similar Camshaft
    Q:
    What should be done to the bearing cap bolts before tightening for the 2009 Scion xB? Posted by Customer
    A:
    Apply engine oil to the threads and under the heads of the bearing cap bolts.
    Posted by ToyotaPartsNow Specialist
    See expert answers on similar Camshaft
    Q:
    What should be done after installing the camshaft timing gear for the 2007 Toyota Camry? Posted by Customer
    A:
    Apply engine oil to the journal portion of the camshaft and install the timing chain onto the camshaft timing gear, aligning the paint mark with the timing mark.
    Posted by ToyotaPartsNow Specialist
    See expert answers on similar Camshaft
    Q:
    What is the procedure to remove the No. 2 camshaft for the 2010 Scion xB? Posted by Customer
    A:
    Uniformly loosen and remove the 10 bearing cap bolts in the specified sequence, then remove the 5 bearing caps, followed by the camshaft timing sprocket set bolt and the sprocket with the timing chain attached.
    Posted by ToyotaPartsNow Specialist
    See expert answers on similar Camshaft
    Q:
    What should be done to the No. 1 cylinder before removing additional components for the 2009 Toyota Corolla? Posted by Customer
    A:
    Set the No. 1 cylinder to TDC/compression.
    Posted by ToyotaPartsNow Specialist
    See expert answers on similar Camshaft
    Q:
    How do you set the No. 1 cylinder to TDC/compression for the 2009 Toyota Matrix? Posted by Customer
    A:
    Turn the crankshaft pulley until the groove aligns with the timing mark "0" on the timing chain cover, ensuring the timing marks on the camshaft timing gear and sprocket align with those on the No. 1 and No. 2 bearing caps.
    Posted by ToyotaPartsNow Specialist
    See expert answers on similar Camshaft
    Q:
    What is the first step to service the camshaft for the 2007 Toyota Solara? Posted by Customer
    A:
    Begin by removing the front wheel RH, front fender apron seal RH, engine cover sub-assembly No.1, spark plug, ventilation hoses, engine wire, and cylinder head cover sub-assembly.
    Posted by ToyotaPartsNow Specialist
    See expert answers on similar Camshaft
    Q:
    What steps are involved in removing the camshaft for the 2008 Toyota Solara? Posted by Customer
    A:
    Loosen the bearing cap bolts in the specified sequence, remove the caps, and then the camshaft, tying the timing chain with a string to prevent dropping anything inside the timing chain cover.
    Posted by ToyotaPartsNow Specialist
    See expert answers on similar Camshaft
    If you have any questions about this product, please don't hesitate to ask us. We will be happy to help you!

OEM Toyota 13501-28060, Excellent Performance and Perfect Fitment

To ensure reliability, purchase Toyota part # 13501-28060 Camshaft. It is sometimes referred to as Toyota Camshaft. OEM parts are unrivaled in terms of quality. They go through extensive quality control inspections and are produced in accordance with Toyota's official factory specifications. All of these remove defects and imperfections. So you can relax knowing they promise exceptional lifespan and flawless fitment.

ToyotaPartsNow.com is a leading supplier of genuine Toyota parts such as Toyota 1350128060 Camshaft. At ToyotaPartsNow.com, we have a wide variety of OEM Toyota parts available at competitive prices. Our comprehensive range of genuine Toyota parts come with a manufacturer's warranty for peace of mind. We also prioritize customer satisfaction, providing a hassle-free return policy and expedited delivery for all our parts. For detailed Toyota parts information, click here.
Choose ToyotaPartsNow for discounted prices, exceptional service and fast delivery