×
ToyotaParts- Hello
- Login or Register
- Quick Links
- Live Chat
- Track Order
- Parts Availability
- RMA
- Help Center
- Contact Us
- Shop for
- Toyota Parts
- Scion Parts
My Garage
My Account
Cart
OEM Toyota RAV4 Timing Chain Tensioner
Engine Timing Chain Tensioner- Select Vehicle by Model
- Select Vehicle by VIN
Select Vehicle by Model
orMake
Model
Year
Select Vehicle by VIN
For the most accurate results, select vehicle by your VIN (Vehicle Identification Number).
6 Timing Chain Tensioners found


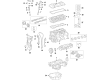
Toyota RAV4 Tensioner Part Number: 13540-0V031
$33.21 MSRP: $46.22You Save: $13.01 (29%)


Toyota RAV4 Tensioner Assembly, Chain Part Number: 13540-0H010
$100.48 MSRP: $141.04You Save: $40.56 (29%)Ships in 1 Business Day

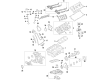
Toyota RAV4 Chain Tensioner, Driver Side Part Number: 13560-0P010
$80.21 MSRP: $112.59You Save: $32.38 (29%)Ships in 1-2 Business Days
Toyota RAV4 Chain Tensioner, Passenger Side Part Number: 13550-0P010
$80.21 MSRP: $112.59You Save: $32.38 (29%)Ships in 1-2 Business Days


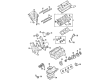
Toyota RAV4 Chain Tensioner Part Number: 13540-31021
$77.84 MSRP: $109.26You Save: $31.42 (29%)Ships in 1 Business Day

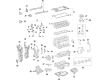
Toyota RAV4 Tensioner Assembly, Chain Part Number: 13540-F0010
$31.89 MSRP: $44.39You Save: $12.50 (29%)Ships in 1-3 Business Days
Toyota RAV4 Timing Chain Tensioner
Choose genuine Timing Chain Tensioner that pass strict quality control tests. You can trust the top quality and lasting durability. Shopping for OEM Timing Chain Tensioner for your Toyota RAV4? Our website is your one-stop destination. We stock an extensive selection of genuine Toyota RAV4 parts. The price is affordable so you can save more. It only takes minutes to browse and find the exact fit. Easily add to cart and check out fast. Our hassle-free return policy will keep you stress-free. We process orders quickly for swift delivery. Your parts will arrive faster, so you can get back on the road sooner.
The Toyota RAV4 Timing Chain Tensioner is important since it is used in regulating the performance as well as the stability of the engine in different RAV4 models. The Timing Chain Tensioner's responsibility includes holding the appropriate tension against the Timing Chain to minimize slack and, therefore, help avoid the issues that accompany a loose timing chain on the engine. This reliability is valuable to Toyota RAV4 owners in two ways, and that is; It improves the efficiency and safety of their automobiles. There are various types of engines available for the RAV4, two liter, 2.4 liter and 3.5 liter ones; the Timing Chain Tensioner has been developed to suit all RAV4 generation models. It should, however, be noted that the Toyota RAV4 Timing Chain Tensioner is distinguishable from other cars in the market since it has a strong features consistent with the tensioner indications, and enhanced engineering construction that prevents it from failing soon. Further, effectiveness of the tensioner also increases the ease of the smooth running of the engine hence increases comfort during driving and above all increases efficiency of the car hence another factor that embraces environmental conservation. Based on the experience, the Toyota RAV4 Timing Chain Tensioner is one of the key indicators that the brand is coherent with the quality and innovation, which defines RAV4 as one of the most significant contenders in SUV market.
Toyota RAV4 Timing Chain Tensioner Parts and Q&A
- Q: How to service and repair the Timing Chain Tensioner on Toyota RAV4?A:The service process for the Timing Chain Tensioner starts with engine oil drainage before removing sequential components like RH engine under cover, PS vane pump, ABS actuator, RH engine mounting insulator and Drive Belt, generator, air cleaner assembly, and Ignition Coils. You must disconnect the two PCV hoses then remove eight bolts along with two nuts to extract the cylinder head cover. Start by placing No. 1 cylinder at TDC position by spinning the crankshaft pulley until the groove lines up with timestamp 0 as well as when the camshaft and VVT timing sprocket timing marks align with their bearing caps; make a single crankshaft rotation if alignment requires it. You can remove the pulley bolt and crankshaft pulley by utilizing SST 09213-54015, 09330-00021 and SST 09950-50013 as needed. A proper procedure includes taking off 2 nuts and the chain tensioner along with its gasket followed by the drive belt tensioner then the Crankshaft Position Sensor and the oil pan along with the timing chain cover which requires disassembling the stud bolt for drive belt tensioner and removing 14 bolts and 2 nuts while prying the cover off with care. Before proceeding with the replacement separate the crank angle sensor plate from the chain tensioner slipper and the chain vibration damper and timing chain guide then remove the timing chain cranks shaft timing sprocket and camshaft timing sprocket and VVT timing sprocket but avoid damaging the cylinder head and valve lifter. Changes in the timing chain length and sprocket structural integrity need replacement. The chain tensioner slipper and vibration damper need replacement if wear exceeds 1.0 mm. The installation of new timing chain cover oil seal requires SST 09309-37010 for tapping both removal and installation unless it's under cover; in that case use SST 09308-10010 and 09950-60010 to retrieve and implement the seal. Proper alignment followed by correct torque values leads to the installation of camshaft timing sprocket and VVT timing sprocket before resetting No. 1 cylinder to TDC/compression. You should install the chain vibration damper and crankshaft timing sprocket followed by putting on the timing chain while maintaining proper mark alignment. Then install the timing chain guide as well as the chain tensioner slipper to the cylinder block stopper while ensuring the slipper remains in position. Install the crank angle sensor plate together with the timing chain cover which includes seal packing (Part No. 08826-00080), secure bolts and nuts with their specified torques. The installation process includes placing the drive belt tensioner followed by the crankshaft position sensor then the oil pan after which the crankshaft pulley and chain tensioner are installed by maintaining proper torque along with correct alignment. The last step includes checking valve timing before installing the cylinder head cover with its new gasket while reattaching all components before filling with engine oil and starting the engine for leak inspection and subsequent oil level check.

Related Toyota RAV4 Parts
 Toyota RAV4 Engine Cover
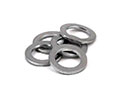 Toyota RAV4 Oil Drain Plug Gasket
 Toyota RAV4 Oil Pan
 Toyota RAV4 Timing Chain
 Toyota RAV4 Oil Filler Cap
 Toyota RAV4 Cam Gear
 Toyota RAV4 Camshaft
 Toyota RAV4 Crankshaft Pulley
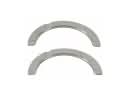 Toyota RAV4 Crankshaft Thrust Washer
 Toyota RAV4 Piston Ring Set
 Toyota RAV4 Rocker Arm
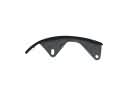 Toyota RAV4 Timing Chain Guide