×
ToyotaParts- Hello
- Login or Register
- Quick Links
- Live Chat
- Track Order
- Parts Availability
- RMA
- Help Center
- Contact Us
- Shop for
- Toyota Parts
- Scion Parts
My Garage
My Account
Cart
OEM Toyota FJ Cruiser Door Lock Actuator
Power Door Lock Actuator- Select Vehicle by Model
- Select Vehicle by VIN
Select Vehicle by Model
orMake
Model
Year
Select Vehicle by VIN
For the most accurate results, select vehicle by your VIN (Vehicle Identification Number).
7 Door Lock Actuators found


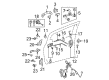
Toyota FJ Cruiser Lock Actuator, Passenger Side Part Number: 69030-52470
$261.65 MSRP: $373.57You Save: $111.92 (30%)Ships in 1-3 Business Days


Toyota FJ Cruiser Lock Actuator, Driver Side Part Number: 69040-47060
$255.71 MSRP: $365.09You Save: $109.38 (30%)Ships in 1-2 Business Days


Toyota FJ Cruiser Lock Actuator, Rear Part Number: 69110-35071
$258.39 MSRP: $368.92You Save: $110.53 (30%)Ships in 1-2 Business Days
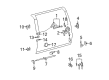
Toyota FJ Cruiser Lock Assembly, Upper Driver Side Part Number: 69360-35010
$152.27 MSRP: $215.55You Save: $63.28 (30%)Ships in 1-3 Business DaysToyota FJ Cruiser Lock Assembly, Upper Passenger Side Part Number: 69350-35030
$152.27 MSRP: $215.55You Save: $63.28 (30%)Ships in 1-3 Business Days
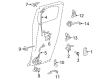
Toyota FJ Cruiser Lock Assembly, Lower Driver Side Part Number: 69390-35041
$164.84 MSRP: $233.35You Save: $68.51 (30%)Ships in 1-3 Business DaysToyota FJ Cruiser Lock Assembly, Lower Passenger Side Part Number: 69380-35021
$164.84 MSRP: $233.35You Save: $68.51 (30%)Ships in 1-3 Business Days
Toyota FJ Cruiser Door Lock Actuator
Choose genuine Door Lock Actuator that pass strict quality control tests. You can trust the top quality and lasting durability. Shopping for OEM Door Lock Actuator for your Toyota FJ Cruiser? Our website is your one-stop destination. We stock an extensive selection of genuine Toyota FJ Cruiser parts. The price is affordable so you can save more. It only takes minutes to browse and find the exact fit. Easily add to cart and check out fast. Our hassle-free return policy will keep you stress-free. We process orders quickly for swift delivery. Your parts will arrive faster, so you can get back on the road sooner.
It is fundamental to understand that the Toyota FJ Cruiser Door Lock Actuator is among those products that efficiently symbolize steady and high-quality automobiles within the market. This Door Lock Actuator is custom-built for the Toyota FJ Cruiser that automatically locks and unlocks the car doors to increase the level of convenience and car safety for drivers and their passengers. Every door of the FJ Cruiser comes with an individual actuator, thus if there is a problem, only one door is affected and the Vehicle is not totally crippled. Toyota FJ Cruiser door lock actuator is suitable for several FJ Cruiser models, thus making it suitable to use on your car. The motorized kind is more efficient and easy to operate because it responds quickly to the power lock switch which in turn enhances the security of the overhead door. However, the variety of the terminal and the connector is unique in each case because it should fit perfectly for a given model to enable proper installation. The Toyota FJ Cruiser, a car with a truck like outlook and the off-road performance features, during a locking, unlatching or unlocking process, it gains reliability from the Door Lock Actuator. Also, the actuator can be easily installed by merely replacing the original equipment part and easily fits into the automotive market. In sum, the Toyota FJ Cruiser Door Lock Actuator is a very important part of this vehicle and make the vehicle much safer and more efficient for the users and for those who like to have adventures.
Toyota FJ Cruiser Door Lock Actuator Parts and Q&A
- Q: How to remove the power door lock actuator from the front door on Toyota FJ Cruiser?A:Before undertaking the front door power Door Lock actuator replacement process the technician should first disconnect the negative battery cable. The first step in removing the power door lock actuator requires removal of the front armrest base upper panel followed by removing the front door trim board sub-assembly and front No. 2 door service hole cover and outer rear view mirror and front door glass outer Weather Strip assembly and front No. 1 speaker and front door service hole cover. The next step involves removing the front door inside panel plate together with front door check assembly and front door Weather Strip and front door glass run. The next steps require removal of front door frame sub-assembly front lower followed by front door lower frame bracket garnish and front door window frame rear lower. You must uninstall the front door glass sub-assembly and front door lock cylinder assembly by removing the hole plug and using a "Torx" socket wrench T30 to unwind the screw. The front door lock removal process starts with using a T30 "Torx" socket wrench to loosen 3 screws and then continuing with lowering the front door lock and removing the outside handle frame link before opening the cover with 5 claws before disconnecting the front door lock remote control cable and front door inside locking cable while also taking off the door lock wire harness seal.

Related Toyota FJ Cruiser Parts
 Toyota FJ Cruiser Door Hinge
 Toyota FJ Cruiser Door Latch Assembly
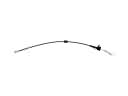 Toyota FJ Cruiser Door Latch Cable
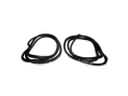 Toyota FJ Cruiser Door Seal
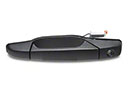 Toyota FJ Cruiser Exterior Door Handle
 Toyota FJ Cruiser Interior Door Handle
 Toyota FJ Cruiser Liftgate Hinge
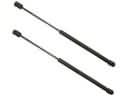 Toyota FJ Cruiser Liftgate Lift Support
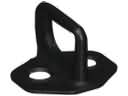 Toyota FJ Cruiser Rear Door Striker
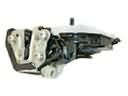 Toyota FJ Cruiser Rear Passenger Door Handle Latch
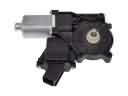 Toyota FJ Cruiser Window Motor
 Toyota FJ Cruiser Window Regulator
Browse Toyota FJ Cruiser Door Lock Actuator by Years
2014
2013
2012
2011
2010
2009
2008
2007