×
ToyotaParts- Hello
- Login or Register
- Quick Links
- Live Chat
- Track Order
- Parts Availability
- RMA
- Help Center
- Contact Us
- Shop for
- Toyota Parts
- Scion Parts
My Garage
My Account
Cart
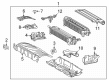
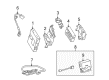
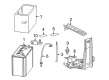
OEM Toyota Car Battery
Auto Battery- Select Vehicle by Model
- Select Vehicle by VIN
Select Vehicle by Model
orMake
Model
Year
Select Vehicle by VIN
For the most accurate results, select vehicle by your VIN (Vehicle Identification Number).
97 Car Batterys found

Toyota Battery Part Number: 86770-47010
$3596.04 MSRP: $5270.05You Save: $1674.01 (32%)Ships in 1-3 Business DaysProduct Specifications- Other Name: Battery Assembly, Mayday

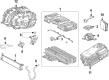
Toyota BATTERY ASSY, HEV SU Part Number: G9510-33132
$3761.19 MSRP: $5512.06You Save: $1750.87 (32%)Ships in 1-2 Business Days
Toyota Stack Sub-Assembly, HV Supply Part Number: G950A-47021
$6133.43 MSRP: $8988.62You Save: $2855.19 (32%)Ships in 1-2 Business DaysProduct Specifications- Other Name: Battery Sub-Assembly, Supply

Toyota Stack Sub-Assembly, HV Supply Part Number: G9509-47051
$6133.43 MSRP: $8988.62You Save: $2855.19 (32%)Ships in 1-2 Business DaysProduct Specifications- Other Name: Battery Sub-Assembly, Supply

Toyota Stack Sub-Assembly, HV Supply Part Number: G9508-47181
$6133.43 MSRP: $8988.62You Save: $2855.19 (32%)Ships in 1-2 Business DaysProduct Specifications- Other Name: Battery Sub-Assembly, Supply

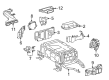
Toyota Battery Assembly, Hev Su Part Number: G9510-60010
$5686.51 MSRP: $8292.09You Save: $2605.58 (32%)Ships in 1-2 Business DaysProduct Specifications- Other Name: BATTERY ASSY, HEV SU

Toyota Battery Assembly, Hev Su Part Number: G9510-42021
$2674.04 MSRP: $3365.69You Save: $691.65 (21%)Ships in 1-2 Business DaysProduct Specifications- Other Name: BATTERY ASSY, HEV SU

Toyota Battery Assembly, HV Supply Part Number: G9510-33121
$2702.39 MSRP: $3365.69You Save: $663.30 (20%)Ships in 1-2 Business Days
Toyota Battery Assembly, Hev Su Part Number: G9510-47162
$10308.97Ships in 1-2 Business DaysProduct Specifications- Other Name: BATTERY ASSY, HEV SU
Toyota Battery Assembly, Hev Su Part Number: G9510-47212
$13727.55Ships in 1-2 Business DaysProduct Specifications- Other Name: BATTERY ASSY, HEV SU

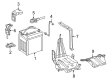
Toyota Battery Part Number: G9510-47210
$13727.55Ships in 1-2 Business DaysProduct Specifications- Other Name: Battery Assembly, Hev Su; Battery Assembly, HV Supply
- Manufacturer Note: MOON ROOF-GLASS ROOF, WITH(SOLAR CELL)
Toyota Battery Assembly, Hev Su Part Number: G9510-52032
$1981.47 MSRP: $2456.74You Save: $475.27 (20%)Ships in 1-2 Business DaysProduct Specifications- Other Name: BATTERY ASSY, HEV SU
Toyota BATTERY Part Number: 28800-36052
$264.92 MSRP: $315.83You Save: $50.91 (17%)Ships in 1-2 Business Days
Toyota Battery Assembly, Hev Su Part Number: G9510-47033
$1802.17 MSRP: $2049.00You Save: $246.83 (13%)Ships in 1-2 Business DaysProduct Specifications- Other Name: BATTERY ASSY, HEV SU
Toyota Battery Assembly, Hev Su Part Number: G9510-33052
$2841.79 MSRP: $3541.14You Save: $699.35 (20%)Ships in 1-2 Business DaysProduct Specifications- Other Name: BATTERY ASSY, HEV SU
Toyota BATTERY Part Number: 28800-28102
$244.84 MSRP: $291.89You Save: $47.05 (17%)Ships in 1-2 Business Days

Toyota Battery Part Number: 00544-25060-550
$173.86 MSRP: $204.78You Save: $30.92 (16%)Product Specifications- Other Name: Truestart Battery; Vehicle Battery
- Replaces: 00544-25060-525


Toyota Battery Part Number: 00544-H4052-470
$174.88 MSRP: $206.00You Save: $31.12 (16%)Product Specifications- Other Name: Truestart H4 (En)


Toyota Battery Part Number: 86777-76040
Product Specifications- Other Name: Battery, Mayday
- Replaces: 86777-0W060, 86777-48020, 86777-76020

Toyota Battery Part Number: 28800-31293
$244.84 MSRP: $291.89You Save: $47.05 (17%)Product Specifications- Replaces: 28800-31292
| Page 1 of 5 |Next >
1-20 of 97 Results
Toyota Car Battery
OEM parts deliver unmatched quality you can rely on. They pass extensive quality control inspections. Toyota produces them to the official factory specifications. This process helps prevent defects and imperfections. So you can get exceptional lifespan and a flawless fit. Need new OEM Toyota Car Battery? You'll love our wide selection of genuine options. Shop in minutes and skip the hunt. Our prices are unbeatable, you'll save time and money. It's easy to shop and find the right piece. Our committed customer service team gives professional help from start to finish. Every part includes a manufacturer's warranty. We ship quickly, your parts will arrive fast at your door.
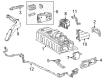
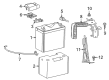
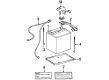
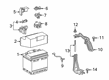
Toyota Car Battery provides consistent power and reliable engine kick throughout the year to all the systems in the car. Toyota emerged as one of the world giants out of a Japanese company that was founded in 1937 by cutting the wastes and giving the factory floor an ability to make decisions swiftly. Toyota is carrying on with the momentum by launching the TNGA platform which has tightened the handling, reduced weight, and increased safety without having to balloon the price. The reward of the refreshed Prius plug-in, the RAV4 plug-in hybrid which can be applied in many ways and a growing lineup of efficient models are pay-offs to Toyota drivers. In 2022, Hybrid Synergy Drive upgrades extended the electric range without worrying about gas bills. Durability remains good hence cars purchased in one continent usually cover trouble-free miles in another continent. The next element is trust since the company does not make buyers make choices when it is offering efficiency and resilience together. Car Battery in Toyota cars serve as mini power plants and convert the energy of chemical into the burst that rotates the starter motor. The Car Battery too is able to keep the radios, locks, and memory settings alive when the engine is not running. Car Battery is available in three flavors, the standard flooded lead-acid units that require regular water tests, maintenance-free flooded units that eliminate the hassle, or the basic and rugged AGM packs that bounce back after vibrations, perform better in cold weather, and never need to be topped off. Car Battery is maintained by the right size, correct Cold Cranking Amps, and good terminals to remain prepared when the cold of winter bites.
Toyota Car Battery Parts and Q&A
- Q: What Are the Safety Precautions and Steps for Maintaining Car Battery on 2003 through 2009 Toyota 4Runner?A:First, inspect the battery for any kind of problem like a corroded attachment, cracks, weak clamps, and battery cable problems. Then, charge the battery outside the vehicle with a slow-rate charger. You can estimate gravity with a hydrometer while charging it.
- Q: How Can Car Battery Be Accurately Tested and Replaced on 2005 Through 2009 Toyota Tacoma?A:A battery cannot be both loaded and unloaded at the same time, that is, it has to be fully charged before it can adequately be tested. Disconnect the negative battery cable and perform the following tests: the indicator eye located on top of the battery should be lightly illuminated; if black, one should charge the battery. For battery types that have easily removable caps, check on the level of the electrolyte solution and in case it is below the uppermost point of the plates, then add distilled water without over flooding the same. To check the density of the electrolyte, dip a hydrometer and maintain the specific gravity around 1.270 at 68 degrees F Indeed, use a digital volt meter to conduct an open circuit voltage examination; fully charged battery must register 12.6 volts and above. An examination of battery condition entails the use of a load tester, which determines the battery's performance under high amperes; the voltage reading should not drop below 9.6 even when held at 15 seconds. Regarding Battery Drain Test, turn off all the accessories and connect a digital ammeter to the negative battery cable and post, the normal battery Drain should be 100 milli amperes or less. The basic procedure of replacing the battery is to disconnect the negative terminal first and connect it last to avoid short circuit. Disconnect both the negative and the positive batteries and unbolt the battery compartment cover and then withdraw the battery slowly. Check from the battery tray and clean it if you see that it has developed corrosion. If replacing, make sure the new battery is as close a match as possible to the old one, make sure the hold down strap is tight and connect the positive terminal first followed by the negative terminal.


Related Toyota Parts
 Toyota Alternator
 Toyota Starter
 Toyota Battery Terminal
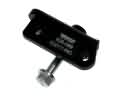 Toyota Alternator Bracket
 Toyota Alternator Pulley
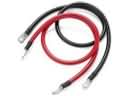 Toyota Battery Cable
 Toyota Battery Tray
 Toyota Voltage Regulator
 Toyota Alternator Brush
 Toyota Armature
 Toyota Starter Brush
 Toyota Starter Drive Gear
Browse Toyota Car Battery by Models
Tacoma 4Runner Camry Tundra Corolla RAV4 Highlander Prius Sienna Land Cruiser Pickup FJ Cruiser 86 Sequoia T100 Avalon Celica Supra Yaris Matrix MR2 Solara Venza Echo C-HR Cressida Grand Highlander Paseo Prius C Prius Prime bZ4X Corolla Cross Corolla iM Crown Crown Signia GR Corolla Mirai MR2 Spyder Prius V Starlet Tercel Yaris iA Prius Plug-In GR Supra Prius AWD-e RAV4 Prime