×
ToyotaParts- Hello
- Login or Register
- Quick Links
- Live Chat
- Track Order
- Parts Availability
- RMA
- Help Center
- Contact Us
- Shop for
- Toyota Parts
- Scion Parts
My Garage
My Account
Cart
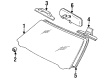
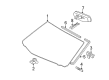
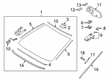
OEM Toyota Avalon Windshield
Glass Windshield- Select Vehicle by Model
- Select Vehicle by VIN
Select Vehicle by Model
orMake
Model
Year
Select Vehicle by VIN
For the most accurate results, select vehicle by your VIN (Vehicle Identification Number).
26 Windshields found

Toyota Avalon Windshield, Bronze Part Number: 56101-AC020-83
$412.03 MSRP: $603.83You Save: $191.80 (32%)Ships in 1-3 Business Days
Toyota Avalon Windshield, Front Part Number: 56101-07020
$472.72 MSRP: $692.77You Save: $220.05 (32%)Ships in 1-3 Business Days

Toyota Avalon Windshield, Front Part Number: 56101-07030
$484.97 MSRP: $710.74You Save: $225.77 (32%)Ships in 1-3 Business DaysToyota Avalon Windshield, Front Part Number: 56101-07120
$492.58 MSRP: $721.88You Save: $229.30 (32%)Ships in 1-3 Business DaysToyota Avalon Windshield, Front Part Number: 56101-07110
$492.58 MSRP: $721.88You Save: $229.30 (32%)Toyota Avalon Windshield, Front Part Number: 56101-07050
$492.58 MSRP: $721.88You Save: $229.30 (32%)Toyota Avalon Windshield, Front Part Number: 56101-07040
$492.58 MSRP: $721.88You Save: $229.30 (32%)Ships in 1-3 Business Days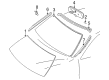
Toyota Avalon Windshield, Green, Front Part Number: 56101-AC080-83
$499.62 MSRP: $732.19You Save: $232.57 (32%)Ships in 1-3 Business Days
Toyota Avalon Windshield Part Number: 56101-07181
$500.18 MSRP: $733.03You Save: $232.85 (32%)Ships in 1-3 Business DaysToyota Avalon Windshield, Front Part Number: 56101-07130
$500.18 MSRP: $733.03You Save: $232.85 (32%)Ships in 1-3 Business DaysToyota Avalon Windshield, Front Part Number: 56101-07060
$500.18 MSRP: $733.03You Save: $232.85 (32%)Ships in 1-3 Business DaysToyota Avalon Windshield, Front Part Number: 56101-07100
$523.11 MSRP: $766.62You Save: $243.51 (32%)Toyota Avalon Windshield, Front Part Number: 56101-07080
$523.11 MSRP: $766.62You Save: $243.51 (32%)Toyota Avalon Windshield, Front Part Number: 56101-07180
$579.63 MSRP: $849.46You Save: $269.83 (32%)Ships in 1-3 Business DaysToyota Avalon Windshield, Front Part Number: 56101-07160
$565.79 MSRP: $829.16You Save: $263.37 (32%)Ships in 1-3 Business Days

Toyota Avalon Windshield, Front Part Number: 56101-AC170
$576.46 MSRP: $844.80You Save: $268.34 (32%)Ships in 1-3 Business DaysToyota Avalon Windshield, Front Part Number: 56101-AC160
$657.27 MSRP: $963.23You Save: $305.96 (32%)Ships in 1-3 Business DaysToyota Avalon Windshield, Front Part Number: 56101-07170
$680.19 MSRP: $996.83You Save: $316.64 (32%)Ships in 1-3 Business DaysToyota Avalon Windshield, Front Part Number: 56101-AC190
$671.00 MSRP: $983.36You Save: $312.36 (32%)Ships in 1-3 Business DaysToyota Avalon Windshield, Front Part Number: 56101-AC180
$683.80 MSRP: $1002.12You Save: $318.32 (32%)Ships in 1-3 Business Days
| Page 1 of 2 |Next >
1-20 of 26 Results
Toyota Avalon Windshield
Choose genuine Windshield that pass strict quality control tests. You can trust the top quality and lasting durability. Shopping for OEM Windshield for your Toyota Avalon? Our website is your one-stop destination. We stock an extensive selection of genuine Toyota Avalon parts. The price is affordable so you can save more. It only takes minutes to browse and find the exact fit. Easily add to cart and check out fast. Our hassle-free return policy will keep you stress-free. We process orders quickly for swift delivery. Your parts will arrive faster, so you can get back on the road sooner.
Toyota Avalon Windshield Parts and Q&A
- Q: How to remove the windshield on Toyota Avalon?A:The first step to windshield removal starts with disassembling both windshield wiper arm assemblies then extracting the cowl top ventilator louver from the right-hand side of the vehicle. Start by removing the front door opening trim Weather Strip from the LH and RH side followed by taking off the front pillar garnish from both sides together with the assist grip sub-assembly for the front section. The work process requires professionals to eliminate first the visor bracket cover followed by taking off LH and RH visor assemblies and roof console box assembly and visor holder. Next move to take out the inner rear view mirror stay holder cover together with the rain sensor cover but keep the rain sensor in place. Remove the sunroof opening trim moulding and the roof headlining assembly in case they are present. The windshield moulding outer upper requires gentle knife cuts to protect the vehicle body while you remove the remaining part of the moulding. One must remove the windshield glass by placing piano wires between interior vehicle body and glass and creating handle attachments to wire ends followed by exterior protective tape application to the vehicle. Handle the curtain shield Air Bag element with care to prevent paint or ornament damage on the vehicle. Chop the adhesive with piano wire while separating the stoppers to lift the glass from its vehicle body using a suction cup while keeping as much adhesive on the vehicle body possible. Scrape off defective stoppers and eliminate adhesive residue from the windshield glass before applying white gasoline to clean the outer edge of the glass without touching it. Begin the body-washing process by adjusting the glass contact area then carefully remove all thick adhesive with a knife before treating the cleaned surface with saturated cleaning items to achieve optimal new glass alignment.
- Q: How to install the windshield glass on Toyota Avalon?A:Start the windshield glass installation process with Primer G application to Windshield Glass Stopper No. 2's installation part followed by minimum 3-minute drying time before trashing any excess and avoiding thick application. You should place 2 new stoppers on both the glass panels subsequently apply 2 new stoppers to the automobile body. Afterwards you must install two new retainers onto the glass surface. Begin by applying Primer G on the installation part of the windshield glass adhesive dam before drying it for 3 minutes and removing excess material before installation. Install the glass with a suction cup to achieve an even contact surface and make reference marks on both the glass and vehicle body. Check the stoppers before taking out the glass and treat bare spots on the vehicle body with Primer M that needs a 3 minute dry time followed by excess removal. Apply Primer M coating to the glass edge and its contacting areas and swiftly wipe off accidental residue before the material dries. Use adhesive cartridge Part No. 00850-00801 or equivalent by cutting the cartridge nozzle followed by loading it into a sealer gun before applying it to the glass surface. Secure the glass installation while following reference marks and using gentle pressure on the rim until the vehicle body maintains a thin gap with the glass. Press the front glass surface gently to fix the fit while using a scraper to remove extra adhesive. The drying process will finish after which you need to perform an air-tightness check and fix any detected leakage points with out glass sealer. Install the roof headlining assembly before moving on to install the sunroof opening trim moulding rail, rain sensor, rain sensor cover, inner rear view mirror stay holder cover, visor holder, roof console box assembly, right and left-hand visor assemblies, visor bracket cover, assist grip sub-assemblies, front pillar garnishes, front door opening trim Weather Strips, cowl top ventilator louver and windshield wiper arm and blade assemblies for both sides.

Related Toyota Avalon Parts
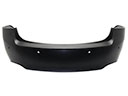 Toyota Avalon Bumper Cover
 Toyota Avalon Grille
 Toyota Avalon Instrument Cluster
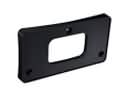 Toyota Avalon License Plate
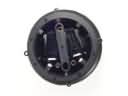 Toyota Avalon Mirror Actuator
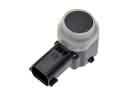 Toyota Avalon Parking Assist Sensor
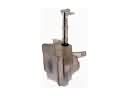 Toyota Avalon Windshield Washer Fluid Reservoir
 Toyota Avalon Windshield Washer Nozzle
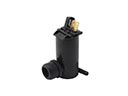 Toyota Avalon Windshield Washer Pump
 Toyota Avalon Windshield Wiper
 Toyota Avalon Wiper Blade
 Toyota Avalon Wiper Linkage