×
ToyotaParts- Hello
- Login or Register
- Quick Links
- Live Chat
- Track Order
- Parts Availability
- RMA
- Help Center
- Contact Us
- Shop for
- Toyota Parts
- Scion Parts
My Garage
My Account
Cart
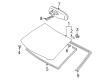
OEM 2003 Toyota Avalon Windshield
Glass Windshield- Select Vehicle by Model
- Select Vehicle by VIN
Select Vehicle by Model
orMake
Model
Year
Select Vehicle by VIN
For the most accurate results, select vehicle by your VIN (Vehicle Identification Number).
2 Windshields found

 Product Specifications
- Other Name: Glass Sub-Assembly, Windshield; Windshield Glass, Front; Glass, Windshield
- Manufacturer Note: *UVCTT,T=4.7,W(RAIN SENSOR)
- Position: Front
- Part Name Code: 56111
- Condition: New
- Fitment Type: Direct Replacement
- SKU: 56101-AC140
- Warranty: This genuine part is guaranteed by Toyota's factory warranty.
- Product Specifications
- Other Name: Glass Sub-Assembly, Windshield; Windshield Glass, Front; Glass, Windshield
- Manufacturer Note: *UVCTT,T=4.7
- Position: Front
- Part Name Code: 56111
- Condition: New
- Fitment Type: Direct Replacement
- SKU: 56101-AC110
- Warranty: This genuine part is guaranteed by Toyota's factory warranty.
2003 Toyota Avalon Windshield
Looking for affordable OEM 2003 Toyota Avalon Windshield? Explore our comprehensive catalogue of genuine 2003 Toyota Avalon Windshield. All our parts are covered by the manufacturer's warranty. Plus, our straightforward return policy and speedy delivery service ensure an unparalleled shopping experience. We look forward to your visit!
2003 Toyota Avalon Windshield Parts Q&A
- Q: How to remove and install a windshield on 2003 Toyota Avalon?A: The first step to remove the windshield requires users to disconnect the inner rear view mirror starting by removing its cover with a screwdriver followed by connector disconnection then removing the mirror itself. First remove sun visors with holders and then proceed to the roof console box by executing the map light lens removal and unscrewing three screws and disconnecting the connector. Start by uninstalling the front door opening trims with the removal of front pillar garnishes from both sides. You should remove the wiper arms together with the hood to cowl top seal along with the cowl top ventilator louver using two clips. Then remove the assist grip followed by the sliding roof opening trim if it exists. Use a knife to meticulously cut away the windshield upper moulding while keeping away from body damage before discarding the rest of the moulding. A piano wire must be inserted between body and glass to detach the windshield. The wire must have its ends connected to wooden blocks while protective tape should cover the glass before application. Climb the windshield glass off with piano wire slices until the body still retains most adhesive residue. The body contact surface must be cleaned and shaped for installation with intact adhesive before cleaning the glass removal area without causing damage to the material. Install the new No. 1 stoppers to the body by aligning them with the notches while putting fresh No. 2 stoppers onto the glass. Use new retainers and dams to attach the glass then correctly position it before marking the contact areas. Rub the black contact area of the glass before applying Primer "M" to the visible body surface which needs to dry for three minutes. The glass edge needs to receive a thin layer of Primer "G" followed by immediate wiping off the excess before the primer becomes dry. You must use adhesive from Part No. 08850-00801 or equivalent within the designated time period to mount windshield glass by aligning it with reference marks. After contact with light pressure you should adjust excess adhesive and then put in the new windshield moulding before the adhesive stops forming bonds. Protective tape should be used to secure the glass and moulding while the adhesive sets up because driving the vehicle must be avoided. A leak test should be performed when adhesive has hardened. The technician must install sliding roof opening trim along with assist grip and cowl top ventilator louver and hood to cowl top seal while adjusting wiper arms to specific positions according to dimension requirements before torquing nuts to 24 N.m. In the last step reinstall the front pillar garnish along with front door opening trims roof console box and sun visors and holders and the inner rear view mirror.
Related 2003 Toyota Avalon Parts
 2003 Toyota Avalon Bumper
 2003 Toyota Avalon Grille
 2003 Toyota Avalon Car Mirror
 2003 Toyota Avalon Instrument Cluster
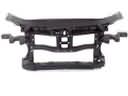 2003 Toyota Avalon Radiator Support
 2003 Toyota Avalon Washer Pump
 2003 Toyota Avalon Windshield Washer Nozzle
 2003 Toyota Avalon Windshield Wiper
 2003 Toyota Avalon Wiper Arm
 2003 Toyota Avalon Wiper Blade
 2003 Toyota Avalon Wiper Linkage
 2003 Toyota Avalon Wiper Motor