×
ToyotaParts- Hello
- Login or Register
- Quick Links
- Live Chat
- Track Order
- Parts Availability
- RMA
- Help Center
- Contact Us
- Shop for
- Toyota Parts
- Scion Parts
My Garage
My Account
Cart
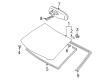
OEM 2004 Toyota Avalon Windshield
Glass Windshield- Select Vehicle by Model
- Select Vehicle by VIN
Select Vehicle by Model
orMake
Model
Year
Select Vehicle by VIN
For the most accurate results, select vehicle by your VIN (Vehicle Identification Number).
2 Windshields found

 Product Specifications
- Other Name: Glass Sub-Assembly, Windshield; Windshield Glass, Front; Glass, Windshield
- Manufacturer Note: *UVCTT,T=4.7,W(RAIN SENSOR)
- Position: Front
- Part Name Code: 56111
- Condition: New
- Fitment Type: Direct Replacement
- SKU: 56101-AC140
- Warranty: This genuine part is guaranteed by Toyota's factory warranty.
- Product Specifications
- Other Name: Glass Sub-Assembly, Windshield; Windshield Glass, Front; Glass, Windshield
- Manufacturer Note: *UVCTT,T=4.7
- Position: Front
- Part Name Code: 56111
- Condition: New
- Fitment Type: Direct Replacement
- SKU: 56101-AC110
- Warranty: This genuine part is guaranteed by Toyota's factory warranty.
2004 Toyota Avalon Windshield
Looking for affordable OEM 2004 Toyota Avalon Windshield? Explore our comprehensive catalogue of genuine 2004 Toyota Avalon Windshield. All our parts are covered by the manufacturer's warranty. Plus, our straightforward return policy and speedy delivery service ensure an unparalleled shopping experience. We look forward to your visit!
2004 Toyota Avalon Windshield Parts Q&A
- Q: How to remove and install a windshield on 2004 Toyota Avalon?A: The windshield removal process starts with taking off the inner rear view mirror by using a screwdriver to remove its cover followed by disconnecting the connector and removing the mirror. The next installation step requires disassembly of roof console box components starting with map light lens fixture removal and continuation to three screw removal and connector detachment. Start the windshield removal process by taking off the front door opening trims together with the front pillar garnish from both sides. A clip remover should be used to detach two clips from both the wiper arms and the hood to cowl top seal and the cowl top ventilator louver. Use a scraper tool to remove first the assist grip then the sliding roof opening trim when present. Start by carefully cut the windshield upper moulding with a knife without hurting the body while removing the excess material. A piano wire should be used to remove windshield glass by inserting it between body and glass while protecting the surface with tape for scratch prevention. Cut the adhesive with the piano wire until the glass frees up leaving maximum adhesive on the body. To start the installation process clean and shape the contact area of the body with a knife combined with a shop rag treated with cleaner but maintain adhesive residue on the body surface. The removed glass requires cleaning through the removal of damaged No. 2 stoppers and dams followed by adhesive scraping before cleaning with a cleaner. To install new No. 1 stoppers you should remove existing adhesive before cleaning the base and securely placing new rubber pieces along the notches. New No. 2 stoppers should be installed onto the glass by positioning them to align precisely with the ceramic notches followed by installation of new retainers and dams to the glass. The correct glass positioning should be followed by checking for consistent contact before marking reference points and performing black-colored contact surface cleaning at the glass rim. Apply Primer M on the accessible body area but skip the adhesive surface itself. Let it dry for at least three minutes. Apply Primer G liquid to the glass edge but remove all trace of mistakes before it dries. A sealer gun should be used to dispense a cartridge (Part No. 08850-00801 or equivalent) within its specified time frame. Install the windshield glass by placing it in proper position according to reference marks before applying light pressure to establish contact and resolving any adhesive problems with a spatula. You must install the new windshield moulding ahead of adhesive hardness and wipe away extra adhesive substance before securely fastening the glass together with moulding using protective tape for adhesive curing duration. Check for leakage before completing assembly steps which include sliding roof opening trim and assist grip installation followed by cowl top ventilator louver installation and then hood to cowl top seal and wiper arms before adding front pillar garnish together with front door opening trims and roof console box and finally sun visors with their holders and an inner rear view mirror.
Related 2004 Toyota Avalon Parts
 2004 Toyota Avalon Bumper
 2004 Toyota Avalon Grille
 2004 Toyota Avalon Car Mirror
 2004 Toyota Avalon Instrument Cluster
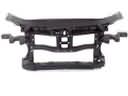 2004 Toyota Avalon Radiator Support
 2004 Toyota Avalon Washer Pump
 2004 Toyota Avalon Windshield Washer Nozzle
 2004 Toyota Avalon Windshield Wiper
 2004 Toyota Avalon Wiper Arm
 2004 Toyota Avalon Wiper Blade
 2004 Toyota Avalon Wiper Linkage
 2004 Toyota Avalon Wiper Motor