×
ToyotaParts- Hello
- Login or Register
- Quick Links
- Live Chat
- Track Order
- Parts Availability
- RMA
- Help Center
- Contact Us
- Shop for
- Toyota Parts
- Scion Parts
My Garage
My Account
Cart
OEM 2007 Toyota Avalon Windshield
Glass Windshield- Select Vehicle by Model
- Select Vehicle by VIN
Select Vehicle by Model
orMake
Model
Year
Select Vehicle by VIN
For the most accurate results, select vehicle by your VIN (Vehicle Identification Number).
4 Windshields found
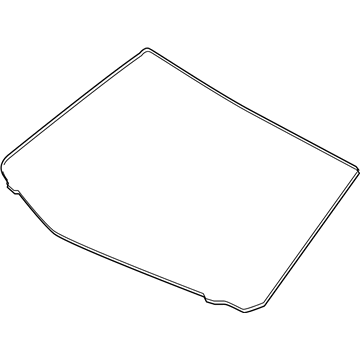
2007 Toyota Avalon Windshield, Front
Part Number: 56101-AC180$683.80 MSRP: $1002.12You Save: $318.32 (32%)Ships in 1-3 Business DaysProduct Specifications- Other Name: Glass Sub-Assembly, Windshield; Windshield Glass, Front; Glass, Windshield
- Manufacturer Note: *LAM,T=4.7,GREEN
- Position: Front
- Part Name Code: 56111
- Condition: New
- Fitment Type: Direct Replacement
- SKU: 56101-AC180
- Warranty: This genuine part is guaranteed by Toyota's factory warranty.
2007 Toyota Avalon Windshield, Front
Part Number: 56101-AC190$671.00 MSRP: $983.36You Save: $312.36 (32%)Ships in 1-3 Business DaysProduct Specifications- Other Name: Glass Sub-Assembly, Windshield; Windshield Glass, Front; Glass, Windshield
- Manufacturer Note: *LAM,T=4.7,GREEN,INTERMITTENT WIPER-RAIN SENSE TMR WASH LNKD
- Position: Front
- Part Name Code: 56111
- Condition: New
- Fitment Type: Direct Replacement
- SKU: 56101-AC190
- Warranty: This genuine part is guaranteed by Toyota's factory warranty.
2007 Toyota Avalon Windshield, Front
Part Number: 56101-AC160$657.27 MSRP: $963.23You Save: $305.96 (32%)Ships in 1-3 Business DaysProduct Specifications- Other Name: Glass Sub-Assembly, Windshield; Windshield Glass, Front; Glass, Windshield
- Manufacturer Note: *LAM,T=4.7,GREEN
- Position: Front
- Part Name Code: 56111
- Condition: New
- Fitment Type: Direct Replacement
- SKU: 56101-AC160
- Warranty: This genuine part is guaranteed by Toyota's factory warranty.
2007 Toyota Avalon Windshield, Front
Part Number: 56101-AC170$576.46 MSRP: $844.80You Save: $268.34 (32%)Ships in 1-3 Business DaysProduct Specifications- Other Name: Glass Sub-Assembly, Windshield; Windshield Glass, Front; Glass, Windshield
- Position: Front
- Part Name Code: 56111
- Condition: New
- Fitment Type: Direct Replacement
- SKU: 56101-AC170
- Warranty: This genuine part is guaranteed by Toyota's factory warranty.
2007 Toyota Avalon Windshield
Looking for affordable OEM 2007 Toyota Avalon Windshield? Explore our comprehensive catalogue of genuine 2007 Toyota Avalon Windshield. All our parts are covered by the manufacturer's warranty. Plus, our straightforward return policy and speedy delivery service ensure an unparalleled shopping experience. We look forward to your visit!
2007 Toyota Avalon Windshield Parts Q&A
- Q: How to remove and install windshield glass on 2007 Toyota Avalon?A: To remove the windshield glass, first take off the windshield wiper arm and blade assembly on both the left and right sides, followed by the removal of the cowl top ventilator louver on the right, front door opening trim Weather Strips on both sides, front pillar garnishes, assist grip sub-assemblies, visor bracket cover, both visor assemblies, roof console box assembly, visor holder, inner rear view mirror stay holder cover, rain sensor cover, rain sensor, sunroof opening trim moulding (if applicable), and the roof headlining assembly. Carefully cut the outer upper windshield moulding with a knife while protecting the vehicle body from damage before you can remove the windshield glass through piano wire insertion and handle attachment methods to the wire ends alongside applying protective tape externally. Use piano wire to cut the adhesive before disengaging stoppers and sucking out the glass using a cup while allowing adhesive to remain on the vehicle surface. First scrape away damaged stoppers and adhesive before cleaning the glass circumference with white gasoline while avoiding contact with the glass at any time. Clean the contact surface with a cloth after removing rough adhesive from the vehicle body. Before putting on windshield glass stopper No. 2 install both new stoppers to the glass after a 3-minute dry time of Primer G on the installation section. For windshield glass stopper No. 1 the technician installs two retainers onto the glass and coats the installation area of the windshield glass adhesive dam with Primer G before installing a new dam. Install the glass through the suction cup while verifying that the contact areas remain level before noting down the reference marks. First remove the glass pane so you can apply Primer M to the entire visible vehicle body part. After this step use the adhesive (Part No. 00850-00801 or equivalent) to stick the glass panes. Place the glass while maintaining reference marks alignment then press it across the rim so there is a tiny gap between the body and glass. Settle excess adhesive before attaching the outer upper windshield moulding by applying Primer G onto the glass edge. After adhesive hardening perform a leak test and then use out glass sealer to close the leaks before reinstalling the roof headlining assembly as well as sunroof opening trim moulding, rain sensor and cover, inner rear view mirror stay holder cover, visor holder, roof console box assembly, both visor assemblies, visor bracket cover, assist grip sub-assemblies, front pillar garnishes, front door opening trim Weather Strips, cowl top ventilator louver, and both windshield wiper arm and blade assemblies.


