×
ToyotaParts- Hello
- Login or Register
- Quick Links
- Live Chat
- Track Order
- Parts Availability
- RMA
- Help Center
- Contact Us
- Shop for
- Toyota Parts
- Scion Parts
My Garage
My Account
Cart
OEM Scion xA Throttle Body
Fuel Injection Throttle Body- Select Vehicle by Model
- Select Vehicle by VIN
Select Vehicle by Model
orMake
Model
Year
Select Vehicle by VIN
For the most accurate results, select vehicle by your VIN (Vehicle Identification Number).
1 Throttle Body found


Scion xA Throttle Body Part Number: 22210-21020
$376.47 MSRP: $551.72You Save: $175.25 (32%)Ships in 1-2 Business Days
Scion xA Throttle Body
Choose genuine Throttle Body that pass strict quality control tests. You can trust the top quality and lasting durability. Shopping for OEM Throttle Body for your Scion xA? Our website is your one-stop destination. We stock an extensive selection of genuine Scion xA parts. The price is affordable so you can save more. It only takes minutes to browse and find the exact fit. Easily add to cart and check out fast. Our hassle-free return policy will keep you stress-free. We process orders quickly for swift delivery. Your parts will arrive faster, so you can get back on the road sooner.
The Scion xA Throttle Body is one of the crucial parts of the fuel injection system of the car that is popular for its quality and performance. This one controls the air intake into the engine; it contains a butterfly valve that opens and closes depending on the position of the accelerator pedal to help in the provision of the required air-fuel mixture for improved efficiency. Scion xA models, that are equipped with ETC, have better sensitivity, smooth interaction with other systems, and at the moment, this makes them unique in the automobile market. The design of the Scion xA Throttle Body includes a fine control of the air supply that is very essential for the efficiency of the car and more so when the car has taken high mileage or when it is showing signs of wear out. Cleaning or even replacing some of the items such as the throttle position sensor is crucial so that the throttle body remains efficient in the operation of the vehicle and there will be improvement on the safety of the vehicle. The Scion xA is built with series hybrid 1.5 L DOHC I4 engine, and fuel economy is good on this car it has 27/34 mpg city/hwy, this again shows why the throttle body is important in enhancing the performance. Thanks to small size and comparatively low weight the Scion xA provides rather dynamic ride, featuring 0-60 mph acceleration in 8.8 seconds. The Scion xA Throttle Body not only makes a car run better but also makes them safer and more efficient, which explains why it is a key offering within the Scion clan.
Scion xA Throttle Body Parts and Q&A
- Q: How to service and repair the throttle body on Scion xA?A:Activation of Air Bags and seat belt pretensioners can be prevented by waiting this amount of time after disconnecting the negative cable before starting any throttle body service work. The service starts with draining engine coolant followed by disconnecting the MAF meter connector and purge VSV connector and detaching the wire harness clamp while removing the No. 2 and No. 1 purge line hoses and the ventilation hose. Begin by unlocking the 2 clamp hooks followed by loosening the hose clamp and then extracting the air cleaner case and filter element before taking out the 4 air cleaner case securing bolts. Disconnection of the accelerator control cable requires you to first loosen its nut. Automatic transaxle maintenance requires disconnecting the throttle position sensor connector, hose and bolt with the oil cooler tube clamp followed by disassembly of the bolt from the transmission oil filler tube. Afterward remove the O-ring found on the transmission oil filler tube. The throttle body assembly removal starts with disconnecting the IAC valve connector then the throttle position sensor connector (for manual transaxle) followed by removing the wire harness clamp until finally removing the bolt and 2 nuts to detach the accelerator control cable bracket and throttle body before gasket removal from the intake manifold and disconnecting the No. 1 and No. 2 water by-pass hoses. Procedure for installation includes connecting No. 1 and No. 2 water by-pass hoses followed by installing a new gasket to the intake manifold and tightening the bolt and 2 nuts securing the throttle body and accelerator control bracket to 30 N.m (306 kgf.cm, 22 ft.lbf). After installation of the wire harness clamp, users must connect the throttle position sensor connector (for manual transaxle) before linking the IAC valve connector. The automatic transaxle process requires installing a new O-ring on the transmission oil filler tube which should be bolted with 5.5 N.m (56 kgf.cm, 49 in.lbf) torque before adding the oil cooler tube clamp secured with 5.5 N.m (56 kgf.cm, 49 in.lbf) torque and connecting the hose and throttle position sensor connector. Install the accelerator control cable assembly, torqued to 13 N.m (133 kgf.cm, 10 ft.lbf), followed by the air cleaner assembly, securing the air cleaner case to the air cleaner bracket with 3 bolts torqued to 7.8 N.m (80 kgf.cm, 69 in.lbf), connecting the air cleaner inlet to the engine compartment with a bolt torqued to 7.5 N.m (76 kgf.cm, 66 in.lbf), tightening the hose clamp, and reconnecting the MAF meter connector, purge VSV connector, wire harness clamp, No. 2 and No. 1 purge line hoses, and the ventilation hose, locking the 2 clamp hooks. After connecting the cable to the negative terminal you must inspect for leaks while adding engine coolant before initiating system procedures because specific features need initialization before reconnecting the negative terminal.

Related Scion xA Parts
 Scion xA Fuel Filter
 Scion xA Gas Cap
 Scion xA Air Duct
 Scion xA Air Filter Box
 Scion xA Air Intake Coupling
 Scion xA Fuel Filler Hose
 Scion xA Fuel Filler Neck
 Scion xA Fuel Injector
 Scion xA Fuel Pressure Regulator
 Scion xA Fuel Pump Gasket
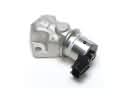 Scion xA Idle Control Valve
 Scion xA Throttle Body Gasket