My Garage
Cart

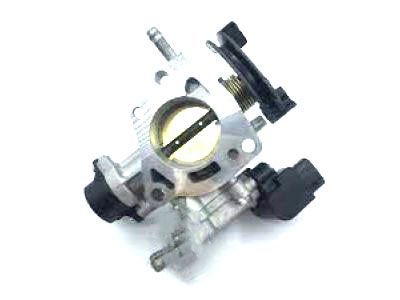
OEM 2006 Scion xA Throttle Body

Fuel Injection Throttle Body
  • Select Vehicle by Model
  • Select Vehicle by VIN
Select Vehicle by Model
Make
Model
Year
or
Select Vehicle by VIN
For the most accurate results, select vehicle by your VIN (Vehicle Identification Number).

1 Throttle Body found

  • 2006 Scion xA Throttle Body - 22210-21020
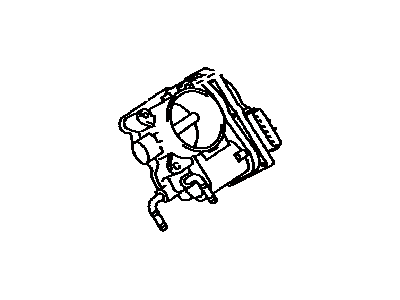
    2006 Scion xA Throttle Body Diagram - 22210-21020
    View related parts

    2006 Scion xA Throttle Body

    Part Number: 22210-21020
    $337.00 MSRP: $481.16
    You Save: $144.16 (30%)
    Ships in 1-2 Business Days
    ADD TO CART
    Product Specifications
    • Other Name: Body Assembly, Throttle
    • Part Name Code: 22210
    • Item Weight: 2.50 Pounds
    • Item Dimensions: 8.7 x 7.6 x 5.8 inches
    • Condition: New
    • Fitment Type: Direct Replacement
    • SKU: 22210-21020
    • Warranty: This genuine part is guaranteed by Toyota's factory warranty.
    More Info
    Fits the following 2006 Scion xA Submodels:
    • Base | 4 Cyl 1.5 L GAS

2006 Scion xA Throttle Body

Looking for affordable OEM 2006 Scion xA Throttle Body? Explore our comprehensive catalogue of genuine 2006 Scion xA Throttle Body. All our parts are covered by the manufacturer's warranty. Plus, our straightforward return policy and speedy delivery service ensure an unparalleled shopping experience. We look forward to your visit!

2006 Scion xA Parts Questions & Experts Answers

  • Q: How to service and repair the throttle body on 2006 Scion xA?
    A: Activation of Air Bags and seat belt pretensioners can be prevented by waiting this amount of time after disconnecting the negative cable before starting any throttle body service work. The service starts with draining engine coolant followed by disconnecting the MAF meter connector and purge VSV connector and detaching the wire harness clamp while removing the No. 2 and No. 1 purge line hoses and the ventilation hose. Begin by unlocking the 2 clamp hooks followed by loosening the hose clamp and then extracting the air cleaner case and filter element before taking out the 4 air cleaner case securing bolts. Disconnection of the accelerator control cable requires you to first loosen its nut. Automatic transaxle maintenance requires disconnecting the throttle position sensor connector, hose and bolt with the oil cooler tube clamp followed by disassembly of the bolt from the transmission oil filler tube. Afterward remove the O-ring found on the transmission oil filler tube. The throttle body assembly removal starts with disconnecting the IAC valve connector then the throttle position sensor connector (for manual transaxle) followed by removing the wire harness clamp until finally removing the bolt and 2 nuts to detach the accelerator control cable bracket and throttle body before gasket removal from the intake manifold and disconnecting the No. 1 and No. 2 water by-pass hoses. Procedure for installation includes connecting No. 1 and No. 2 water by-pass hoses followed by installing a new gasket to the intake manifold and tightening the bolt and 2 nuts securing the throttle body and accelerator control bracket to 30 N.m (306 kgf.cm, 22 ft.lbf). After installation of the wire harness clamp, users must connect the throttle position sensor connector (for manual transaxle) before linking the IAC valve connector. The automatic transaxle process requires installing a new O-ring on the transmission oil filler tube which should be bolted with 5.5 N.m (56 kgf.cm, 49 in.lbf) torque before adding the oil cooler tube clamp secured with 5.5 N.m (56 kgf.cm, 49 in.lbf) torque and connecting the hose and throttle position sensor connector. Install the accelerator control cable assembly, torqued to 13 N.m (133 kgf.cm, 10 ft.lbf), followed by the air cleaner assembly, securing the air cleaner case to the air cleaner bracket with 3 bolts torqued to 7.8 N.m (80 kgf.cm, 69 in.lbf), connecting the air cleaner inlet to the engine compartment with a bolt torqued to 7.5 N.m (76 kgf.cm, 66 in.lbf), tightening the hose clamp, and reconnecting the MAF meter connector, purge VSV connector, wire harness clamp, No. 2 and No. 1 purge line hoses, and the ventilation hose, locking the 2 clamp hooks. After connecting the cable to the negative terminal you must inspect for leaks while adding engine coolant before initiating system procedures because specific features need initialization before reconnecting the negative terminal.

Related 2006 Scion xA Parts