×
ToyotaParts- Hello
- Login or Register
- Quick Links
- Live Chat
- Track Order
- Parts Availability
- RMA
- Help Center
- Contact Us
- Shop for
- Toyota Parts
- Scion Parts
My Garage
My Account
Cart
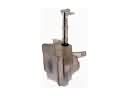
OEM Scion xA Clock Spring
Spiral Cable Clock Spring- Select Vehicle by Model
- Select Vehicle by VIN
Select Vehicle by Model
orMake
Model
Year
Select Vehicle by VIN
For the most accurate results, select vehicle by your VIN (Vehicle Identification Number).
2 Clock Springs found


Scion xA Clockspring Part Number: 84306-06030
$338.42 MSRP: $483.19You Save: $144.77 (30%)Ships in 1-3 Business Days

Scion xA Clockspring Part Number: 84306-52060
$357.51 MSRP: $523.94You Save: $166.43 (32%)Ships in 1-2 Business Days
Scion xA Clock Spring
Choose genuine Clock Spring that pass strict quality control tests. You can trust the top quality and lasting durability. Shopping for OEM Clock Spring for your Scion xA? Our website is your one-stop destination. We stock an extensive selection of genuine Scion xA parts. The price is affordable so you can save more. It only takes minutes to browse and find the exact fit. Easily add to cart and check out fast. Our hassle-free return policy will keep you stress-free. We process orders quickly for swift delivery. Your parts will arrive faster, so you can get back on the road sooner.
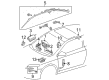
The Scion xA Clock Spring operates as a crucial element in Supplemental Restraint System (SRS) of the vehicle by creating dependable electrical connections to link the airbag module with the vehicle electrical system. The connection ensures quick deployment of airbags when a car collides thus boosting passenger protection. Designed to save energy the Scion xA Clock Spring uses flat multiple wires wound into a spiral that lets the steering wheel turn during usage. The design supports proper functionality. This Clock Spring functions with many Scion xA versions and guarantees support for vehicle airbags and strengthens both vehicle efficiency and operational performance. Vehicle safety relies heavily upon the Scion xA Clock Spring since its average replacement cost reaches between $50 to $400. The Scion xA achieves its excellent fuel economy together with agile driving performance because of this dependable component which makes safety features operate seamlessly. The automotive market values the the automaker model Clock Spring because of its reliable performance alongside its robust design which delivers dependable safety features to drivers. The car Clock Spring demonstrates the brand's dedication to quality safety products which verify its central role for improved driving conditions.
Scion xA Clock Spring Parts and Q&A
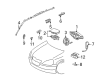
- Q: How to replace the Clock Spring Assembly / Spiral Cable on Scion xA?A:The process to replace the Clock Spring Assembly / Clock Spring starts with following restraint systems service precautions and disconnecting the battery negative terminal. The front wheels should be aligned facing forward while workers use Special Service Tool: 09950-50013 (09951-05010, 09952-05010, 09953-05020, 09954-05021) to remove the Horn Button Assy along with the Steering Wheel Assy. Start by removing the steering column cover through the disposal of its 3 screws until you achieve the removal of the Clock Spring Sub-Assy by detaching its Air Bag connector together with the connector from the clock spring sub-assy and then detach the 3 claws. Check the clock spring sub-assy connector for both connector scratches and cracks as well as any present chips, dents or cracks before replacing it with a fresh component. After ensuring the front wheels are still facing straight ahead, install the new clock spring sub-assy by setting the turn signal switch to the neutral position, engaging the 3 claws, and connecting the Air Bag connector and the connector to the clock spring sub-assy. Reinstall the steering column cover with the 3 screws, then adjust the clock spring sub-assy by ensuring the Ignition Switch is off and the battery negative terminal is disconnected for 90 seconds before turning the clock spring sub-assy counterclockwise slowly until firm, then rotating it clockwise about 2.5 turns to align the marks. To complete the installation you should put together the Steering Wheel Assy before examining the steering wheel center point and adding the Horn Button Assy for examination and checking the SRS warning light functionality.
- Q: How to service the Clock Spring Assembly / Spiral Cable on Scion xA?A:Any service work on the Clock Spring Assembly / Clock Spring requires beginning with negative battery cable disconnection followed by at least 90 seconds of wait time to avoid activating Air Bag and seat belt pretensioners. The first step requires removing the steering pad assembly while the front wheels should be directly forward and the steering wheel assembly and steering column cover must be taken off. The service process begins by disconnecting the Air Bag connector from the clock spring sub-assembly while paying attention to prevent wire harness damage and detaching 3 claws for clock spring removal. Before assembly verify that the front wheels are set to a straight position while placing the turn signal switch into the neutral setting to prevent pin breakage. As part of the installation process attach the clock spring while removing the lock pin (if replacing it with new) then attach the Air Bag connector without harming the wire harness. Install the 3 screws into the steering column cover before positioning the clock spring by counterclockwise rotation until firm then move to clockwise rotation of 2.5 turns to reach alignment marks. Steering should only use mechanical means and not touch the Air Bag wire harness. Finish the installation with steering wheel and steering pad components followed by reconnecting battery cables to the negative terminal while checking the steering pad assembly quality. System initialization must be performed when the battery cable reconnection requires it. Check the SRS warning light afterward and inspect the steering wheel position.