×
ToyotaParts- Hello
- Login or Register
- Quick Links
- Live Chat
- Track Order
- Parts Availability
- RMA
- Help Center
- Contact Us
- Shop for
- Toyota Parts
- Scion Parts
My Garage
My Account
Cart
OEM 2010 Scion xD Seat Belt
Seat Safety Belt- Select Vehicle by Model
- Select Vehicle by VIN
Select Vehicle by Model
orMake
Model
Year
Select Vehicle by VIN
For the most accurate results, select vehicle by your VIN (Vehicle Identification Number).
11 Seat Belts found

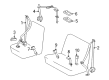
2010 Scion xD Center Buckle, Passenger Side
Part Number: 73330-52070-B0$37.03 MSRP: $51.54You Save: $14.51 (29%)Ships in 1-3 Business DaysProduct Specifications- Other Name: Belt Assembly, Rear Seat L; Seat Belt Receptacle, Rear Right Outer; Latch; Belt Assembly, Rear Seat Inner W/Center, Passenger Side
- Manufacturer Note: DK.GRAY,TRIM1#
- Position: Passenger Side
- Part Name Code: 73470B
- Item Weight: 1.80 Pounds
- Condition: New
- Fitment Type: Direct Replacement
- SKU: 73330-52070-B0
- Warranty: This genuine part is guaranteed by Toyota's factory warranty.

2010 Scion xD Inner Buckle, Driver Side
Part Number: 73390-52040-B0$28.43 MSRP: $39.58You Save: $11.15 (29%)Ships in 1-2 Business DaysProduct Specifications- Other Name: Belt Assembly, Rear Seat; Seat Belt Receptacle, Rear Left Inner; Latch; Belt Assembly, Rear Seat, Inner Driver Side
- Manufacturer Note: DK.GRAY,TRIM1#
- Position: Inner Driver Side
- Part Name Code: 73390C
- Item Weight: 1.00 Pounds
- Condition: New
- Fitment Type: Direct Replacement
- SKU: 73390-52040-B0
- Warranty: This genuine part is guaranteed by Toyota's factory warranty.

2010 Scion xD Inner Buckle
Part Number: 73380-52110-B0$28.43 MSRP: $39.58You Save: $11.15 (29%)Ships in 1-3 Business DaysProduct Specifications- Other Name: Belt Assembly, Rear Seat; Seat Belt Receptacle, Rear Right Inner; Latch; Belt Assembly, Rear Seat, Inner
- Manufacturer Note: DK.GRAY,TRIM1#
- Position: Inner
- Part Name Code: 73380A
- Item Weight: 1.30 Pounds
- Condition: New
- Fitment Type: Direct Replacement
- SKU: 73380-52110-B0
- Warranty: This genuine part is guaranteed by Toyota's factory warranty.

2010 Scion xD Center Buckle, Driver Side
Part Number: 73340-52060-B0$28.43 MSRP: $39.58You Save: $11.15 (29%)Ships in 1-3 Business DaysProduct Specifications- Other Name: Belt Assembly, Rear Seat L; Seat Belt Receptacle, Rear Left Outer; Latch; Belt Assembly, Rear Seat Lap Type, Center Driver Side
- Manufacturer Note: DK.GRAY,TRIM1#
- Position: Center Driver Side
- Part Name Code: 73340C
- Item Weight: 1.40 Pounds
- Condition: New
- Fitment Type: Direct Replacement
- SKU: 73340-52060-B0
- Warranty: This genuine part is guaranteed by Toyota's factory warranty.

2010 Scion xD Lap & Shoulder Belt, Outer Passenger Side
Part Number: 73360-52250-B0$163.33 MSRP: $231.21You Save: $67.88 (30%)Ships in 1-3 Business DaysProduct Specifications- Other Name: Belt Assembly, Rear Seat; Seat Belt Lap and Shoulder Belt, Rear Right Outer; Outer Belt Assembly; Belt Assembly, Rear Seat, Outer Passenger Side
- Manufacturer Note: BLACK,TRIM1#
- Position: Outer Passenger Side
- Part Name Code: 73360C
- Item Weight: 2.90 Pounds
- Condition: New
- Fitment Type: Direct Replacement
- SKU: 73360-52250-B0
- Warranty: This genuine part is guaranteed by Toyota's factory warranty.

2010 Scion xD Lap & Shoulder Belt, Outer Driver Side
Part Number: 73370-52210-B0$174.97 MSRP: $249.82You Save: $74.85 (30%)Ships in 1-3 Business DaysProduct Specifications- Other Name: Belt Assembly, Rear Seat; Seat Belt Lap and Shoulder Belt, Rear Left Outer; Outer Belt Assembly; Belt Assembly, Rear Seat, Outer Driver Side
- Manufacturer Note: BLACK,TRIM1#
- Position: Outer Driver Side
- Part Name Code: 73370C
- Item Weight: 2.20 Pounds
- Condition: New
- Fitment Type: Direct Replacement
- SKU: 73370-52210-B0
- Warranty: This genuine part is guaranteed by Toyota's factory warranty.

2010 Scion xD Buckle, Passenger Side
Part Number: 73230-52751-B0$61.49 MSRP: $86.31You Save: $24.82 (29%)Ships in 1-3 Business DaysProduct Specifications- Other Name: Belt Assembly, Front Seat; Seat Belt Receptacle, Front Right; Latch; Belt Assembly, Front Seat Inner, Passenger Side
- Manufacturer Note: DK.GRAY,TRIM1#
- Position: Passenger Side
- Part Name Code: 73230
- Item Weight: 1.50 Pounds
- Item Dimensions: 13.9 x 11.2 x 2.3 inches
- Condition: New
- Fitment Type: Direct Replacement
- SKU: 73230-52751-B0
- Warranty: This genuine part is guaranteed by Toyota's factory warranty.
2010 Scion xD Buckle, Driver Side
Part Number: 73230-52741-B0$66.82 MSRP: $93.80You Save: $26.98 (29%)Ships in 1-3 Business DaysProduct Specifications- Other Name: Belt Assembly, Front Seat; Seat Belt Receptacle, Front Left; Latch; Belt Assembly, Front Seat Inner, Driver Side
- Manufacturer Note: DK.GRAY,TRIM1#
- Position: Driver Side
- Part Name Code: 73240
- Item Weight: 1.40 Pounds
- Condition: New
- Fitment Type: Direct Replacement
- SKU: 73230-52741-B0
- Warranty: This genuine part is guaranteed by Toyota's factory warranty.

2010 Scion xD Lap & Shoulder Belt, Passenger Side
Part Number: 73210-52670-B0$279.82 MSRP: $399.52You Save: $119.70 (30%)Ships in 1-3 Business DaysProduct Specifications- Other Name: Belt Assembly, Front Seat; Seat Belt Lap and Shoulder Belt, Front Right; Belt & Retractor; Belt Assembly, Front Seat Outer, Passenger Side
- Manufacturer Note: DK.GRAY,TRIM1#
- Position: Passenger Side
- Part Name Code: 73210
- Item Weight: 5.40 Pounds
- Item Dimensions: 10.1 x 7.4 x 6.2 inches
- Condition: New
- Fitment Type: Direct Replacement
- SKU: 73210-52670-B0
- Warranty: This genuine part is guaranteed by Toyota's factory warranty.
2010 Scion xD Lap & Shoulder Belt, Driver Side
Part Number: 73220-52710-B0$272.13 MSRP: $388.54You Save: $116.41 (30%)Ships in 1-3 Business DaysProduct Specifications- Other Name: Belt Assembly, Front Seat; Seat Belt Lap and Shoulder Belt, Front Left; Belt & Retractor; Belt Assembly, Front Seat Outer, Driver Side
- Manufacturer Note: DK.GRAY,TRIM1#
- Position: Driver Side
- Part Name Code: 73220
- Item Weight: 4.60 Pounds
- Item Dimensions: 10.2 x 7.1 x 6.1 inches
- Condition: New
- Fitment Type: Direct Replacement
- SKU: 73220-52710-B0
- Warranty: This genuine part is guaranteed by Toyota's factory warranty.
 Product Specifications
- Other Name: Belt Assembly, Rear Seat 3; Seat Belt Lap and Shoulder Belt, Rear Inner; Center Seat Belt; Belt Assembly, Rear Seat 3 Point Type, Passenger Side
- Manufacturer Note: BLACK,TRIM1#
- Position: Passenger Side
- Part Name Code: 73310
- Condition: New
- Fitment Type: Direct Replacement
- SKU: 73310-52040-B0
- Warranty: This genuine part is guaranteed by Toyota's factory warranty.
2010 Scion xD Seat Belt
Looking for affordable OEM 2010 Scion xD Seat Belt? Explore our comprehensive catalogue of genuine 2010 Scion xD Seat Belt. All our parts are covered by the manufacturer's warranty. Plus, our straightforward return policy and speedy delivery service ensure an unparalleled shopping experience. We look forward to your visit!
2010 Scion xD Seat Belt Parts Q&A
- Q: How to remove the rear Seat Belt assembly on 2010 Scion xD?A: Every instance of rear seat outer belt assembly removal requires the specific tool TORX socket wrench E10 for the rear seat application. JeffInstances should begin their operation by uninstalling the deck board assembly followed by unfastening the No. 1 rear seat leg cover for the RH side plus the No. 1 rear seat leg cover for the LH side then the No. 2 rear seat leg cover for the LH side. First remove the rear door scuff plate and the rear door opening trim Weather Strip but keep working from both RH and LH sides simultaneously until deck trim side panel and roof side inner garnish are exposed for removal. The second step requires removing both the rear deck trim cover and the luggage hold belt striker assembly. You need to remove the deck trim side panel assembly by first unfastening the rear seat outer belt from the rear seat shoulder belt hanger and removing the bolt but before disengaging the clip to extract the rear seat outer belt anchor plate and finally removing the screw to unfasten the deck trim side panel through the separation of three clips and seven claws. Discharge the room light connector before detaching the deck trim side panel assembly LH. Use a screwdriver which is taped up to extract the rear seat shoulder belt hanger's 2 claws one by one. The completion of the rear seat outer belt assembly depends on removing the bolt and through anchor then bolt followed by the hooks and retractor and finally detaching the seat belt hole seal using 2 claws.
Related 2010 Scion xD Parts
 2010 Scion xD Bumper
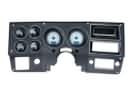 2010 Scion xD Dash Panels
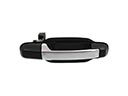 2010 Scion xD Door Handle
 2010 Scion xD Door Hinge
 2010 Scion xD Door Lock Cylinder
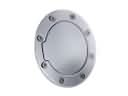 2010 Scion xD Fuel Door
 2010 Scion xD Hood Cable
 2010 Scion xD Instrument Cluster
 2010 Scion xD Interior Door Handle
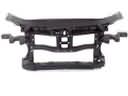 2010 Scion xD Radiator Support
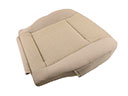 2010 Scion xD Seat Cushion
 2010 Scion xD Wiper Motor