×
ToyotaParts- Hello
- Login or Register
- Quick Links
- Live Chat
- Track Order
- Parts Availability
- RMA
- Help Center
- Contact Us
- Shop for
- Toyota Parts
- Scion Parts
My Garage
My Account
Cart
OEM 2009 Toyota Tacoma Crankshaft Seal
- Select Vehicle by Model
- Select Vehicle by VIN
Select Vehicle by Model
orMake
Model
Year
Select Vehicle by VIN
For the most accurate results, select vehicle by your VIN (Vehicle Identification Number).
4 Crankshaft Seals found

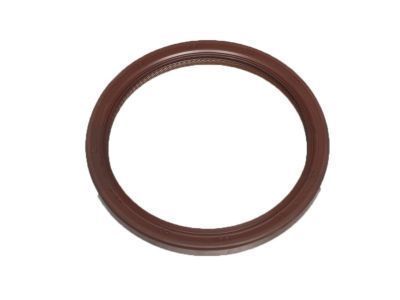
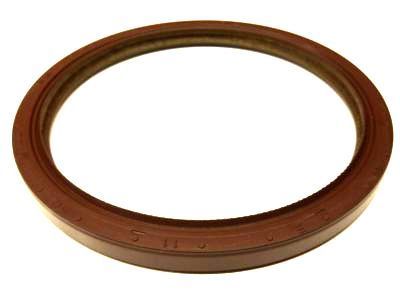
2009 Toyota Tacoma Rear Main Seal
Part Number: 90311-88006$39.78 MSRP: $55.37You Save: $15.59 (29%)Ships in 1-2 Business DaysProduct Specifications- Other Name: Seal, Type T Oil; Engine Crankshaft Seal, Rear; Seal, Engine Rear Oil; Engine Crankshaft Seal; Crankshaft Seal
- Position: Rear
- Replaces: 90311-88004, 90311-88005, 90311-T0058
- Part Name Code: 11381A
- Item Weight: 0.50 Pounds
- Item Dimensions: 5.2 x 5.2 x 0.4 inches
- Condition: New
- Fitment Type: Direct Replacement
- SKU: 90311-88006
- Warranty: This genuine part is guaranteed by Toyota's factory warranty.

2009 Toyota Tacoma Crankshaft Seal, Front
Part Number: 90311-48031$17.08 MSRP: $23.77You Save: $6.69 (29%)Ships in 1 Business DayProduct Specifications- Other Name: Seal, Type T Oil; Engine Crankshaft Seal, Front; Front Crank Seal; Oil Seal for Timing Gear/Chain Case and Crankshaft Front.
- Position: Front
- Replaces: 90311-48029, 90311-T0032
- Item Weight: 0.50 Pounds
- Item Dimensions: 2.3 x 2.2 x 0.4 inches
- Condition: New
- Fitment Type: Direct Replacement
- SKU: 90311-48031
- Warranty: This genuine part is guaranteed by Toyota's factory warranty.

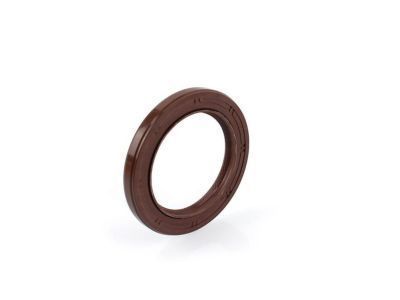
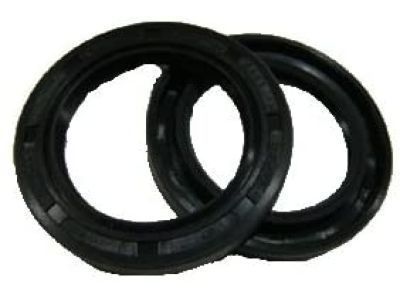
2009 Toyota Tacoma Rear Main Seal
Part Number: 90311-A0006$53.88 MSRP: $75.00You Save: $21.12 (29%)Ships in 1-2 Business DaysProduct Specifications- Other Name: Seal, Type T Oil; Engine Crankshaft Seal, Rear; Engine Crankshaft Seal Kit; Crankshaft Seal Kit; Oil Seal Set; Crankshaft Seal; Rear Seal; Seal, Engine Rear Oil; Seal
- Manufacturer Note: (L)
- Replaces: 90311-99010
- Part Name Code: 11381A
- Item Weight: 0.70 Pounds
- Item Dimensions: 5.2 x 5.1 x 0.4 inches
- Condition: New
- Fitment Type: Direct Replacement
- SKU: 90311-A0006
- Warranty: This genuine part is guaranteed by Toyota's factory warranty.

2009 Toyota Tacoma Oil Seal, Front
Part Number: 90311-A0005$19.11 MSRP: $26.60You Save: $7.49 (29%)Ships in 1-3 Business DaysProduct Specifications- Other Name: Seal, Type T Oil; Engine Crankshaft Seal, Front; Timing Cover Gasket; Multi-Purpose Seal; Timing Cover Seal; Crankshaft Seal; Front Seal; Timing Cover Oil Seal; Engine Crankshaft Seal
- Position: Front
- Replaces: 90311-42019, 90311-42007, 90311-42037, 90311-42036
- Part Name Code: 11301C
- Item Weight: 0.50 Pounds
- Item Dimensions: 5.3 x 4.8 x 1.0 inches
- Condition: New
- Fitment Type: Direct Replacement
- SKU: 90311-A0005
- Warranty: This genuine part is guaranteed by Toyota's factory warranty.
2009 Toyota Tacoma Crankshaft Seal
Looking for affordable OEM 2009 Toyota Tacoma Crankshaft Seal? Explore our comprehensive catalogue of genuine 2009 Toyota Tacoma Crankshaft Seal. All our parts are covered by the manufacturer's warranty. Plus, our straightforward return policy and speedy delivery service ensure an unparalleled shopping experience. We look forward to your visit!
2009 Toyota Tacoma Crankshaft Seal Parts Q&A
- Q: How to install the front crankshaft seal on 2009 Toyota Tacoma?A: Before placing the new oil seal on the 2TR-FE front crankshaft seal position, users must spread a light layer of MP grease across the lip while keeping the lip clean of foreign matter. Using Special Service Tool: 09223-50010 conduct uniform tapping of the new oil seal until it reaches the timing chain cover edge level with attention to tapping only straight down and eliminating grease from the crankshaft. Start by aligning the pulley key groove with the set key of the crankshaft and then slide on the crankshaft pulley with a new crankshaft pulley bolt temporarily installed. Use Special Service Tool 09213-54015 91651-60855 to maintain the grip on the crankshaft pulley before tightening the bolt to 260 Nm (2,651 kgf-cm, 192 ft-lbf) while leaving out repeated use of the pulley bolt. Use the bolt and bracket and fasten it with 7.5 Nm torque for cars that have air conditioning installed (76 kgf-cm, 66 in-lbf). The next step requires installing the fan shroud after which the installer must install the radiator support to frame seal LH then add engine coolant for a final inspection of leakages from engine coolant and oil. End the installation of the Pre Runner and 4WD type engine under cover sub-assembly by tightening each of the four bolts to 30 Nm (306 kgf-cm, 22 ft-lbf).
