×
ToyotaParts- Hello
- Login or Register
- Quick Links
- Live Chat
- Track Order
- Parts Availability
- RMA
- Help Center
- Contact Us
- Shop for
- Toyota Parts
- Scion Parts
My Garage
My Account
Cart
OEM 2009 Toyota Highlander Windshield
Glass Windshield- Select Vehicle by Model
- Select Vehicle by VIN
Select Vehicle by Model
orMake
Model
Year
Select Vehicle by VIN
For the most accurate results, select vehicle by your VIN (Vehicle Identification Number).
2 Windshields found


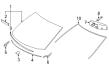
2009 Toyota Highlander Windshield, Front
Part Number: 56101-0E151$587.12 MSRP: $860.44You Save: $273.32 (32%)Ships in 1-3 Business DaysProduct Specifications- Other Name: Glass Sub-Assembly, Windshield; Windshield Glass, Front; Glass, Windshield
- Position: Front
- Replaces: 56101-0E150, 56101-48273, 56101-48272, 56101-48271, 56101-48274, 56101-48270
- Part Name Code: 56111
- Condition: New
- Fitment Type: Direct Replacement
- SKU: 56101-0E151
- Warranty: This genuine part is guaranteed by Toyota's factory warranty.
2009 Toyota Highlander Windshield, Front
Part Number: 56101-0E141$587.12 MSRP: $860.44You Save: $273.32 (32%)Ships in 1-3 Business DaysProduct Specifications- Other Name: Glass Sub-Assembly, Windshield; Windshield Glass, Front; Glass, Windshield
- Manufacturer Note: *LAM,T=4.76,GREEN
- Position: Front
- Replaces: 56101-48251, 56101-48252, 56101-0E140, 56101-48254, 56101-48250, 56101-48253
- Part Name Code: 56111
- Condition: New
- Fitment Type: Direct Replacement
- SKU: 56101-0E141
- Warranty: This genuine part is guaranteed by Toyota's factory warranty.
2009 Toyota Highlander Windshield
Looking for affordable OEM 2009 Toyota Highlander Windshield? Explore our comprehensive catalogue of genuine 2009 Toyota Highlander Windshield. All our parts are covered by the manufacturer's warranty. Plus, our straightforward return policy and speedy delivery service ensure an unparalleled shopping experience. We look forward to your visit!
2009 Toyota Highlander Windshield Parts Q&A
- Q: How to install the windshield glass on 2009 Toyota Highlander?A: Start the windshield glass installation by brushing Primer G onto both No. 2 windshield glass stops and waiting three minutes until discarding the unused primer. New glass stoppers belonging to the 2-piece type should be positioned onto the glass. Fix two new No. 1 windshield glass stoppers onto the vehicle body structure while using the 2-piece type configuration. The application area of the window glass adhesive dam requires Primer G application followed by a 3-minute drying period to remove excess while also installing the new adhesive dam on the dam reference line. Use suction cups to mount the windshield glass by maintaining surface level equality and marking both windscreen points with body alignment marks. The exposed body portion receives Primer M for 3 minutes and requires Primer G on the adhesive area with a controlled amount before drying time. Cut the cartridge nozzle of Toyota Genuine Windshield Glass Adhesive or equivalent and insert it into a sealer gun to apply adhesive onto the glass glass particularly around the ceramic notches. Slightly press the windshield glass to fit its rim properly while ensuring correct matchmarks alignment and stopping points are secure before examining the clearance area. Use a scraper if needed to alter the adhesive before securing the glass with protective tape until the adhesive achieves hardness while preventing vehicle operation as per the designated minimum waiting period. The adhesive needs to cure before performing a leak test using water from outside. Succeeding leak detection either allow more drying time or fill any remaining adhesive gaps before removing protective tape. Conclude the installation by properly reattaching the roof headlining assembly together with the assist grip assemblies.
Related 2009 Toyota Highlander Parts
 2009 Toyota Highlander Bumper
 2009 Toyota Highlander Emblem
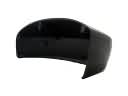 2009 Toyota Highlander Mirror Cover
 2009 Toyota Highlander Mud Flaps
 2009 Toyota Highlander Windshield Wiper
 2009 Toyota Highlander A/C Switch
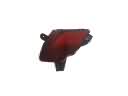 2009 Toyota Highlander Bumper Reflector
 2009 Toyota Highlander Car Mirror
 2009 Toyota Highlander Door Hinge
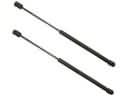 2009 Toyota Highlander Liftgate Lift Support
 2009 Toyota Highlander Windshield Washer Nozzle
 2009 Toyota Highlander Wiper Linkage