×
ToyotaParts- Hello
- Login or Register
- Quick Links
- Live Chat
- Track Order
- Parts Availability
- RMA
- Help Center
- Contact Us
- Shop for
- Toyota Parts
- Scion Parts
My Garage
My Account
Cart
OEM 2008 Toyota Tacoma Bumper
Bumper Fascia- Select Vehicle by Model
- Select Vehicle by VIN
Select Vehicle by Model
orMake
Model
Year
Select Vehicle by VIN
For the most accurate results, select vehicle by your VIN (Vehicle Identification Number).
4 Bumpers found


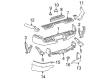
2008 Toyota Tacoma Cover, Rear
Part Number: 52159-04020$64.33 MSRP: $90.30You Save: $25.97 (29%)Ships in 1-3 Business DaysProduct Specifications- Other Name: Cover, Rear Bumper; Bumper Step Pad, Rear Upper
- Manufacturer Note: NO PAINT REQ.
- Position: Rear
- Part Name Code: 52159
- Item Weight: 10.70 Pounds
- Item Dimensions: 56.7 x 15.3 x 26.0 inches
- Condition: New
- Fitment Type: Direct Replacement
- SKU: 52159-04020
- Warranty: This genuine part is guaranteed by Toyota's factory warranty.


2008 Toyota Tacoma Bumper Cover, Front Driver Side
Part Number: 52119-04904$207.36 MSRP: $296.06You Save: $88.70 (30%)Ships in 1 Business DayProduct Specifications- Other Name: Cover, Front Bumper, L/; Bumper Cover, Front; Cover, Front Bumper
- Manufacturer Note: PAINT REQ.
- Position: Front Driver Side
- Part Name Code: 52119A
- Item Weight: 27.00 Pounds
- Item Dimensions: 66.3 x 24.7 x 12.6 inches
- Condition: New
- Fitment Type: Direct Replacement
- SKU: 52119-04904
- Warranty: This genuine part is guaranteed by Toyota's factory warranty.


2008 Toyota Tacoma Bumper Cover, Front
Part Number: 52119-04040$215.51 MSRP: $307.70You Save: $92.19 (30%)Ships in 1-3 Business DaysProduct Specifications- Other Name: Cover, Front Bumper; Bumper Cover, Front
- Position: Front
- Part Name Code: 52119A
- Item Weight: 27.00 Pounds
- Item Dimensions: 68.3 x 25.2 x 12.5 inches
- Condition: New
- Fitment Type: Direct Replacement
- SKU: 52119-04040
- Warranty: This genuine part is guaranteed by Toyota's factory warranty.
2008 Toyota Tacoma Bumper Cover, Front
Part Number: 52119-04010$215.51 MSRP: $307.70You Save: $92.19 (30%)Ships in 1-3 Business DaysProduct Specifications- Other Name: Cover, Front Bumper; Bumper Cover, Front
- Position: Front
- Part Name Code: 52119A
- Item Weight: 1.40 Pounds
- Item Dimensions: 72.4 x 16.3 x 24.7 inches
- Condition: New
- Fitment Type: Direct Replacement
- SKU: 52119-04010
- Warranty: This genuine part is guaranteed by Toyota's factory warranty.
2008 Toyota Tacoma Bumper
Looking for affordable OEM 2008 Toyota Tacoma Bumper? Explore our comprehensive catalogue of genuine 2008 Toyota Tacoma Bumper. All our parts are covered by the manufacturer's warranty. Plus, our straightforward return policy and speedy delivery service ensure an unparalleled shopping experience. We look forward to your visit!
2008 Toyota Tacoma Bumper Parts Q&A
- Q: How to replace the front bumper cover on 2008 Toyota Tacoma?A: In order to remove the front bumper cover, one needs to disconnect the negative battery terminal, dismantle the radiator grille and put protective tape on it. Unscrew clips and screws, disconnects the fog lamps, clean off the various covers and assemblies, etc. Re-Install parts, with correct torque requirements, and re-fasten the battery connector.
Related 2008 Toyota Tacoma Parts
 2008 Toyota Tacoma Grille
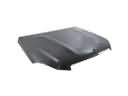 2008 Toyota Tacoma Hood
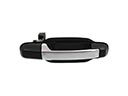 2008 Toyota Tacoma Door Handle
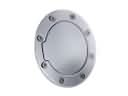 2008 Toyota Tacoma Fuel Door
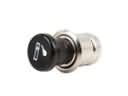 2008 Toyota Tacoma Cigarette Lighter
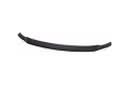 2008 Toyota Tacoma Spoiler
 2008 Toyota Tacoma Windshield Washer Nozzle
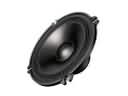 2008 Toyota Tacoma Car Speakers
 2008 Toyota Tacoma Door Hinge
 2008 Toyota Tacoma Front Cross-Member
 2008 Toyota Tacoma Lift Support
 2008 Toyota Tacoma Window Run