×
ToyotaParts- Hello
- Login or Register
- Quick Links
- Live Chat
- Track Order
- Parts Availability
- RMA
- Help Center
- Contact Us
- Shop for
- Toyota Parts
- Scion Parts
My Garage
My Account
Cart
OEM 2008 Toyota FJ Cruiser Air Bag
Air Bag Module- Select Vehicle by Model
- Select Vehicle by VIN
Select Vehicle by Model
orMake
Model
Year
Select Vehicle by VIN
For the most accurate results, select vehicle by your VIN (Vehicle Identification Number).
5 Air Bags found

2008 Toyota FJ Cruiser Inflator Curtain, Driver Side
Part Number: 62180-35033$1111.61 MSRP: $1629.08You Save: $517.47 (32%)Ships in 1-3 Business DaysProduct Specifications- Other Name: Air Bag Assembly, Curtain Shield; Curtain Air Bag, Left; Head Air Bag; Air Bag Assembly, Curtain Shield, Driver Side
- Position: Driver Side
- Replaces: 62180-35030, 62180-35032
- Part Name Code: 62180A
- Item Weight: 11.70 Pounds
- Item Dimensions: 47.8 x 18.7 x 9.5 inches
- Condition: New
- Fitment Type: Direct Replacement
- SKU: 62180-35033
- Warranty: This genuine part is guaranteed by Toyota's factory warranty.
2008 Toyota FJ Cruiser Inflator Curtain, Passenger Side
Part Number: 62170-35033$1173.47 MSRP: $1719.73You Save: $546.26 (32%)Ships in 1-3 Business DaysProduct Specifications- Other Name: Air Bag Assembly, Curtain Shield; Curtain Air Bag, Right; Head Air Bag; Air Bag Assembly, Curtain Shield, Passenger Side
- Position: Passenger Side
- Replaces: 62170-35030
- Part Name Code: 62170A
- Item Weight: 11.40 Pounds
- Item Dimensions: 48.3 x 18.6 x 9.3 inches
- Condition: New
- Fitment Type: Direct Replacement
- SKU: 62170-35033
- Warranty: This genuine part is guaranteed by Toyota's factory warranty.

2008 Toyota FJ Cruiser Passenger Air Bag
Part Number: 73960-35070$583.95 MSRP: $855.78You Save: $271.83 (32%)Ships in 1-3 Business DaysProduct Specifications- Other Name: Air Bag Assembly, Instrument Panel; Instrument Panel Air Bag, Upper; Passenger Inflator Module; Air Bag Assembly, Instrument Panel Passenger W/O Door
- Part Name Code: 73960A
- Item Weight: 8.00 Pounds
- Item Dimensions: 15.3 x 11.4 x 7.7 inches
- Condition: New
- Fitment Type: Direct Replacement
- SKU: 73960-35070
- Warranty: This genuine part is guaranteed by Toyota's factory warranty.

2008 Toyota FJ Cruiser Side Impact Inflator Module, Passenger Side
Part Number: 73910-52070$350.92 MSRP: $514.28You Save: $163.36 (32%)Ships in 1-3 Business DaysProduct Specifications- Other Name: Air Bag Assembly, Front Seat; Seat Air Bag, Front Right; Front Seat Air Bag; Air Bag Assembly, Front Seat, Passenger Side
- Position: Passenger Side
- Part Name Code: 73910A
- Item Weight: 2.60 Pounds
- Condition: New
- Fitment Type: Direct Replacement
- SKU: 73910-52070
- Warranty: This genuine part is guaranteed by Toyota's factory warranty.
2008 Toyota FJ Cruiser Side Impact Inflator Module, Driver Side
Part Number: 73920-52070$388.39 MSRP: $569.18You Save: $180.79 (32%)Product Specifications- Other Name: Air Bag Assembly, Front Seat; Seat Air Bag, Front Left; Front Seat Air Bag; Air Bag Assembly, Front Seat, Driver Side
- Position: Driver Side
- Part Name Code: 73920A
- Item Weight: 2.80 Pounds
- Condition: New
- Fitment Type: Direct Replacement
- SKU: 73920-52070
- Warranty: This genuine part is guaranteed by Toyota's factory warranty.
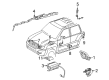
2008 Toyota FJ Cruiser Air Bag
Looking for affordable OEM 2008 Toyota FJ Cruiser Air Bag? Explore our comprehensive catalogue of genuine 2008 Toyota FJ Cruiser Air Bag. All our parts are covered by the manufacturer's warranty. Plus, our straightforward return policy and speedy delivery service ensure an unparalleled shopping experience. We look forward to your visit!
2008 Toyota FJ Cruiser Air Bag Parts Q&A
- Q: How does the Air Bag Supplemental Restraint System (SRS) function and what precautions should be taken during servicing on 2008 Toyota FJ Cruiser?A: The car has Supplemental Restraint System (SRS) with multiple Air Bags and seat belt pretentioners. Before servicing, make sure to wait, turn off the ignition and unplug the battery. Check the parts after small collisions, do not use the parts of other automobiles, and do not disassemble SRS parts. Proper sensor/ connector handling.
Related 2008 Toyota FJ Cruiser Parts
 2008 Toyota FJ Cruiser Ignition Coil
 2008 Toyota FJ Cruiser Air Bag Control Module
 2008 Toyota FJ Cruiser Air Bag Sensor
 2008 Toyota FJ Cruiser Clock Spring
 2008 Toyota FJ Cruiser Coolant Temperature Sensor
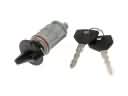 2008 Toyota FJ Cruiser Ignition Lock Assembly
 2008 Toyota FJ Cruiser Mirror Switch
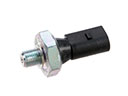 2008 Toyota FJ Cruiser Oil Pressure Switch
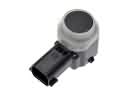 2008 Toyota FJ Cruiser Parking Assist Distance Sensor
 2008 Toyota FJ Cruiser Relay
 2008 Toyota FJ Cruiser Speedometer
 2008 Toyota FJ Cruiser Turn Signal Flasher