×
ToyotaParts- Hello
- Login or Register
- Quick Links
- Live Chat
- Track Order
- Parts Availability
- RMA
- Help Center
- Contact Us
- Shop for
- Toyota Parts
- Scion Parts
My Garage
My Account
Cart
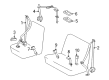
OEM 2008 Scion xD Seat Belt
Seat Safety Belt- Select Vehicle by Model
- Select Vehicle by VIN
Select Vehicle by Model
orMake
Model
Year
Select Vehicle by VIN
For the most accurate results, select vehicle by your VIN (Vehicle Identification Number).
11 Seat Belts found

2008 Scion xD Center Buckle, Passenger Side
Part Number: 73330-52070-B0$37.03 MSRP: $51.54You Save: $14.51 (29%)Ships in 1-3 Business DaysProduct Specifications- Other Name: Belt Assembly, Rear Seat L; Seat Belt Receptacle, Rear Right Outer; Latch; Belt Assembly, Rear Seat Inner W/Center, Passenger Side
- Manufacturer Note: DK.GRAY,TRIM1#
- Position: Passenger Side
- Part Name Code: 73470B
- Item Weight: 1.80 Pounds
- Condition: New
- Fitment Type: Direct Replacement
- SKU: 73330-52070-B0
- Warranty: This genuine part is guaranteed by Toyota's factory warranty.

2008 Scion xD Inner Buckle, Driver Side
Part Number: 73390-52040-B0$28.43 MSRP: $39.58You Save: $11.15 (29%)Ships in 1-2 Business DaysProduct Specifications- Other Name: Belt Assembly, Rear Seat; Seat Belt Receptacle, Rear Left Inner; Latch; Belt Assembly, Rear Seat, Inner Driver Side
- Manufacturer Note: DK.GRAY,TRIM1#
- Position: Inner Driver Side
- Part Name Code: 73390C
- Item Weight: 1.00 Pounds
- Condition: New
- Fitment Type: Direct Replacement
- SKU: 73390-52040-B0
- Warranty: This genuine part is guaranteed by Toyota's factory warranty.

2008 Scion xD Inner Buckle
Part Number: 73380-52110-B0$28.43 MSRP: $39.58You Save: $11.15 (29%)Ships in 1-3 Business DaysProduct Specifications- Other Name: Belt Assembly, Rear Seat; Seat Belt Receptacle, Rear Right Inner; Latch; Belt Assembly, Rear Seat, Inner
- Manufacturer Note: DK.GRAY,TRIM1#
- Position: Inner
- Part Name Code: 73380A
- Item Weight: 1.30 Pounds
- Condition: New
- Fitment Type: Direct Replacement
- SKU: 73380-52110-B0
- Warranty: This genuine part is guaranteed by Toyota's factory warranty.

2008 Scion xD Center Buckle, Driver Side
Part Number: 73340-52060-B0$28.43 MSRP: $39.58You Save: $11.15 (29%)Ships in 1-3 Business DaysProduct Specifications- Other Name: Belt Assembly, Rear Seat L; Seat Belt Receptacle, Rear Left Outer; Latch; Belt Assembly, Rear Seat Lap Type, Center Driver Side
- Manufacturer Note: DK.GRAY,TRIM1#
- Position: Center Driver Side
- Part Name Code: 73340C
- Item Weight: 1.40 Pounds
- Condition: New
- Fitment Type: Direct Replacement
- SKU: 73340-52060-B0
- Warranty: This genuine part is guaranteed by Toyota's factory warranty.

2008 Scion xD Lap & Shoulder Belt, Outer Passenger Side
Part Number: 73360-52250-B0$163.33 MSRP: $231.21You Save: $67.88 (30%)Ships in 1-3 Business DaysProduct Specifications- Other Name: Belt Assembly, Rear Seat; Seat Belt Lap and Shoulder Belt, Rear Right Outer; Outer Belt Assembly; Belt Assembly, Rear Seat, Outer Passenger Side
- Manufacturer Note: BLACK,TRIM1#
- Position: Outer Passenger Side
- Part Name Code: 73360C
- Item Weight: 2.90 Pounds
- Condition: New
- Fitment Type: Direct Replacement
- SKU: 73360-52250-B0
- Warranty: This genuine part is guaranteed by Toyota's factory warranty.

2008 Scion xD Lap & Shoulder Belt, Outer Driver Side
Part Number: 73370-52210-B0$174.97 MSRP: $249.82You Save: $74.85 (30%)Ships in 1-3 Business DaysProduct Specifications- Other Name: Belt Assembly, Rear Seat; Seat Belt Lap and Shoulder Belt, Rear Left Outer; Outer Belt Assembly; Belt Assembly, Rear Seat, Outer Driver Side
- Manufacturer Note: BLACK,TRIM1#
- Position: Outer Driver Side
- Part Name Code: 73370C
- Item Weight: 2.20 Pounds
- Condition: New
- Fitment Type: Direct Replacement
- SKU: 73370-52210-B0
- Warranty: This genuine part is guaranteed by Toyota's factory warranty.

2008 Scion xD Buckle, Passenger Side
Part Number: 73230-52751-B0$61.49 MSRP: $86.31You Save: $24.82 (29%)Ships in 1-3 Business DaysProduct Specifications- Other Name: Belt Assembly, Front Seat; Seat Belt Receptacle, Front Right; Latch; Belt Assembly, Front Seat Inner, Passenger Side
- Manufacturer Note: DK.GRAY,TRIM1#
- Position: Passenger Side
- Part Name Code: 73230
- Item Weight: 1.50 Pounds
- Item Dimensions: 13.9 x 11.2 x 2.3 inches
- Condition: New
- Fitment Type: Direct Replacement
- SKU: 73230-52751-B0
- Warranty: This genuine part is guaranteed by Toyota's factory warranty.
2008 Scion xD Buckle, Driver Side
Part Number: 73230-52741-B0$66.82 MSRP: $93.80You Save: $26.98 (29%)Ships in 1-3 Business DaysProduct Specifications- Other Name: Belt Assembly, Front Seat; Seat Belt Receptacle, Front Left; Latch; Belt Assembly, Front Seat Inner, Driver Side
- Manufacturer Note: DK.GRAY,TRIM1#
- Position: Driver Side
- Part Name Code: 73240
- Item Weight: 1.40 Pounds
- Condition: New
- Fitment Type: Direct Replacement
- SKU: 73230-52741-B0
- Warranty: This genuine part is guaranteed by Toyota's factory warranty.

2008 Scion xD Lap & Shoulder Belt, Passenger Side
Part Number: 73210-52670-B0$279.82 MSRP: $399.52You Save: $119.70 (30%)Ships in 1-3 Business DaysProduct Specifications- Other Name: Belt Assembly, Front Seat; Seat Belt Lap and Shoulder Belt, Front Right; Belt & Retractor; Belt Assembly, Front Seat Outer, Passenger Side
- Manufacturer Note: DK.GRAY,TRIM1#
- Position: Passenger Side
- Part Name Code: 73210
- Item Weight: 5.40 Pounds
- Item Dimensions: 10.1 x 7.4 x 6.2 inches
- Condition: New
- Fitment Type: Direct Replacement
- SKU: 73210-52670-B0
- Warranty: This genuine part is guaranteed by Toyota's factory warranty.
2008 Scion xD Lap & Shoulder Belt, Driver Side
Part Number: 73220-52710-B0$272.13 MSRP: $388.54You Save: $116.41 (30%)Ships in 1-3 Business DaysProduct Specifications- Other Name: Belt Assembly, Front Seat; Seat Belt Lap and Shoulder Belt, Front Left; Belt & Retractor; Belt Assembly, Front Seat Outer, Driver Side
- Manufacturer Note: DK.GRAY,TRIM1#
- Position: Driver Side
- Part Name Code: 73220
- Item Weight: 4.60 Pounds
- Item Dimensions: 10.2 x 7.1 x 6.1 inches
- Condition: New
- Fitment Type: Direct Replacement
- SKU: 73220-52710-B0
- Warranty: This genuine part is guaranteed by Toyota's factory warranty.
 Product Specifications
- Other Name: Belt Assembly, Rear Seat 3; Seat Belt Lap and Shoulder Belt, Rear Inner; Center Seat Belt; Belt Assembly, Rear Seat 3 Point Type, Passenger Side
- Manufacturer Note: BLACK,TRIM1#
- Position: Passenger Side
- Part Name Code: 73310
- Condition: New
- Fitment Type: Direct Replacement
- SKU: 73310-52040-B0
- Warranty: This genuine part is guaranteed by Toyota's factory warranty.
2008 Scion xD Seat Belt
Looking for affordable OEM 2008 Scion xD Seat Belt? Explore our comprehensive catalogue of genuine 2008 Scion xD Seat Belt. All our parts are covered by the manufacturer's warranty. Plus, our straightforward return policy and speedy delivery service ensure an unparalleled shopping experience. We look forward to your visit!
2008 Scion xD Seat Belt Parts Q&A
- Q: How to Remove a Seat Belt Assembly Safely on 2008 Scion xD?A: The first step to remove the front seat outer belt assembly involves disconnecting the negative cable battery terminal then waiting 90 seconds before starting work to stop the Air Bag deployment. Start by removing door scuff plates from the front and rear before proceeding to remove Weather Strips on the door opening trims to gain access to the upper and lower garnishes on the center pillar. The process begins by extracting the center pillar lower garnish followed by pulling portion A to open the claws on the seat belt anchor cover cap. The next operation calls for releasing the 3 claws so you can pull off the lap belt outer anchor cover. Remove the front seat outer belt assembly by first detaching the bolt and anchor plate and then the bolt and shoulder anchor. After that disconnect the pretensioner connector through unlocking its button and using a screwdriver to achieve the disconnect. Finish the repair work by taking out two bolts, two hooks, and a retractor and removing the center pillar upper garnish before disengaging two claws for the shoulder belt anchorage plate cover then performing the front shoulder belt anchor adjuster assembly removal by uninstalling its two bolts along with hook and front shoulder belt anchor adjuster.
Related 2008 Scion xD Parts
 2008 Scion xD Bumper
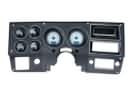 2008 Scion xD Dash Panels
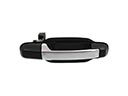 2008 Scion xD Door Handle
 2008 Scion xD Door Hinge
 2008 Scion xD Door Lock Cylinder
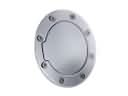 2008 Scion xD Fuel Door
 2008 Scion xD Hood Cable
 2008 Scion xD Instrument Cluster
 2008 Scion xD Interior Door Handle
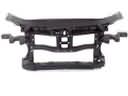 2008 Scion xD Radiator Support
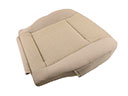 2008 Scion xD Seat Cushion
 2008 Scion xD Wiper Motor