×
ToyotaParts- Hello
- Login or Register
- Quick Links
- Live Chat
- Track Order
- Parts Availability
- RMA
- Help Center
- Contact Us
- Shop for
- Toyota Parts
- Scion Parts
My Garage
My Account
Cart
OEM 2007 Toyota Sienna Windshield
Glass Windshield- Select Vehicle by Model
- Select Vehicle by VIN
Select Vehicle by Model
orMake
Model
Year
Select Vehicle by VIN
For the most accurate results, select vehicle by your VIN (Vehicle Identification Number).
1 Windshield found

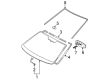
2007 Toyota Sienna Glass, Front
Part Number: 56101-AE041$824.91 MSRP: $1208.91You Save: $384.00 (32%)Ships in 1-3 Business DaysProduct Specifications- Other Name: Glass Sub-Assembly, Windshield; Windshield Glass, Front; Glass, Windshield
- Position: Front
- Replaces: 56101-AE040
- Part Name Code: 56111
- Item Weight: 59.90 Pounds
- Condition: New
- Fitment Type: Direct Replacement
- SKU: 56101-AE041
- Warranty: This genuine part is guaranteed by Toyota's factory warranty.
2007 Toyota Sienna Windshield
Looking for affordable OEM 2007 Toyota Sienna Windshield? Explore our comprehensive catalogue of genuine 2007 Toyota Sienna Windshield. All our parts are covered by the manufacturer's warranty. Plus, our straightforward return policy and speedy delivery service ensure an unparalleled shopping experience. We look forward to your visit!
2007 Toyota Sienna Windshield Parts Q&A
- Q: How to remove and install the windshield glass on 2007 Toyota Sienna?A: A windshield glass replacement procedure begins by removing the left and right front door opening trim Weather Strips and the front pillar garnishes from both sides before continuing to separate the visor assemblies and assist grip sub-assembly and visor holder along with the roof console box assembly and sunroof opening trim moulding (if present) and inner rear view mirror and roof headlining assembly. Start the windshield glass removal by taking off the front wiper arm head caps and both front wiper arms and moving on to front fender to cowl side seals from both sides along with the cowl top ventilator louver sub-assembly. To dismantle the deicing system users must sever the outer upper windshield moulding with a blade carefully avoiding damage to body components. Disconnection of wiring is required in cases where deicers are installed. A piano wire should be used to transfer through the vehicle body and glass separation inside the car before binding wooden blocks at the ends. Protective tape should be applied to the exterior of the vehicle. A suction cup will remove the glass while the piano wire gently cuts adhesive to preserve as much remaining adhesive on the vehicle body. The windshield glass repair requires removal of all damaged stoppers and adhesive through scraping before wiping the glass borders with white gasoline while avoiding contact with the glass itself. Start by applying Primer G to the glass installation areas of the windshield glass No. 2 stopper before you let the substance dry for 3 minutes and add the new stoppers correctly. Install the windshield glass No. 1 stopper by first securing two new stoppers to the vehicle body while treating the windshield glass adhesive dam installation site with Primer G before adding a new dampened with double-sided tape that avoids the stopper area. Primer G application on the glass edge and contact surface results in a dry surface before mounting the outer upper windshield moulding. Use a vacuum tool to position the glass correctly while verifying that both surfaces match uniformly and noting down reference points before finishing the installation. First remove the glass panel before you coat the vehicle body surface with Primer M and glass edges with Primer G while applying Adhesive (Part No.08850-00801 or equivalent) around the glass boundary. To install the glass position it according to the reference marks while gently pressing it and verify correct attachment of stoppers as well as verifying the space between vehicle body and glass. After applying a gentle pressure to the glass front surface for a proper fit you should use a scraper to scrape away extra adhesive while refraining from driving your vehicle for the recommended time period. To finish reinstallation unfold the windshield moulding from external sides and check for leaks before addressing any necessary repairs and then reinstall all components starting from the opposite end.
Related 2007 Toyota Sienna Parts
 2007 Toyota Sienna Windshield Washer Nozzle
 2007 Toyota Sienna Wiper Arm
 2007 Toyota Sienna Car Mirror
 2007 Toyota Sienna Mirror Actuator
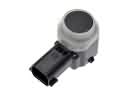 2007 Toyota Sienna Parking Assist Distance Sensor
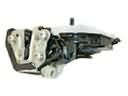 2007 Toyota Sienna Rear Passenger Door Handle Latch
 2007 Toyota Sienna Washer Pump
 2007 Toyota Sienna Washer Reservoir
 2007 Toyota Sienna Windshield Wiper
 2007 Toyota Sienna Wiper Blade
 2007 Toyota Sienna Wiper Linkage
 2007 Toyota Sienna Wiper Motor