×
ToyotaParts- Hello
- Login or Register
- Quick Links
- Live Chat
- Track Order
- Parts Availability
- RMA
- Help Center
- Contact Us
- Shop for
- Toyota Parts
- Scion Parts
My Garage
My Account
Cart
OEM 2007 Toyota Avalon Exhaust Pipe
Exhaust Tail Pipe- Select Vehicle by Model
- Select Vehicle by VIN
Select Vehicle by Model
orMake
Model
Year
Select Vehicle by VIN
For the most accurate results, select vehicle by your VIN (Vehicle Identification Number).
4 Exhaust Pipes found
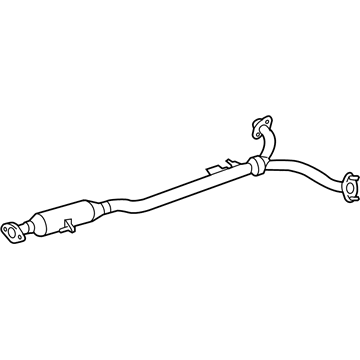
2007 Toyota Avalon Center Pipe
Part Number: 17420-0P011$357.85 MSRP: $480.35You Save: $122.50 (26%)Ships in 1-3 Business DaysProduct Specifications- Other Name: Pipe Assembly, Exhaust; Exhaust Intermediate Pipe, Center; Exhaust Pipe; Pipe Assembly, Exhaust, Center
- Position: Center
- Replaces: 17420-0P010
- Part Name Code: 17420
- Item Weight: 16.10 Pounds
- Item Dimensions: 52.9 x 19.6 x 9.4 inches
- Condition: New
- Fitment Type: Direct Replacement
- SKU: 17420-0P011
- Warranty: This genuine part is guaranteed by Toyota's factory warranty.
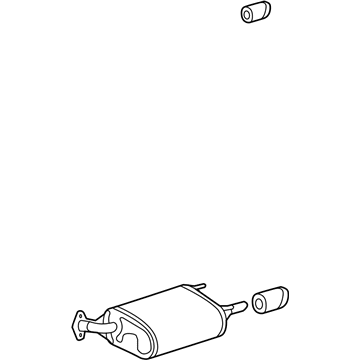
2007 Toyota Avalon Muffler W/Tpipe, Driver Side
Part Number: 17440-0P012$334.46 MSRP: $437.38You Save: $102.92 (24%)Ships in 1-3 Business DaysProduct Specifications- Other Name: Pipe Assembly, Exhaust Tail; Muffler, Left; Muffler Assembly; Pipe Spout; Pipe; Tail Pipe; Muffler; Pipe Assembly, Exhaust, Tail
- Manufacturer Note: LH
- Position: Driver Side
- Replaces: 17440-0P011
- Part Name Code: 17430
- Item Weight: 11.00 Pounds
- Item Dimensions: 44.0 x 12.6 x 9.2 inches
- Condition: New
- Fitment Type: Direct Replacement
- SKU: 17440-0P012
- Warranty: This genuine part is guaranteed by Toyota's factory warranty.
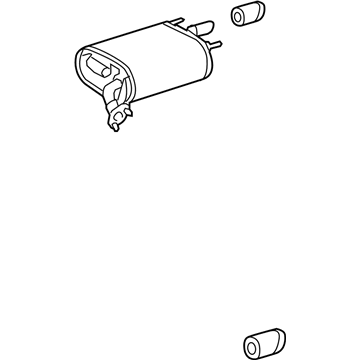
2007 Toyota Avalon Muffler W/Tpipe, Passenger Side
Part Number: 17430-0P042$334.46 MSRP: $437.38You Save: $102.92 (24%)Ships in 1-3 Business DaysProduct Specifications- Other Name: Pipe Assembly, Exhaust Tail; Muffler, Right; Muffler Assembly; Pipe Spout; Pipe; Tail Pipe; Muffler; Pipe Assembly, Exhaust, Tail
- Manufacturer Note: RH
- Position: Passenger Side
- Replaces: 17430-0P041
- Part Name Code: 17430
- Item Weight: 10.80 Pounds
- Item Dimensions: 43.2 x 12.8 x 8.8 inches
- Condition: New
- Fitment Type: Direct Replacement
- SKU: 17430-0P042
- Warranty: This genuine part is guaranteed by Toyota's factory warranty.
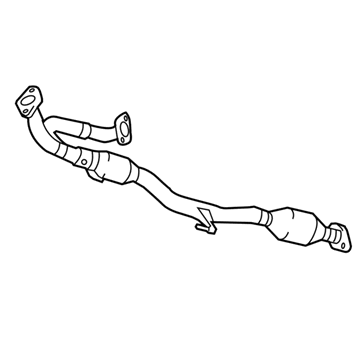
2007 Toyota Avalon Front Pipe
Part Number: 17410-0P051$1477.42 MSRP: $1983.12You Save: $505.70 (26%)Ships in 1-3 Business DaysProduct Specifications- Other Name: Pipe Assembly, Exhaust; Exhaust Crossover Pipe; Exhaust Pipe; Pipe Assembly, Exhaust, Front
- Position: Front
- Part Name Code: 17410
- Item Weight: 21.80 Pounds
- Item Dimensions: 49.9 x 10.4 x 10.5 inches
- Condition: New
- Fitment Type: Direct Replacement
- SKU: 17410-0P051
- Warranty: This genuine part is guaranteed by Toyota's factory warranty.
2007 Toyota Avalon Exhaust Pipe
Looking for affordable OEM 2007 Toyota Avalon Exhaust Pipe? Explore our comprehensive catalogue of genuine 2007 Toyota Avalon Exhaust Pipe. All our parts are covered by the manufacturer's warranty. Plus, our straightforward return policy and speedy delivery service ensure an unparalleled shopping experience. We look forward to your visit!
2007 Toyota Avalon Exhaust Pipe Parts Q&A
- Q: How to service and repair the exhaust pipe on 2007 Toyota Avalon?A: Service and repair of the exhaust pipe begins with gasket removal then the inspection for rusted hardware before replacing any faulty components. The service begins with sensor connector disconnections of both heated oxygen sensor units (bank 1, 2 sensor 2) before the sensors can be removed. Dismantling the service and repair requires removal of the front exhaust pipe No. 1 support bracket nuts before removing the rear exhaust pipe No. 1 support bracket bolts. To remove the exhaust pipe front assembly begin by taking off the 2 nuts from the left bank exhaust manifold side and the 2 bolts from the right bank exhaust pipe manifold side before carefully extracting the exhaust pipe front with all its accompanying 3 gaskets. The next procedure involves the exhaust pipe assembly center by dismantling the 2 exhaust pipe tails from their 4 nuts and unfastening the 2 exhaust pipe supports before removing the exhaust pipe center with its 2 gaskets and 2 bolts from the exhaust pipe damper. Remove first the two exhaust pipe tails by disconnecting their five supports, then uniformly tap out the baffles from each tail using a plastic hammer. Alignment of the exhaust tail pipe baffle projection to the groove on the exhaust pipe tail allows installation of the 5 exhaust pipe supports and the 2 exhaust pipe tails. First install 2 bolts into the exhaust pipe center through the exhaust pipe damper at 194 kgf/cm while achieving a torque of 19 N m. Afterward apply 2 new gaskets between each exhaust pipe center and tail section before connecting the support brackets and securing the center to the tails using 4 nuts at 438 kgf/cm with a torque of 43 N m. To install the exhaust pipe assembly front begin by placing three new gaskets followed by securing two bolts alongside two nuts at 62 N m (632 kgf/cm, 46 ft. lbs.) to affix the front to exhaust manifolds and completing the installation to the exhaust pipe center through two nuts and two bolts at 56 N m (571 kgf/cm, 41 ft. lbs.). Refit the rear support bracket using 2 bolts that measure 33 N m (337 kgf/cm, 24 ft. lbs.) while positioning both brackets correctly. The front support brackets require installation with 2 nuts at this exact torque value. The drained heated oxygen sensors require installation with a torque value of 44 N m (449 kgf/cm, 32 ft. lbs.) and their connectors should be reconnected. Post-installation verify exhaust gas leakage and resolve loose parts by tightening them or by replacing broken components.


