×
ToyotaParts- Hello
- Login or Register
- Quick Links
- Live Chat
- Track Order
- Parts Availability
- RMA
- Help Center
- Contact Us
- Shop for
- Toyota Parts
- Scion Parts
My Garage
My Account
Cart
OEM 2006 Toyota Solara Shift Cable
Transmission Shift Cable- Select Vehicle by Model
- Select Vehicle by VIN
Select Vehicle by Model
orMake
Model
Year
Select Vehicle by VIN
For the most accurate results, select vehicle by your VIN (Vehicle Identification Number).
2 Shift Cables found


2006 Toyota Solara Shift Control Cable
Part Number: 33821-33170$245.45 MSRP: $350.46You Save: $105.01 (30%)Ships in 1-3 Business DaysProduct Specifications- Other Name: Cable, Transmission; Cable Transmission Control Shift (For Floor Shift)
- Part Name Code: 33821
- Item Weight: 1.90 Pounds
- Item Dimensions: 47.0 x 6.7 x 3.3 inches
- Condition: New
- Fitment Type: Direct Replacement
- SKU: 33821-33170
- Warranty: This genuine part is guaranteed by Toyota's factory warranty.


2006 Toyota Solara Selector Cable
Part Number: 33822-33080$214.70 MSRP: $306.54You Save: $91.84 (30%)Ships in 1-3 Business DaysProduct Specifications- Other Name: Cable, Transmission; Cable Transmission Control Select (For Floor Shift)
- Part Name Code: 33822
- Item Weight: 1.90 Pounds
- Item Dimensions: 47.9 x 3.3 x 2.9 inches
- Condition: New
- Fitment Type: Direct Replacement
- SKU: 33822-33080
- Warranty: This genuine part is guaranteed by Toyota's factory warranty.
2006 Toyota Solara Shift Cable
Looking for affordable OEM 2006 Toyota Solara Shift Cable? Explore our comprehensive catalogue of genuine 2006 Toyota Solara Shift Cable. All our parts are covered by the manufacturer's warranty. Plus, our straightforward return policy and speedy delivery service ensure an unparalleled shopping experience. We look forward to your visit!
2006 Toyota Solara Shift Cable Parts Q&A
- Q: How to Service and Repair the Shift Cable on 2006 Toyota Solara?A: The first step to service the transmission control cable assembly demands disconnecting the negative terminal of the battery. Start by removing the instrument panel safety pad sub-assembly, pending the amounts of air conditioning radiator assembly, center Air Bag sensor assembly, air cleaner assembly, and intake air resonator sub-assembly. Disconnect shift cable grommet retainer No. 2 by removing the 2 bolts, then remove the floor shift cable transmission control shift by following these steps: remove the nut from the control shaft lever, disconnect the control cable from the control shaft lever, remove the clip and disconnect the control cable from the control cable bracket, disconnect the control cable from the control cable clamp, disconnect the floor shift cable from the transmission floor shift assembly, pull out the control cable from the body, and remove the shift cable grommet retainer No. 2. Inspection requires smooth P to R shifting under brake pedal press while ignition is on followed by N to D forward movement and R rearward movement tests. Apply the following procedure to make adjustments: firstly loosen the control shaft lever nut then press the control shaft fully downward followed by moving the control shaft lever two notches to position N while pushing the control cable end up with the shift lever at N position to install it on the control shaft lever before nut torquing to 15 Nm (1150 kgf-cm, 11 ft. lbs.). When tightening the control nut maintain proper extension of the control cable. Test the proper forward and reverse movements of the vehicle after engine start-up. The installation process requires that you insert the control cable into the body then install and torque the shift cable grommet retainer No. 2 with two bolts reaching 5.0 Nm (50 kgf-cm, 43 inch lbs.). The center Air Bag sensor assembly should be reinstalled along with the air conditioning radiator assembly according to the required shift lever position adjustments and inspections. The installation process ends with the intake air resonator sub-assembly and air cleaner assembly as well as the battery negative terminal reinstallation before initialization occurs.
Related 2006 Toyota Solara Parts
 2006 Toyota Solara Automatic Transmission Filter
 2006 Toyota Solara Automatic Transmission Shift Levers
 2006 Toyota Solara Clutch Disc
 2006 Toyota Solara Clutch Fork
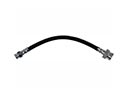 2006 Toyota Solara Clutch Hose
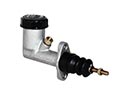 2006 Toyota Solara Clutch Master Cylinder
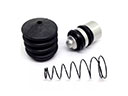 2006 Toyota Solara Clutch Slave Repair Kit
 2006 Toyota Solara Flywheel
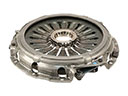 2006 Toyota Solara Pressure Plate
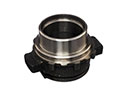 2006 Toyota Solara Release Bearing
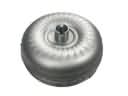 2006 Toyota Solara Torque Converter
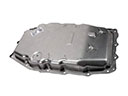 2006 Toyota Solara Transmission Pan