×
ToyotaParts- Hello
- Login or Register
- Quick Links
- Live Chat
- Track Order
- Parts Availability
- RMA
- Help Center
- Contact Us
- Shop for
- Toyota Parts
- Scion Parts
My Garage
My Account
Cart
OEM Toyota Solara Shift Cable
Transmission Shift Cable- Select Vehicle by Model
- Select Vehicle by VIN
Select Vehicle by Model
orMake
Model
Year
Select Vehicle by VIN
For the most accurate results, select vehicle by your VIN (Vehicle Identification Number).
3 Shift Cables found


Toyota Solara Shift Control Cable Part Number: 33821-33170
$252.91 MSRP: $361.10You Save: $108.19 (30%)Ships in 1-3 Business Days

Toyota Solara Selector Cable Part Number: 33822-33080

Toyota Solara Shift Control Cable Part Number: 33820-06280
Toyota Solara Shift Cable
Choose genuine Shift Cable that pass strict quality control tests. You can trust the top quality and lasting durability. Shopping for OEM Shift Cable for your Toyota Solara? Our website is your one-stop destination. We stock an extensive selection of genuine Toyota Solara parts. The price is affordable so you can save more. It only takes minutes to browse and find the exact fit. Easily add to cart and check out fast. Our hassle-free return policy will keep you stress-free. We process orders quickly for swift delivery. Your parts will arrive faster, so you can get back on the road sooner.
Toyota Solara Shift Cable Parts and Q&A
- Q: How to remove the shift cable from the U250E automatic transaxle on Toyota Solara?A:The first step to remove the shift cable from the U250E automatic transaxle requires disconnecting the battery negative terminal. The first step involves removing the instrument panel safety pad sub-assembly then you must take away the air conditioning radiator assembly. Remove the center air bag sensor assembly and the air cleaner assembly and then proceed to the intake air resonator sub-assembly. The removal of two bolts allows disconnecting shift cable grommet retainer NO.2. Start with the floor shift cable transmission control shift by unscrewing the nut from the control shaft lever and unbonding the control cable from the control shaft lever before separate the clip from the control cable bracket along with disconnecting the control cable from the control cable clamp and lastly unbinding the floor shift cable from the transmission floor shift assembly. Draw out the body control cable then eliminate shift cable grommet retainer NO. 2 from its place.
- Q: How to replace the Floor Shift Cable Transmission Control Shift (MTM) on Toyota Solara?A:Replacement of the Floor Shift Cable Transmission Control Shift (MTM) starts with Instrument Panel Safety Pad Sub-Assembly with Passenger Air Bag Assembly removal and continues with taking out the Air Conditioning Radiator Assembly and the Air Bag Sensor Assembly Center. You must remove the Floor Shift Cable Transmission Control Shift starting with separating the top of the shift cable from the transaxle by detaching the clip and washer followed by extracting the clip and shift cable from the control cable bracket. Rotating the lock allows you to separate the shift cable from the shift lever retainer before taking off the clip which unfastens the shift cable top from the shift assembly. First remove the two floor retainer set bolts before separating the retainer from the grommet to disconnect the select cable from the grommet. Then pull the shift cable through the floor hole and retainer. After threading the shift cable through the floor hole and retainer and connecting the select cable to the grommet you should install the retainer to the grommet while ensuring the three projections of the grommet fit into the three holes of the retainer. The procedure requires assembling components as follows: First, set the retainer bolts to 5.0 Nm (51 kgf-cm, 44 inch lbs.) torque and afterward join the shift cable to the shift lever retainer by using the upwards-facing cable outer projection. Finally, validate the cable outer lock position in accordance with illustration point A. Shift lever assembly installation requires the top end of the shift cable followed by new clip connection to the control cable bracket. The shift cable will then be attached to the transaxle using a washer and clip. To finish the process reinstall the Air Bag Sensor Assembly Center together with the Air Conditioning Radiator Assembly and the Instrument Panel Safety Pad Sub-Assembly with Passenger Air Bag Assembly.


Related Toyota Solara Parts
 Toyota Solara Automatic Transmission Shift Levers
 Toyota Solara Clutch Disc
 Toyota Solara Clutch Fork
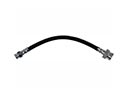 Toyota Solara Clutch Hose
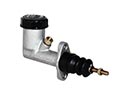 Toyota Solara Clutch Master Cylinder
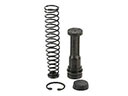 Toyota Solara Clutch Master Repair Kit
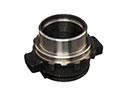 Toyota Solara Clutch Release Bearing
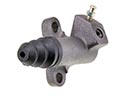 Toyota Solara Clutch Slave Cylinder
 Toyota Solara Flywheel
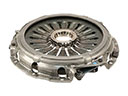 Toyota Solara Pressure Plate
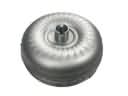 Toyota Solara Torque Converter
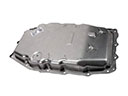 Toyota Solara Transmission Pan