×
ToyotaParts- Hello
- Login or Register
- Quick Links
- Live Chat
- Track Order
- Parts Availability
- RMA
- Help Center
- Contact Us
- Shop for
- Toyota Parts
- Scion Parts
My Garage
My Account
Cart
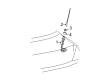
OEM 2006 Toyota Solara Antenna Cable
Radio Antenna Cable- Select Vehicle by Model
- Select Vehicle by VIN
Select Vehicle by Model
orMake
Model
Year
Select Vehicle by VIN
For the most accurate results, select vehicle by your VIN (Vehicle Identification Number).
1 Antenna Cable found

 Product Specifications
- Other Name: Cord Sub-Assembly, Antenna
- Part Name Code: 86101
- Item Weight: 1.10 Pounds
- Item Dimensions: 15.3 x 6.1 x 2.1 inches
- Condition: New
- Fitment Type: Direct Replacement
- SKU: 86101-06140
- Warranty: This genuine part is guaranteed by Toyota's factory warranty.
2006 Toyota Solara Antenna Cable
Looking for affordable OEM 2006 Toyota Solara Antenna Cable? Explore our comprehensive catalogue of genuine 2006 Toyota Solara Antenna Cable. All our parts are covered by the manufacturer's warranty. Plus, our straightforward return policy and speedy delivery service ensure an unparalleled shopping experience. We look forward to your visit!
2006 Toyota Solara Antenna Cable Parts Q&A
- Q: How to service and repair the antenna cable on 2006 Toyota Solara?A: To service and repair the antenna cable, begin by removing the shift lever knob sub-assembly, followed by the console upper rear panel sub-assembly, the console box assembly (rear w/ console door), the console panel sub-assembly upper, the instrument cluster finish panel sub-assembly center, the center cluster integration panel assembly, the rear seat assembly, the rear seatback hinge sub-assembly LH, the front door scuff plate RH, the quarter trim panel assembly front RH, the center pillar garnish RH, the roof side garnish assembly inner RH, and the quarter trim panel upper RH. Unplug the antenna cord assembly by loosening its nut and bolt then releasing the 14 clamps one by one. For installation, reverse the removal steps, starting with the antenna cord sub-assembly, followed by the quarter trim panel upper RH, the roof side garnish assembly inner RH, the center pillar garnish RH, the quarter trim panel assembly front RH, the front door scuff plate RH, the rear seatback hinge sub-assembly LH, the rear seat assembly, the center cluster integration panel assembly, the instrument cluster finish panel sub-assembly center, the console panel sub-assembly upper, the console box assembly (rear w/ console door), the console upper rear panel sub-assembly, and finally, the shift lever knob sub-assembly.
Related 2006 Toyota Solara Parts
 2006 Toyota Solara Fuse Box
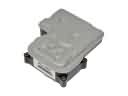 2006 Toyota Solara ABS Control Module
 2006 Toyota Solara Air Bag Sensor
 2006 Toyota Solara Antenna
 2006 Toyota Solara Antenna Mast
 2006 Toyota Solara Crankshaft Position Sensor
 2006 Toyota Solara Dimmer Switch
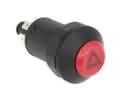 2006 Toyota Solara Hazard Warning Switch
 2006 Toyota Solara Power Window Switch
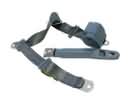 2006 Toyota Solara Seat Belt
 2006 Toyota Solara TPMS Sensor
 2006 Toyota Solara Turn Signal Flasher