×
ToyotaParts- Hello
- Login or Register
- Quick Links
- Live Chat
- Track Order
- Parts Availability
- RMA
- Help Center
- Contact Us
- Shop for
- Toyota Parts
- Scion Parts
My Garage
My Account
Cart
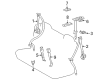
OEM 2006 Toyota RAV4 Seat Belt
Seat Safety Belt- Select Vehicle by Model
- Select Vehicle by VIN
Select Vehicle by Model
orMake
Model
Year
Select Vehicle by VIN
For the most accurate results, select vehicle by your VIN (Vehicle Identification Number).
37 Seat Belts found


2006 Toyota RAV4 Lap & Shoulder Belt, Driver Side
Part Number: 73220-42301-B2$217.73 MSRP: $310.87You Save: $93.14 (30%)Ships in 1-3 Business DaysProduct Specifications- Other Name: Belt Assembly, Front Seat; Seat Belt Lap and Shoulder Belt, Front Left; Belt & Retractor; Belt Assembly, Front Seat Outer, Driver Side
- Manufacturer Note: DK.GRAY,TRIM1#
- Position: Driver Side
- Replaces: 73220-42300-B2, 73220-42140-B2
- Part Name Code: 73220
- Item Weight: 3.10 Pounds
- Condition: New
- Fitment Type: Direct Replacement
- SKU: 73220-42301-B2
- Warranty: This genuine part is guaranteed by Toyota's factory warranty.


2006 Toyota RAV4 Buckle, Gray, Inner
Part Number: 73380-42080-B5$25.44 MSRP: $35.41You Save: $9.97 (29%)Ships in 1-3 Business DaysProduct Specifications- Other Name: Belt Assembly, Rear Seat; Seat Belt Receptacle, Center; Latch; Belt Assembly, Rear Seat, Inner
- Manufacturer Note: GRAY,TRIM1#
- Position: Inner
- Replaces: 73380-42080-B2
- Part Name Code: 73380D
- Item Weight: 1.40 Pounds
- Condition: New
- Fitment Type: Direct Replacement
- Require Quantity: 2
- SKU: 73380-42080-B5
- Warranty: This genuine part is guaranteed by Toyota's factory warranty.
2006 Toyota RAV4 Lap & Shoulder Belt, Passenger Side
Part Number: 73210-42340-B2$238.93 MSRP: $341.13You Save: $102.20 (30%)Ships in 1-3 Business DaysProduct Specifications- Other Name: Belt Assembly, Front Seat; Seat Belt Lap and Shoulder Belt, Front Right; Belt & Retractor; Belt Assembly, Front Seat Outer, Passenger Side
- Position: Passenger Side
- Replaces: 73210-42310-B2, 73210-42311-B2
- Part Name Code: 73210
- Item Weight: 3.30 Pounds
- Condition: New
- Fitment Type: Direct Replacement
- SKU: 73210-42340-B2
- Warranty: This genuine part is guaranteed by Toyota's factory warranty.
2006 Toyota RAV4 Lap & Shoulder Belt, Gray, Passenger Side
Part Number: 73210-42340-B3$238.93 MSRP: $341.13You Save: $102.20 (30%)Ships in 1-3 Business DaysProduct Specifications- Other Name: Belt Assembly, Front Seat; Seat Belt Lap and Shoulder Belt, Front Right; Belt & Retractor; Belt Assembly, Front Seat Outer, Passenger Side
- Position: Passenger Side
- Replaces: 73210-42310-B3, 73210-42311-B3
- Part Name Code: 73210
- Item Weight: 2.70 Pounds
- Condition: New
- Fitment Type: Direct Replacement
- SKU: 73210-42340-B3
- Warranty: This genuine part is guaranteed by Toyota's factory warranty.
2006 Toyota RAV4 Lap & Shoulder Belt, Fawn, Passenger Side
Part Number: 73210-42340-E0$238.93 MSRP: $341.13You Save: $102.20 (30%)Ships in 1-3 Business DaysProduct Specifications- Other Name: Belt Assembly, Front Seat; Seat Belt Lap and Shoulder Belt, Front Right; Belt & Retractor; Belt Assembly, Front Seat Outer, Passenger Side
- Manufacturer Note: SAND BEIGE/IVORY,TRIM4#
- Position: Passenger Side
- Replaces: 73210-42311-E2, 73210-42310-E2, 73210-42311-E1, 73210-42310-E1
- Part Name Code: 73210
- Item Weight: 5.60 Pounds
- Item Dimensions: 10.2 x 7.1 x 6.3 inches
- Condition: New
- Fitment Type: Direct Replacement
- SKU: 73210-42340-E0
- Warranty: This genuine part is guaranteed by Toyota's factory warranty.
2006 Toyota RAV4 Lap & Shoulder Belt, Gray, Driver Side
Part Number: 73220-42301-B3$238.93 MSRP: $341.13You Save: $102.20 (30%)Ships in 1 Business DayProduct Specifications- Other Name: Belt Assembly, Front Seat; Seat Belt Lap and Shoulder Belt, Front Left; Belt & Retractor; Belt Assembly, Front Seat Outer, Driver Side
- Manufacturer Note: GRAY,TRIM1#
- Position: Driver Side
- Replaces: 73220-42300-B3, 73220-42140-B3
- Part Name Code: 73220
- Item Weight: 6.40 Pounds
- Condition: New
- Fitment Type: Direct Replacement
- SKU: 73220-42301-B3
- Warranty: This genuine part is guaranteed by Toyota's factory warranty.
2006 Toyota RAV4 Lap & Shoulder Belt, Fawn, Driver Side
Part Number: 73220-42301-E0$238.93 MSRP: $341.13You Save: $102.20 (30%)Ships in 1-2 Business DaysProduct Specifications- Other Name: Belt Assembly, Front Seat; Seat Belt Lap and Shoulder Belt, Front Left; Belt & Retractor; Belt Assembly, Front Seat Outer, Driver Side
- Manufacturer Note: SAND BEIGE/IVORY,TRIM4#
- Position: Driver Side
- Replaces: 73220-42140-E2, 73220-42140-E1, 73220-42300-E0
- Part Name Code: 73220
- Item Weight: 2.30 Pounds
- Condition: New
- Fitment Type: Direct Replacement
- SKU: 73220-42301-E0
- Warranty: This genuine part is guaranteed by Toyota's factory warranty.

2006 Toyota RAV4 Lap & Shoulder Belt, Gray, Outer Passenger Side
Part Number: 73560-42011-B5$150.62 MSRP: $213.22You Save: $62.60 (30%)Ships in 1-3 Business DaysProduct Specifications- Other Name: Belt Assembly, Rear Seat; Seat Belt Lap and Shoulder Belt, Rear Right; Belt & Retractor; Belt Assembly, Rear Seat, Outer Passenger Side
- Manufacturer Note: THIRD SEAT-WITH(2PERSONS),GRAY,TRIM1#
- Position: Outer Passenger Side
- Replaces: 73560-42010-B2, 73560-42011-B2
- Part Name Code: 73560
- Item Weight: 2.90 Pounds
- Condition: New
- Fitment Type: Direct Replacement
- SKU: 73560-42011-B5
- Warranty: This genuine part is guaranteed by Toyota's factory warranty.

2006 Toyota RAV4 Lap & Shoulder Belt, Gray, Outer Driver Side
Part Number: 73570-42011-B5$160.26 MSRP: $226.86You Save: $66.60 (30%)Ships in 1-3 Business DaysProduct Specifications- Other Name: Belt Assembly, Rear Seat; Seat Belt Lap and Shoulder Belt, Rear Left; Belt & Retractor; Belt Assembly, Rear Seat, Outer Driver Side
- Manufacturer Note: THIRD SEAT-WITH(2PERSONS),GRAY,TRIM1#
- Position: Outer Driver Side
- Replaces: 73570-42010-B2, 73570-42011-B2
- Part Name Code: 73570
- Item Weight: 2.70 Pounds
- Condition: New
- Fitment Type: Direct Replacement
- SKU: 73570-42011-B5
- Warranty: This genuine part is guaranteed by Toyota's factory warranty.

2006 Toyota RAV4 Lap & Shoulder Belt, Rear Driver Side
Part Number: 73370-42111-B2$175.77 MSRP: $248.82You Save: $73.05 (30%)Ships in 1-3 Business DaysProduct Specifications- Other Name: Belt Assembly, Rear Seat; Seat Belt Lap and Shoulder Belt, Center Left; Belt & Retractor
- Position: Rear Driver Side
- Replaces: 73370-42110-B2
- Item Weight: 2.20 Pounds
- Condition: New
- SKU: 73370-42111-B2
- Warranty: This genuine part is guaranteed by Toyota's factory warranty.
2006 Toyota RAV4 Lap & Shoulder Belt, Gray, Rear Driver Side
Part Number: 73370-42111-B3$175.77 MSRP: $248.82You Save: $73.05 (30%)Ships in 1-3 Business DaysProduct Specifications- Other Name: Belt Assembly, Rear Seat; Seat Belt Lap and Shoulder Belt, Center Left; Belt & Retractor
- Position: Rear Driver Side
- Replaces: 73370-42110-B3
- Item Weight: 2.20 Pounds
- Condition: New
- SKU: 73370-42111-B3
- Warranty: This genuine part is guaranteed by Toyota's factory warranty.

2006 Toyota RAV4 Lap & Shoulder Belt, Rear
Part Number: 73320-42062-B0$174.97 MSRP: $249.82You Save: $74.85 (30%)Ships in 1-3 Business DaysProduct Specifications- Other Name: Belt Assembly, Rear Seat 3; Center Seat Belt; Belt Assembly, Rear Seat 3 Point Type
- Manufacturer Note: DK.GRAY,TRIM1#
- Position: Rear
- Replaces: 73320-42060-B0, 73320-42061-B0
- Part Name Code: 73320C
- Condition: New
- Fitment Type: Direct Replacement
- SKU: 73320-42062-B0
- Warranty: This genuine part is guaranteed by Toyota's factory warranty.
2006 Toyota RAV4 Lap & Shoulder Belt, Gray, Rear
Part Number: 73320-42062-B1$174.97 MSRP: $249.82You Save: $74.85 (30%)Ships in 1-3 Business DaysProduct Specifications- Other Name: Belt Assembly, Rear Seat 3; Center Seat Belt; Belt Assembly, Rear Seat 3 Point Type
- Manufacturer Note: GRAY,TRIM1#
- Position: Rear
- Replaces: 73320-42061-B1, 73320-42060-B1
- Part Name Code: 73320C
- Item Weight: 1.40 Pounds
- Condition: New
- Fitment Type: Direct Replacement
- SKU: 73320-42062-B1
- Warranty: This genuine part is guaranteed by Toyota's factory warranty.
2006 Toyota RAV4 Lap & Shoulder Belt, Fawn, Rear
Part Number: 73320-42062-E0$174.97 MSRP: $249.82You Save: $74.85 (30%)Ships in 1-3 Business DaysProduct Specifications- Other Name: Belt Assembly, Rear Seat 3; Center Seat Belt
- Position: Rear
- Replaces: 73320-42060-E0, 73320-42061-E0
- Item Weight: 3.60 Pounds
- Condition: New
- SKU: 73320-42062-E0
- Warranty: This genuine part is guaranteed by Toyota's factory warranty.

2006 Toyota RAV4 Lap & Shoulder Belt, Rear Passenger Side
Part Number: 73360-42201-B2$174.97 MSRP: $249.82You Save: $74.85 (30%)Ships in 1-3 Business DaysProduct Specifications- Other Name: Belt Assembly, Rear Seat; Seat Belt Lap and Shoulder Belt, Center Right; Belt & Retractor
- Position: Rear Passenger Side
- Replaces: 73360-42200-B2
- Item Weight: 2.90 Pounds
- Condition: New
- SKU: 73360-42201-B2
- Warranty: This genuine part is guaranteed by Toyota's factory warranty.
2006 Toyota RAV4 Lap & Shoulder Belt, Gray, Rear Passenger Side
Part Number: 73360-42201-B3$174.97 MSRP: $249.82You Save: $74.85 (30%)Ships in 1-3 Business DaysProduct Specifications- Other Name: Belt Assembly, Rear Seat; Seat Belt Lap and Shoulder Belt, Center Right; Belt & Retractor
- Position: Rear Passenger Side
- Replaces: 73360-42200-B3
- Item Weight: 3.30 Pounds
- Item Dimensions: 13.3 x 10.4 x 9.4 inches
- Condition: New
- SKU: 73360-42201-B3
- Warranty: This genuine part is guaranteed by Toyota's factory warranty.
2006 Toyota RAV4 Lap & Shoulder Belt, Fawn, Rear Driver Side
Part Number: 73370-42111-E1$175.77 MSRP: $248.82You Save: $73.05 (30%)Product Specifications- Other Name: Belt Assembly, Rear Seat; Seat Belt Lap and Shoulder Belt, Center Left; Belt & Retractor
- Position: Rear Driver Side
- Replaces: 73370-42110-E1
- Item Weight: 2.80 Pounds
- Condition: New
- SKU: 73370-42111-E1
- Warranty: This genuine part is guaranteed by Toyota's factory warranty.
2006 Toyota RAV4 Lap & Shoulder Belt, Fawn, Rear Passenger Side
Part Number: 73360-42201-E1$174.97 MSRP: $249.82You Save: $74.85 (30%)Product Specifications- Other Name: Belt Assembly, Rear Seat; Seat Belt Lap and Shoulder Belt, Center Right; Belt & Retractor
- Position: Rear Passenger Side
- Replaces: 73360-42200-E1
- Item Weight: 3.30 Pounds
- Condition: New
- SKU: 73360-42201-E1
- Warranty: This genuine part is guaranteed by Toyota's factory warranty.
2006 Toyota RAV4 Lap & Shoulder Belt, Fawn, Rear Passenger Side
Part Number: 73560-42011-E2$165.26 MSRP: $233.95You Save: $68.69 (30%)Product Specifications- Other Name: Belt Assembly, Rear Seat; Seat Belt Lap and Shoulder Belt, Rear Right; Belt & Retractor
- Position: Rear Passenger Side
- Replaces: 73560-42010-E2
- Item Weight: 2.70 Pounds
- Condition: New
- SKU: 73560-42011-E2
- Warranty: This genuine part is guaranteed by Toyota's factory warranty.
- Product Specifications
- Other Name: Belt Assembly, Rear Seat; Seat Belt Lap and Shoulder Belt, Rear Left; Belt & Retractor
- Position: Rear Driver Side
- Replaces: 73570-42010-E2
- Item Weight: 2.60 Pounds
- Condition: New
- SKU: 73570-42011-E2
- Warranty: This genuine part is guaranteed by Toyota's factory warranty.
| Page 1 of 2 |Next >
1-20 of 37 Results
2006 Toyota RAV4 Seat Belt
Looking for affordable OEM 2006 Toyota RAV4 Seat Belt? Explore our comprehensive catalogue of genuine 2006 Toyota RAV4 Seat Belt. All our parts are covered by the manufacturer's warranty. Plus, our straightforward return policy and speedy delivery service ensure an unparalleled shopping experience. We look forward to your visit!
2006 Toyota RAV4 Seat Belt Parts Q&A
- Q: How to Remove and Replace a Rear Seat Outer Seat Belt on 2006 Toyota RAV4?A: The procedure for taking out the rear seat outer belt starts by disconnecting the negative battery cable and allowing a minimum of 90 seconds before continuation to stop Air Bag and seat belt pretensioner activation. Proceed by removing the rear door scuff plate LH, rear door opening trim Weather Strip LH, package tray trim pocket subassembly (without rear No. 2 seat), tonneau cover assembly (without rear No. 2 seat), rear floor No. 1 board (without rear No. 2 seat), deck board assembly (without rear No. 2 seat), No. 2 seat hinge covers LH and RH (with rear No. 2 seat), No. 2 seat leg covers LH and RH (with rear No. 2 seat), rear No. 2 seat assemblies LH and RH (with rear No. 2 seat), rear floor No. 2 board, rear floor No. 3 board, rear No. 1 floor mat support side plate, back door Weather Strip, rear floor finish plate, rear deck trim cover (with rear No. 2 seat), and reclining remote control lever bezel LH (without rear No. 2 seat). Disconnection of the rear No. 1 seat outer belt assembly RH involves removing the lap belt outer anchor cover together with the bolt that releases the floor anchor before moving on to the rear No. 2 seat outer belt assembly LH by opening the cover and eliminating the floor anchor bolt. The installer must first detach the 2 claws holding the deck trim side panel assembly LH (with and without rear No. 2 seat) and inner roof side garnish assembly LH (with and without rear No. 2 seat). Then open the seat belt anchor covers before removing the bolt that disconnects the shoulder anchor and taking off the 2 bolts with seat belt. The installation starts with the rear No. 1 seat outer belt assembly LH and involves fitting the claws into belt positioning holes followed by retractor bolt installation before torquing both upper and lower bolts to 8.5 N.m (87 kgf.cm, 75 in.lbf) and 42 N.m (428 kgf.cm, 31 ft.lbf) respectively. Next, secure the shoulder anchor with a bolt set to 42 N.m (428 kgf.cm, 31 ft.lbf). Work on the inner roof side garnish assembly LH (with rear No. 2 seat) followed by the rear No. 2 seat outer belt assembly LH (with rear No. 2 seat) and close the cover cap. The assembly includes attaching the floor anchor of the seat belt to the inner roof side garnish assembly LH (without rear No. 2 seat) and deck trim side panel assembly LH (with and without rear No. 2 seat). After pulling the bolt to 42 N.m (428 kgf.cm, 31 ft.lbf) the final step is closing the cover. Use a torque wrench to fix the floor anchor of the seat belt assembly LH to the bolt at 42 N.m and install the lap belt outer anchor cover when installing the LH rear No.1 seat outer belt assembly. Finally, install the reclining remote control lever bezel LH (without rear No. 2 seat), rear floor finish plate, rear No. 1 floor mat support side plate, rear floor No. 3 board, rear floor No. 2 board, rear No. 2 seat assemblies LH and RH (with rear No. 2 seat), No. 2 seat leg covers LH and RH (with rear No. 2 seat), No. 2 seat hinge covers LH and RH (with rear No. 2 seat), deck board assembly (without rear No. 2 seat), rear floor No. 1 board (without rear No. 2 seat), tonneau cover assembly (without rear No. 2 seat), package tray trim pocket subassembly (without rear No. 2 seat), rear door opening trim Weather Strip LH, rear door scuff plate LH, and reconnect the cable to the negative battery terminal.
Related 2006 Toyota RAV4 Parts
 2006 Toyota RAV4 Crankshaft Position Sensor
 2006 Toyota RAV4 Headlight Relay
 2006 Toyota RAV4 Ignition Coil
 2006 Toyota RAV4 Power Window Switch
 2006 Toyota RAV4 Speedometer
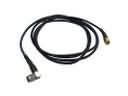 2006 Toyota RAV4 Antenna Cable
 2006 Toyota RAV4 Daytime Running Light Relay
 2006 Toyota RAV4 Dimmer Switch
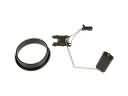 2006 Toyota RAV4 Fuel Level Sensor
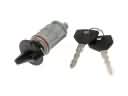 2006 Toyota RAV4 Ignition Lock Assembly
 2006 Toyota RAV4 Mirror Switch
 2006 Toyota RAV4 Oil Pressure Switch