×
ToyotaParts- Hello
- Login or Register
- Quick Links
- Live Chat
- Track Order
- Parts Availability
- RMA
- Help Center
- Contact Us
- Shop for
- Toyota Parts
- Scion Parts
My Garage
My Account
Cart
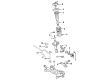
OEM 2006 Toyota Matrix Shock Absorber
Suspension Shock Absorber- Select Vehicle by Model
- Select Vehicle by VIN
Select Vehicle by Model
orMake
Model
Year
Select Vehicle by VIN
For the most accurate results, select vehicle by your VIN (Vehicle Identification Number).
5 Shock Absorbers found


2006 Toyota Matrix Shock Absorber
Part Number: 48530-A9540$108.89 MSRP: $152.84You Save: $43.95 (29%)Ships in 1-3 Business DaysProduct Specifications- Other Name: Absorber Assembly Set, S; Rear Shock Absorber; Suspension Strut Kit; Complete Strut; Strut; Absorber Assembly, Shock, Rear Passenger Side; Absorber Assembly, Shock, Rear Driver Side; Shock
- Manufacturer Note: MARK 48530-AG041
- Replaces: 48530-A9150, 48530-A9430
- Item Weight: 5.40 Pounds
- Item Dimensions: 26.6 x 6.7 x 5.8 inches
- Condition: New
- Fitment Type: Direct Replacement
- SKU: 48530-A9540
- Warranty: This genuine part is guaranteed by Toyota's factory warranty.

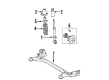
2006 Toyota Matrix Strut, Front Driver Side
Part Number: 48520-09740$136.52 MSRP: $193.27You Save: $56.75 (30%)Ships in 1-3 Business DaysProduct Specifications- Other Name: Absorber Assembly, Shock; Suspension Strut, Front Left; Strut Assembly Kit; Complete Strut Kit; Shock Absorber; Absorber Assembly, Shock, Front Driver Side
- Manufacturer Note: MARK 48520-01041
- Position: Front Driver Side
- Replaces: 48520-09560
- Part Name Code: 48520
- Item Weight: 12.40 Pounds
- Item Dimensions: 26.1 x 8.6 x 7.8 inches
- Condition: New
- Fitment Type: Direct Replacement
- SKU: 48520-09740
- Warranty: This genuine part is guaranteed by Toyota's factory warranty.

2006 Toyota Matrix Strut, Front Driver Side
Part Number: 48520-09750$124.66 MSRP: $176.46You Save: $51.80 (30%)Ships in 1-3 Business DaysProduct Specifications- Other Name: Absorber Assembly, Shock; Front Left Suspension Strut Kit; Complete Strut; Shock Absorber; Absorber Assembly, Shock, Front Driver Side
- Manufacturer Note: MARK 48520-02330,MEXICO SPEC
- Position: Front Driver Side
- Part Name Code: 48520
- Item Weight: 9.20 Pounds
- Item Dimensions: 26.1 x 8.5 x 7.5 inches
- Condition: New
- Fitment Type: Direct Replacement
- SKU: 48520-09750
- Warranty: This genuine part is guaranteed by Toyota's factory warranty.
2006 Toyota Matrix Shock Absorber
Part Number: 48530-09F80$111.02 MSRP: $155.84You Save: $44.82 (29%)Ships in 1-3 Business DaysProduct Specifications- Other Name: Absorber Assembly Set, S; Rear Shock Absorber; Suspension Strut Kit; Complete Strut; Absorber Assembly, Shock, Rear Passenger Side; Absorber Assembly, Shock, Rear Driver Side; Shock
- Manufacturer Note: MARK 48530-02351
- Replaces: 48530-09790, 48530-09C60
- Item Weight: 1.40 Pounds
- Item Dimensions: 25.6 x 6.7 x 5.7 inches
- Condition: New
- Fitment Type: Direct Replacement
- SKU: 48530-09F80
- Warranty: This genuine part is guaranteed by Toyota's factory warranty.

2006 Toyota Matrix Shock Absorber
Part Number: 48530-A9550$79.74 MSRP: $111.93You Save: $32.19 (29%)Ships in 1-3 Business DaysProduct Specifications- Other Name: Absorber Assembly, Shock; Rear Shock Absorber; Suspension Strut Kit; Complete Strut; Strut; Absorber Assembly, Shock, Rear Passenger Side; Absorber Assembly, Shock, Rear Driver Side; Shock
- Manufacturer Note: MARK 48530-01040
- Replaces: 48530-09540
- Item Weight: 1.40 Pounds
- Item Dimensions: 26.4 x 6.8 x 5.9 inches
- Condition: New
- Fitment Type: Direct Replacement
- SKU: 48530-A9550
- Warranty: This genuine part is guaranteed by Toyota's factory warranty.
2006 Toyota Matrix Shock Absorber
Looking for affordable OEM 2006 Toyota Matrix Shock Absorber? Explore our comprehensive catalogue of genuine 2006 Toyota Matrix Shock Absorber. All our parts are covered by the manufacturer's warranty. Plus, our straightforward return policy and speedy delivery service ensure an unparalleled shopping experience. We look forward to your visit!
2006 Toyota Matrix Shock Absorber Parts Q&A
- Q: How to overhaul a rear strut assembly with a shock absorber on 2006 Toyota Matrix?A: Begin the rear strut assembly overhaul procedure by taking off the rear wheel together with deck board No.2, deck board sub-assembly, deck floor box rear, luggage compartment tray, and shock absorber head cover. Raise the rear axle beam assembly with a jack before removing the 2 nuts and bolt together with the nut and then taking out the rear shock absorber LH cushion retainer and rear shock absorber with coil spring. You need Special Service Tool: 09727-30021 to compress the coil spring rear LH because an impact wrench may damage this tool. Use a 6 mm hexagon wrench to remove the front nut before extracting the rear shock absorber cushion washer No.1 and then proceed to take out the rear suspension support followed by the rear spring front bracket sub-assembly LH, LH support assembly rear suspension, rear coil spring insulator upper LH, rear spring bumper No.1 LH, and coil spring rear LH. You must check the shock absorber assembly rear LH by compressively extending the rod against abnormal resistance or atypical noises but if problems are detected then you must replace it with fresh parts. The installation of rear shock absorber assembly LH requires the use of Special Service Tool: 09727-30021 to compress coil spring rear LH before inserting the spring and verifying the lower end fits properly into the spring lower seat. Install the rear spring bumper No.1 LH and LH support assembly rear suspension. Then position the rear coil spring insulator upper LH symmetrically to the rear spring front bracket sub-assembly LH. The install process begins with placing rear suspension support and rear shock absorber cushion washer No.1 and using a new center nut to achieve a temporary nut torque before taking out the Special Service Tool while verifying rear spring front bracket sub-assembly LH direction and tightening the nut to 56 Nm (571 kgf-cm, 41 ft. lbs.) with a 6 mm hexagon wrench holding the piston rod. Begin following the procedure by attaching the rear shock absorber with coil spring through 2 nuts and a bolt that require 80 Nm torque (816 kgf-cm, 59 ft. lbs.) and afterward tighten the nut as well as the rear shock absorber LH cushion retainer temporarily. Proceed with installing the luggage compartment tray followed by the deck board sub-assembly then the deck board No.2 piece and the deck floor box rear before placing the shock absorber head cover. The suspension must be stabilized after installing the rear wheel and lowering the vehicle while tightening the components to 103 Nm (1,050 kgf-cm, 76 ft. lbs.) followed by multiple vehicle bounces to achieve stability. The rear shock absorber installation requires full torque of 80 Nm (816 kgf-cm, 59 ft. lbs.) on the coil spring nut followed by rear wheel alignment verification. One needs to discharge the gas inside the shock absorber assembly rear LH by drilling a hole in the cylinder after extending the shock absorber rod while maintaining safety from flying fragments and noting the colorless and odorless and non-toxic nature of the gas.
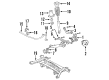
Related 2006 Toyota Matrix Parts
 2006 Toyota Matrix Sway Bar Link
 2006 Toyota Matrix Alignment Bolt
 2006 Toyota Matrix Axle Shaft
 2006 Toyota Matrix Coil Spring Insulator
 2006 Toyota Matrix Control Arm Bolt
 2006 Toyota Matrix Control Arm Bracket
 2006 Toyota Matrix Control Arm Bushing
 2006 Toyota Matrix Rear Crossmember
 2006 Toyota Matrix Shock and Strut Boot
 2006 Toyota Matrix Strut Housing
 2006 Toyota Matrix Suspension Strut Rod
 2006 Toyota Matrix Sway Bar Bushing